
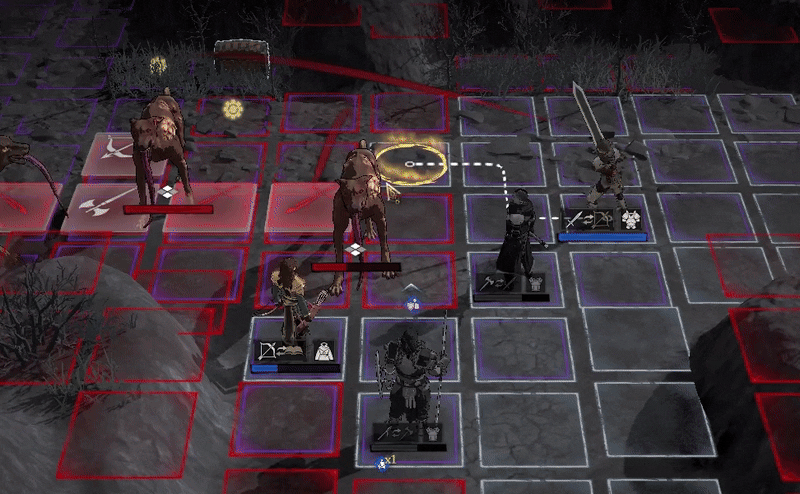
Weak Point Mechanics
Unlike regular enemies, large monsters occupy multiple tiles on the battlefield. These can range from smaller 2x2 monsters to even larger 3x3-sized ones. Each turn, some of the monster’s tiles will randomly display weapon icons, indicating the monster’s current weaknesses. Three tiles for 2x2 monsters and four tiles for 3x3 monsters. Attacking these tiles with the corresponding weapon type will deal significantly higher damage and prevent counterattacks. However, using an incorrect weapon will result in lower damage output and leave the attacker vulnerable to an immediate counter. Additionally, monsters rotate in the direction they are attacked from. This movement also shifts the position of their weakness icons, meaning players must strategically plan their attacks to maximize damage.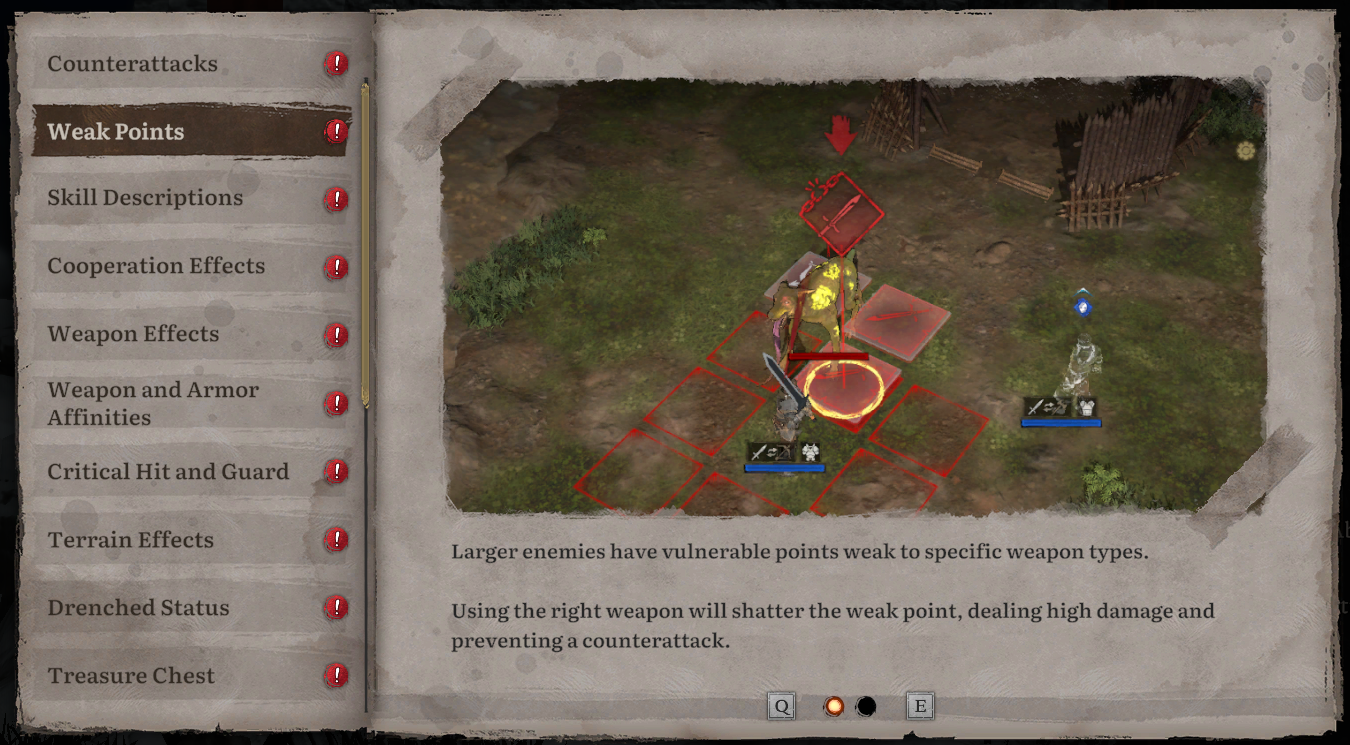
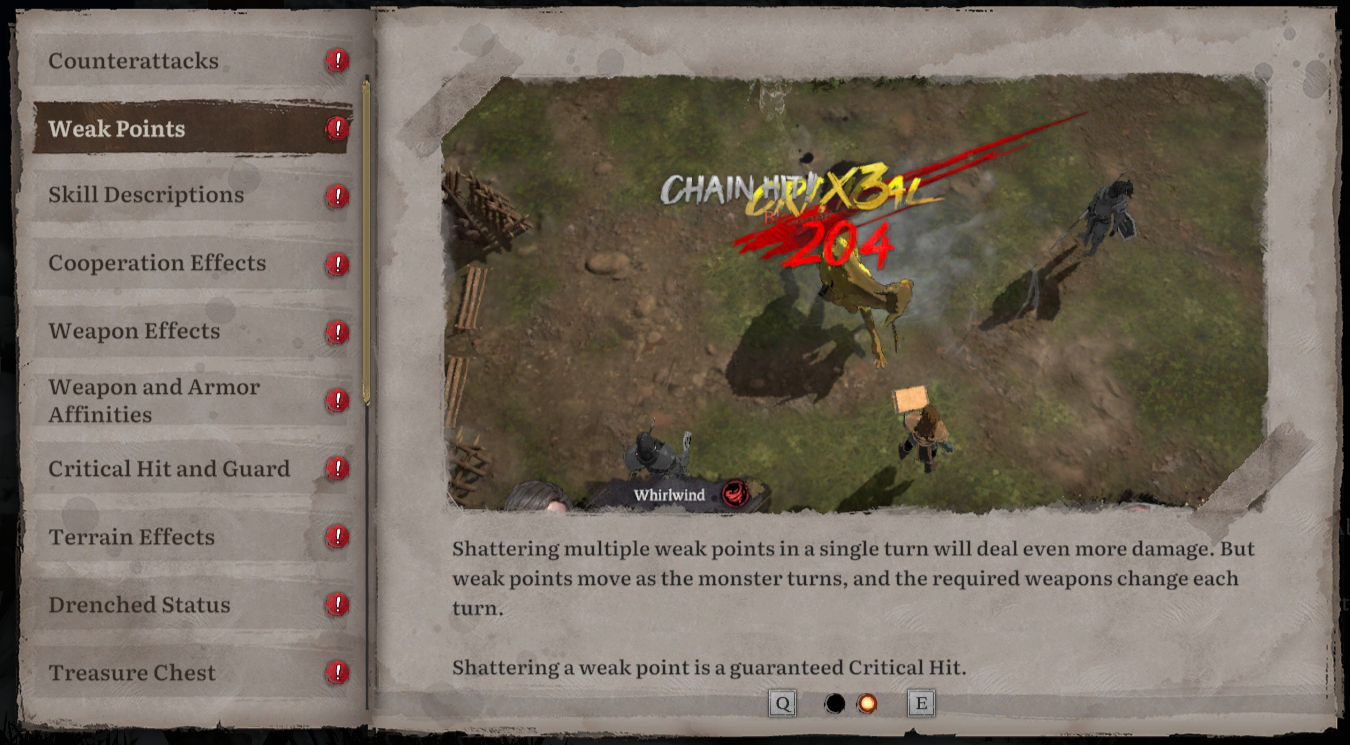
Chain Hit System
When attacking a weakness for the first time, players will see a [b]Chain Hit x1[/b] effect, dealing initial damage. For example, the first attack here resulted in [b]32 damage[/b]: On the second strike, [b]Chain Hit x2[/b] appears, increasing the damage output to [b]33[/b] despite Marco’s spear is weaker than Emile’s axe originally:
 The final weakness strike guarantees a [b]Critical Hit[/b], dealing a massive [b]132 damage[/b]:
Optimizing Damage Output
To maximize efficiency, start your [b]Chain Hit[/b] sequence with a lower-damage character and have your strongest attacker land the third and final hit, unlike what we showed in the above example. This ensures that the accumulated [b]Chain Hit damage multiplier[/b] and [b]Critical Hit[/b] bonus work together for the highest possible damage output.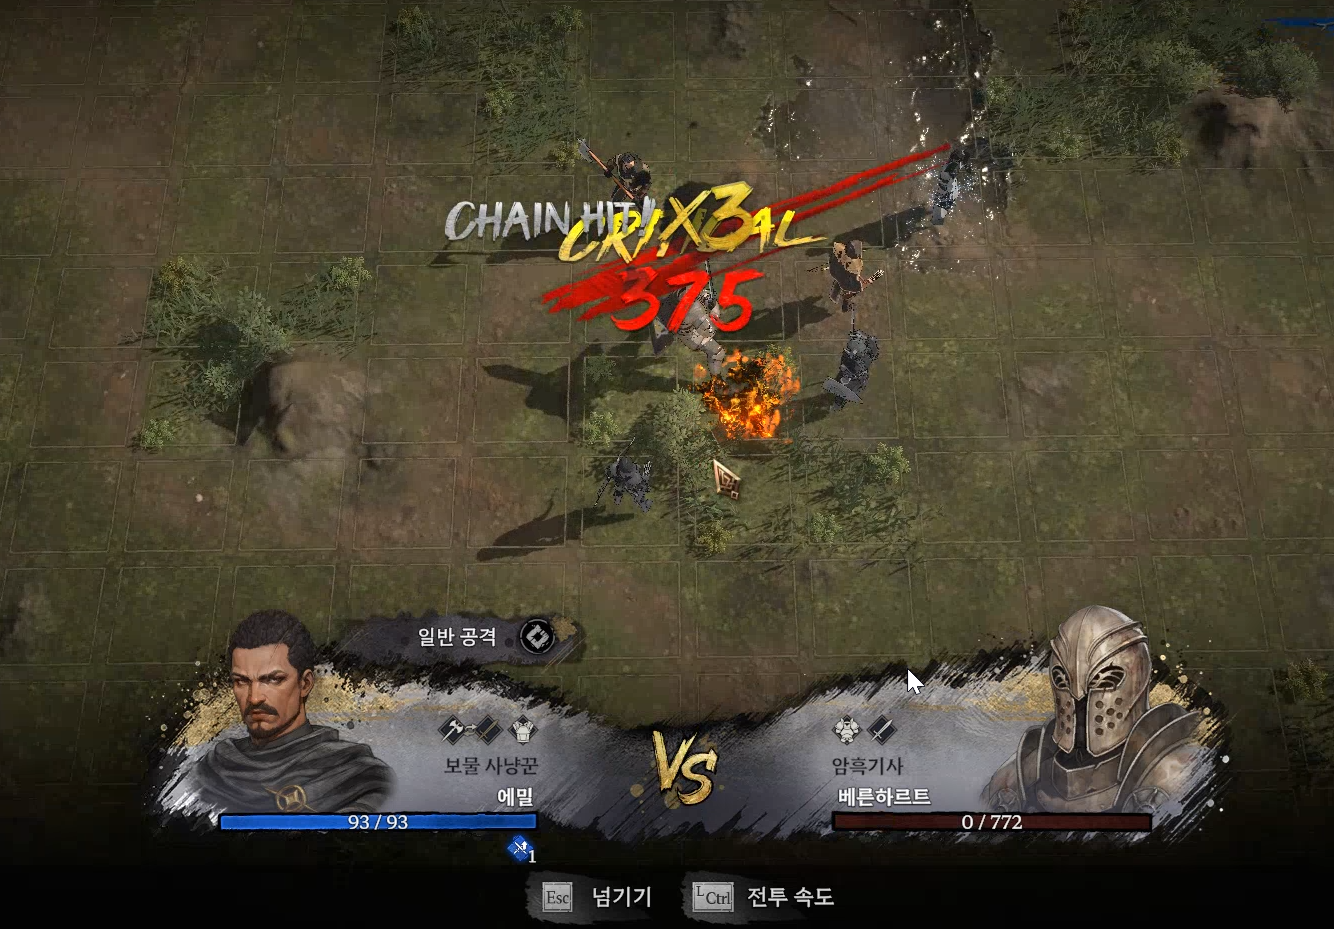 By keeping these strategies in mind, we believe players can successfully overcome the Act 2 boss and other large monsters with greater ease. We hope this helps, and we’ll see you in the next log!
Jin Sang Kim
By keeping these strategies in mind, we believe players can successfully overcome the Act 2 boss and other large monsters with greater ease. We hope this helps, and we’ll see you in the next log!
Jin Sang Kim
