Hello everyone! Welcome to this week’s Developer Diary. I’m stop it D, and I’ll be getting into the Japanese Region Pack. Kaminogi, Koma, and I have put together something we think you’ll enjoy. Here’s a peek behind the scenes and some reflections on the process that aspiring Cities: Skylines II asset makers may find helpful. You can download the Japanese Region Pack here: [b]https://mods.paradoxplaza.com/mods/94094/Windows[/b]
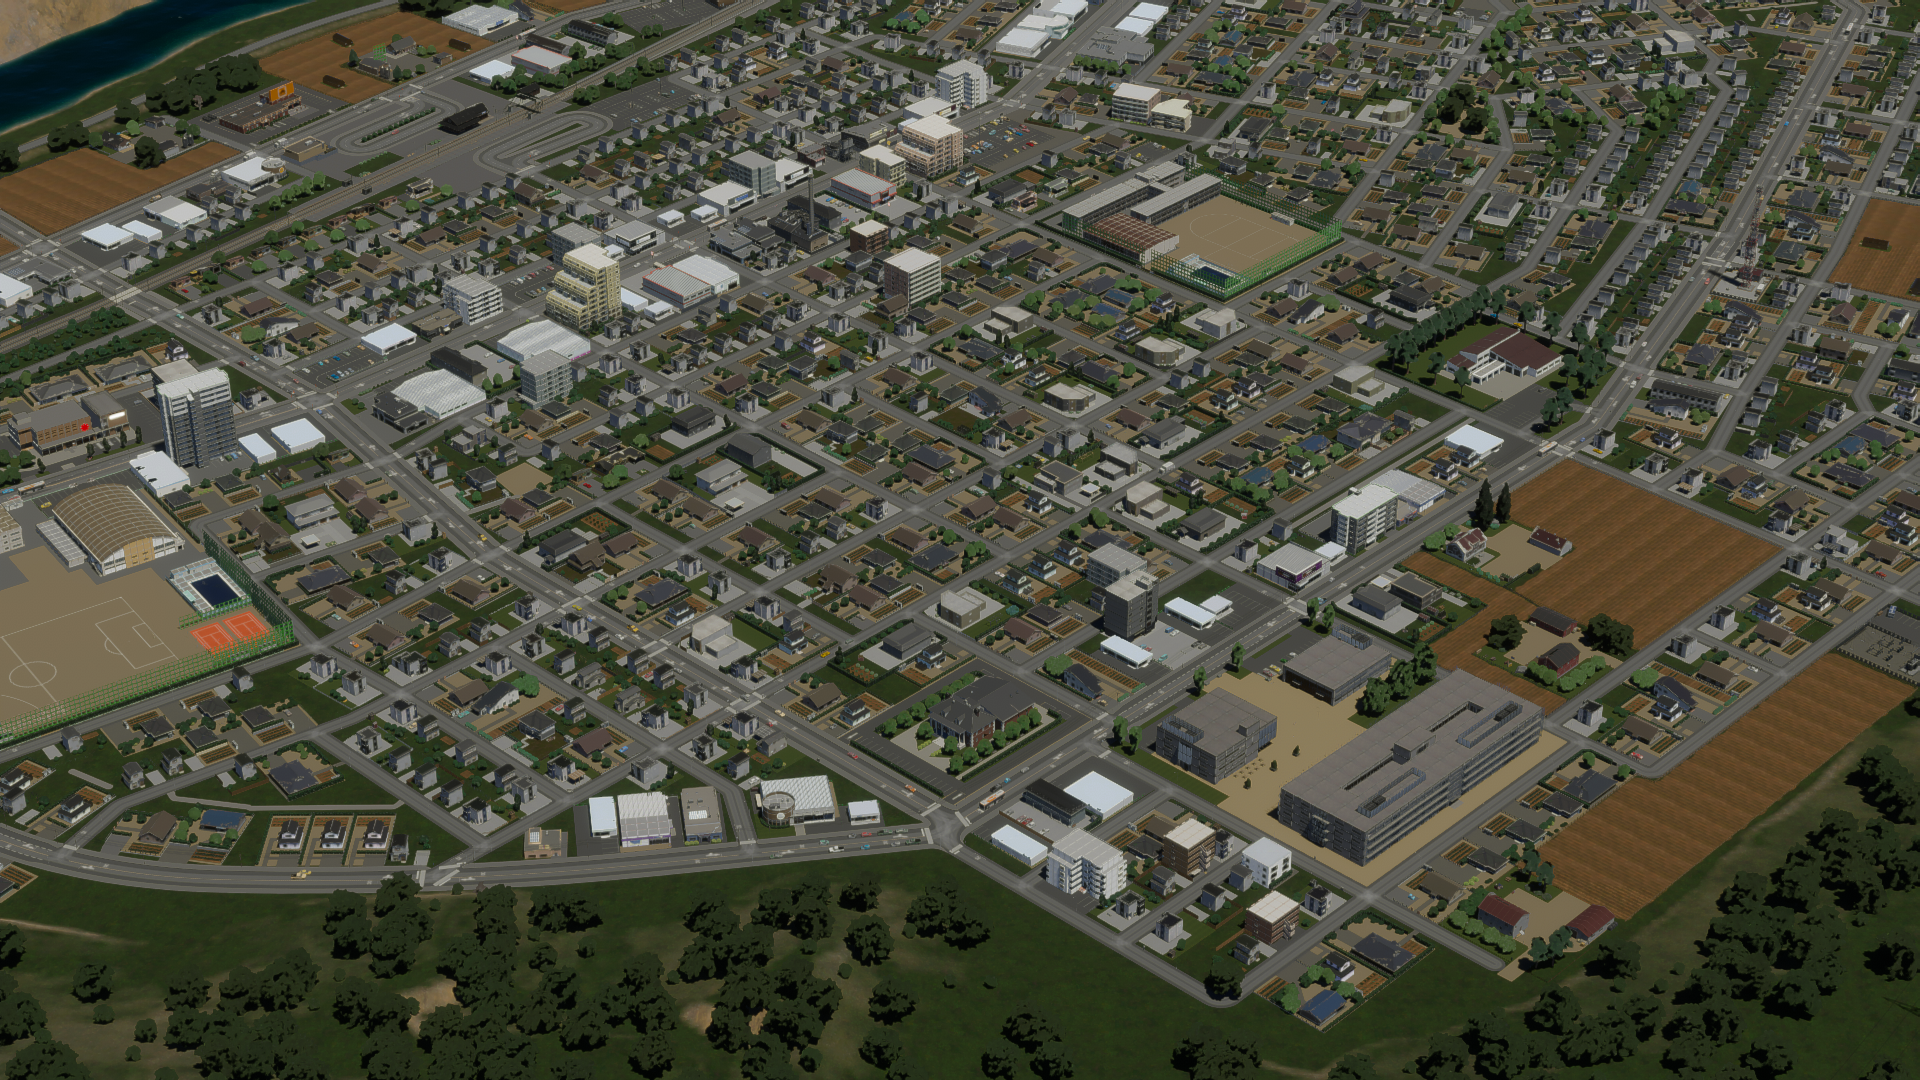
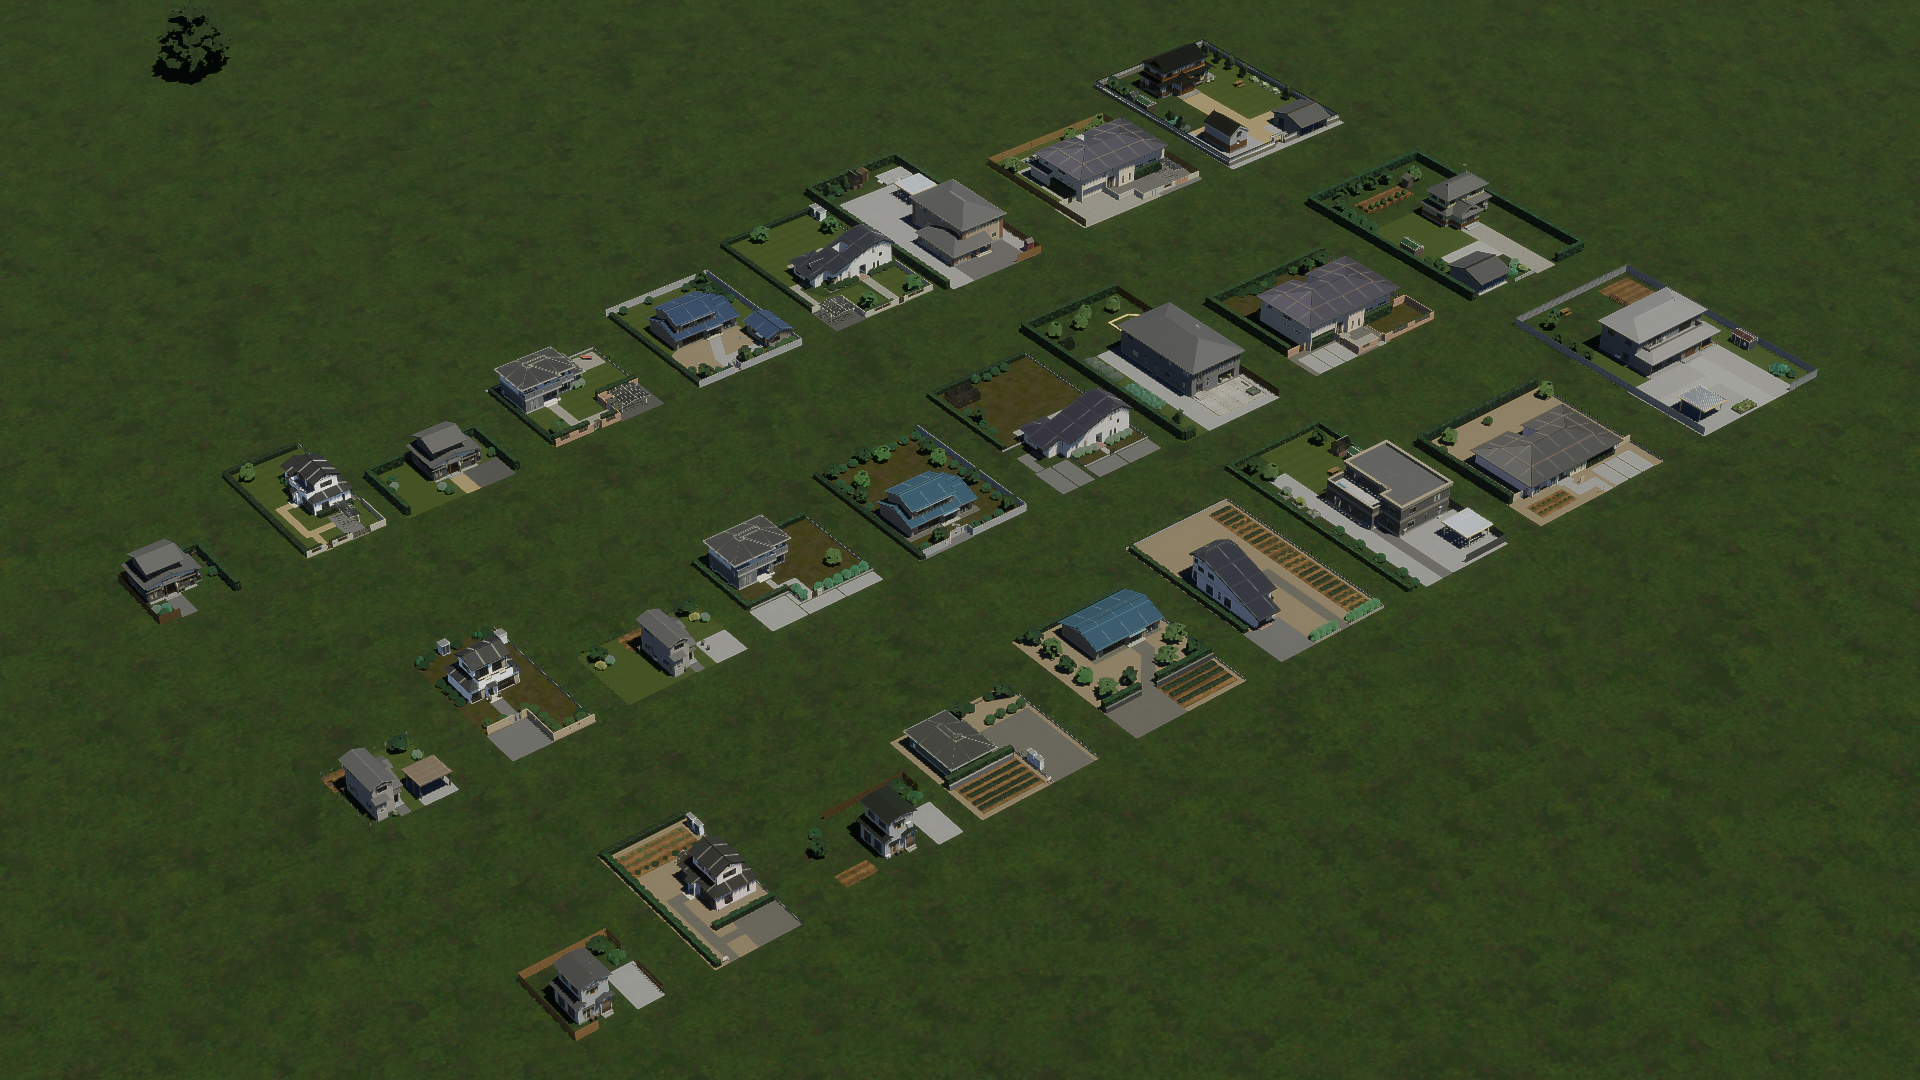
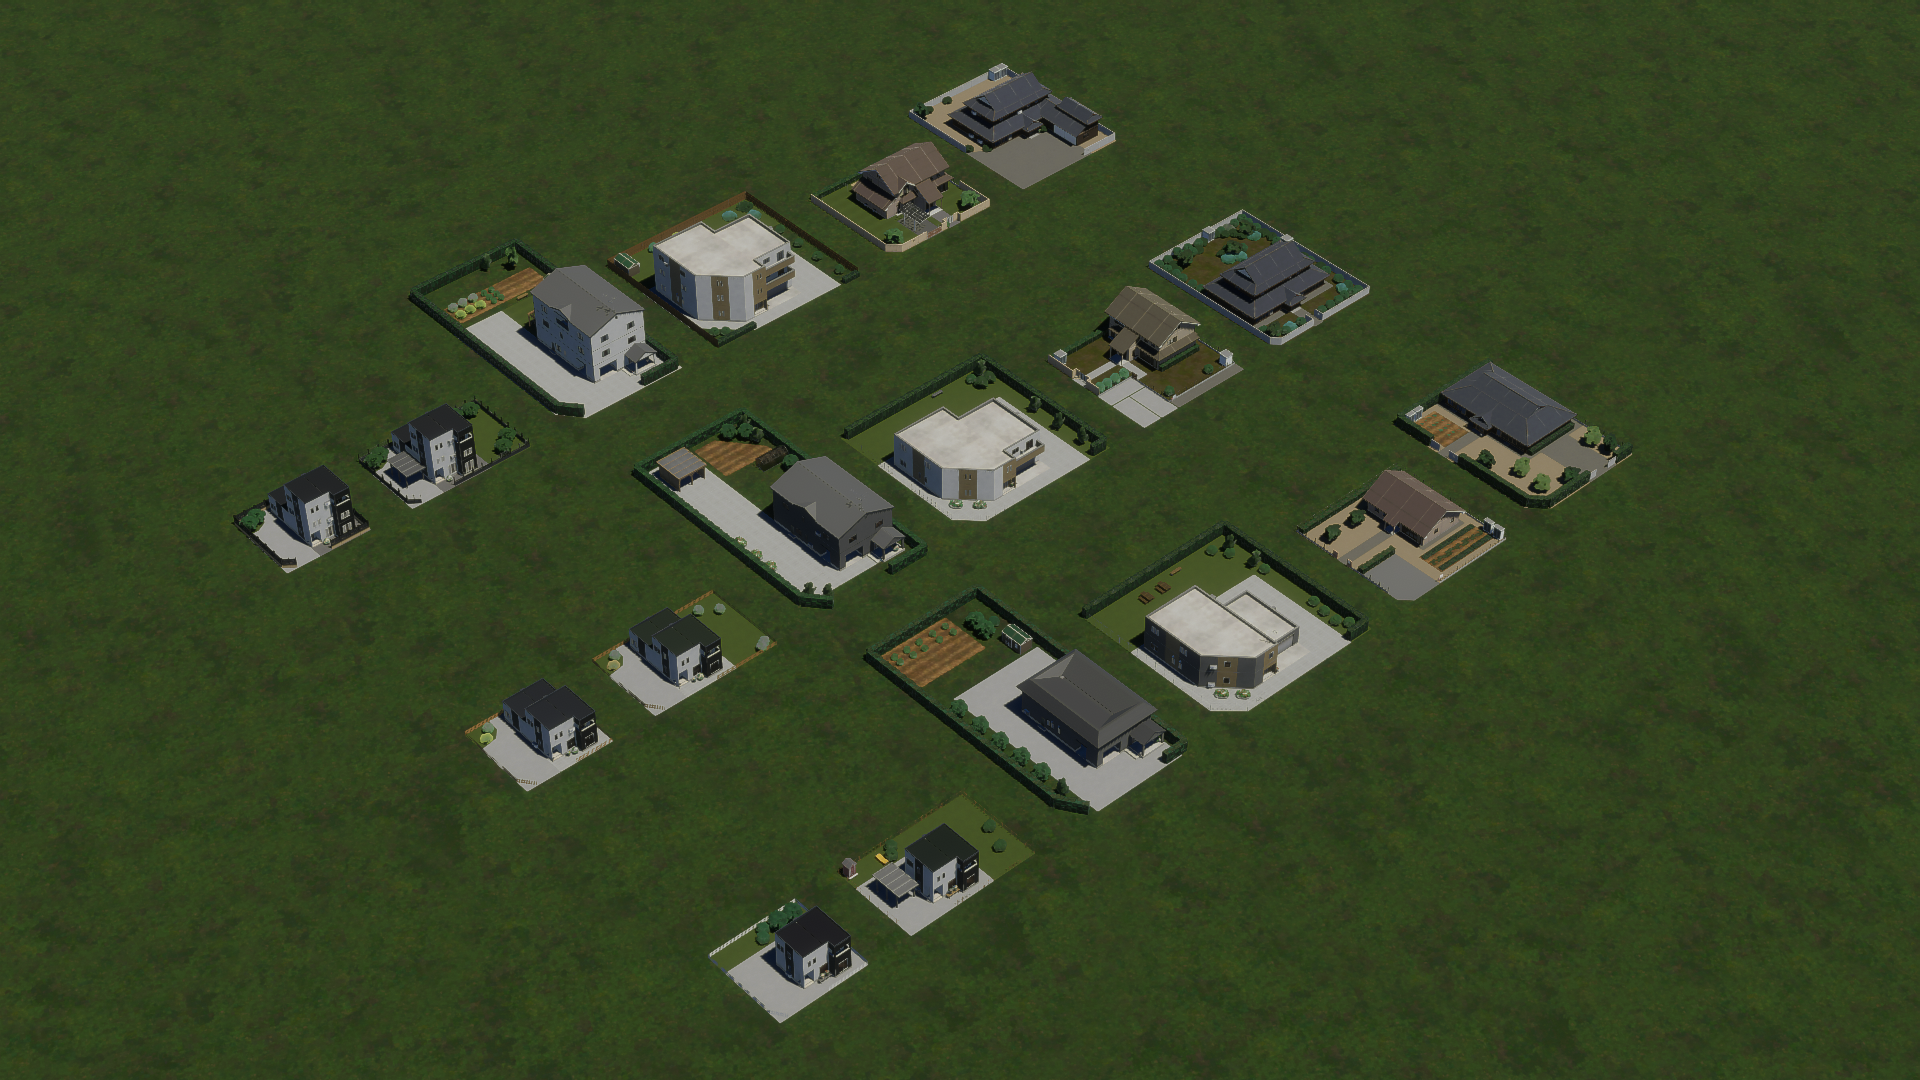
 [i]The city of Miwa is our staging ground for today.[/i]
Concept and Inspiration
With a project like this, the first thing we need to define is the scope. What exactly are we going for here? There are a lot of different routes we could have gone. This region pack should serve as a starter pack for Japanese content. Our hope is that it can stand on its own as a playable pack and also as the base of a collection for detailers that will be supplemented by mod assets on Paradox Mods when they become available. Where we chose to focus our attention was decided by balancing different factors:- Base Game mechanics. Some game limitations don’t always square with how buildings are used or designed in real life, especially in Japan. For example, minimum lot sizes for low-density residential areas are 2x2 grid sizes. However, a large percentage of Japanese single-family housing is roughly 8m x 8m (1x1 grid size). How do you resolve this?
- Importance. How necessary is this kind of building when creating a functional and convincing Japanese city?
- Is it close enough? Will the base game buildings stick out, or do they fit the style adequately?
- The mod scene. How likely is someone to upload a building of this type to Paradox Mods now or in the near future?
- Technical limitations. Will some part of it require a feature yet to be programmed into the game? Will it look wrong if that part has to be cut for technical reasons?
Making the assets
So, what’s new with the asset creation pipeline? Much of it is familiar, but the fine details have changed. Before starting your first mesh for this game, you must read the Asset Creation Guide on the Cities II Wiki first. The new rules for mesh creation required a change to my normal modeling approach. Initially, I imagined I’d be able to piece out parts of meshes made for the previous game. My first attempt soured me on that idea. UVs for this game cannot be outside the 0-1 range, meaning UVs that made use of this will need to be revised for this game. These meshes will need to be broken up and their UVs stacked. Even if this doesn’t apply to your meshes, the windows still need to be appropriately detailed to make use of the window submesh. To match the new standards for this game, I had to add details like door handles as well. And then there’s this curved surface I can smooth out, this feature I can detail better… I ended up wasting a lot of time trying to preserve the work I had done rather than just starting over.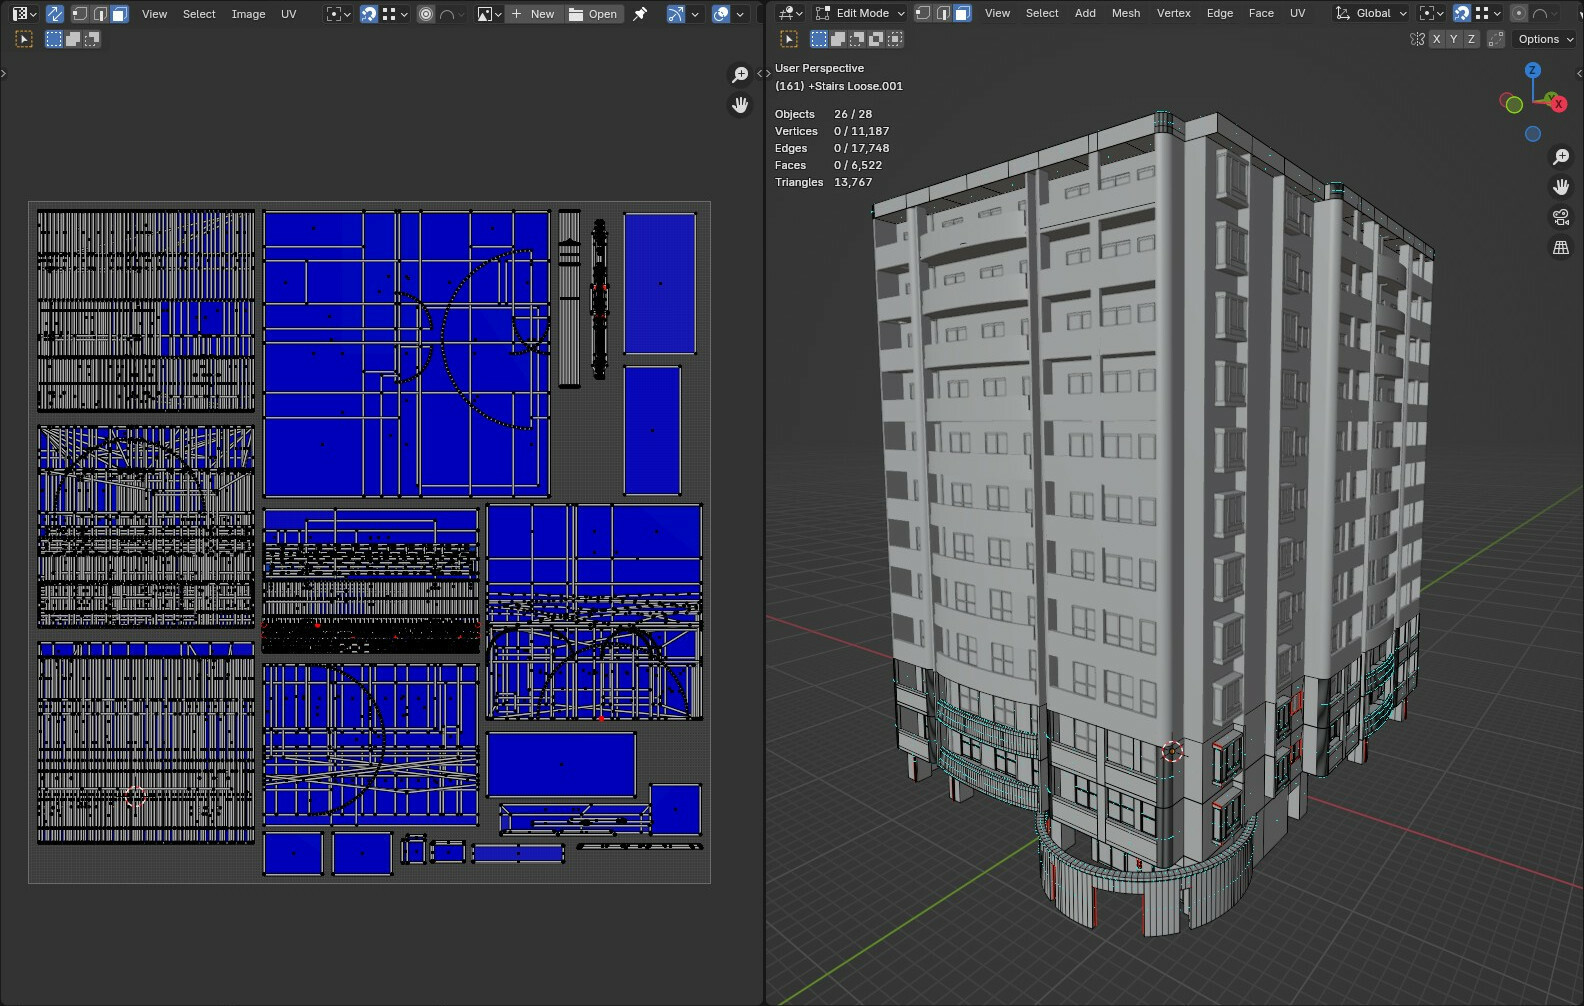 [i]UV is mapped from 0-1. No wraparound, square textures only.[/i]
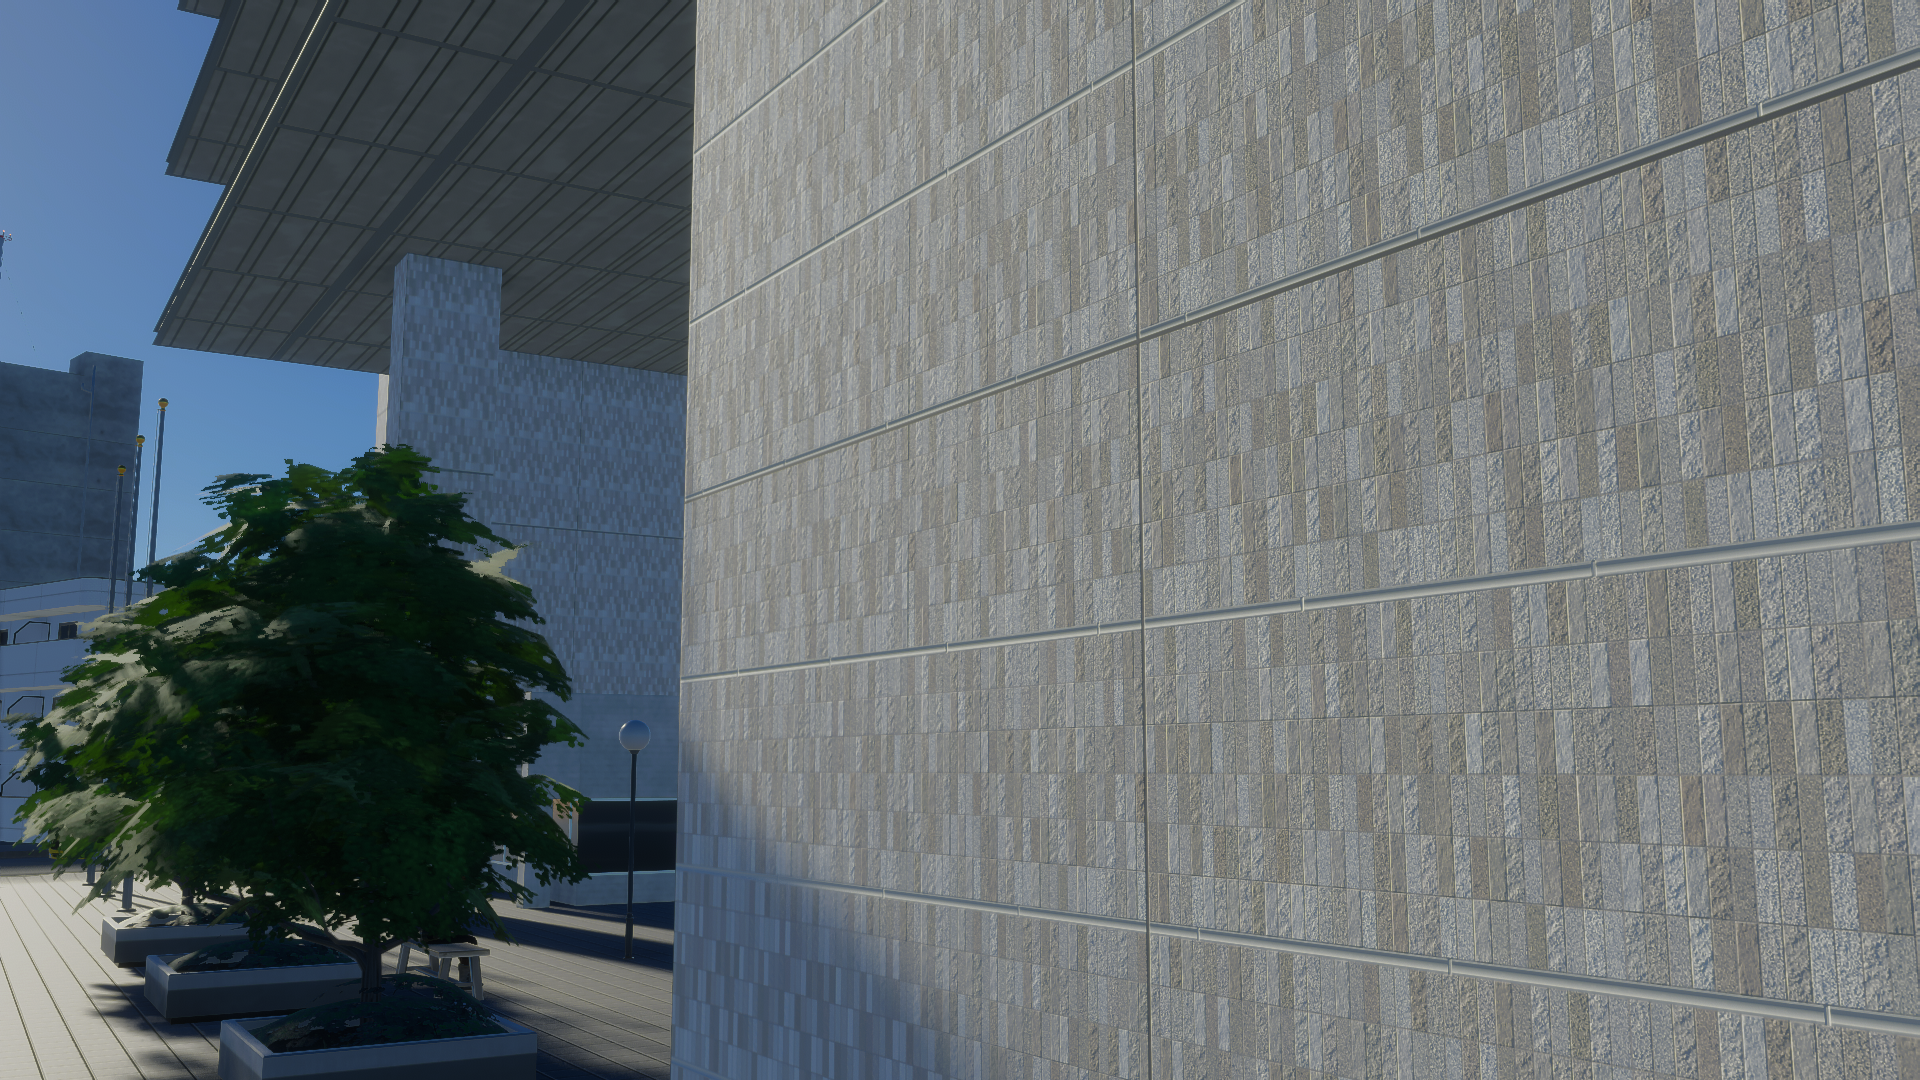
That said, I really welcome the changes. I don’t want to be redundant and repeat what other region packers have said, but I would like to state how much I like the window sub meshes. The time and texture space they save you alone are incredible. The greater texture sizes have enabled much finer patterns, which is critical for Japanese assets due to their frequent use of small tiles.
[i]UV is mapped from 0-1. No wraparound, square textures only.[/i]
That said, I really welcome the changes. I don’t want to be redundant and repeat what other region packers have said, but I would like to state how much I like the window sub meshes. The time and texture space they save you alone are incredible. The greater texture sizes have enabled much finer patterns, which is critical for Japanese assets due to their frequent use of small tiles.
 [i]Very fine, normal, and alpha textures from the pack.[/i]
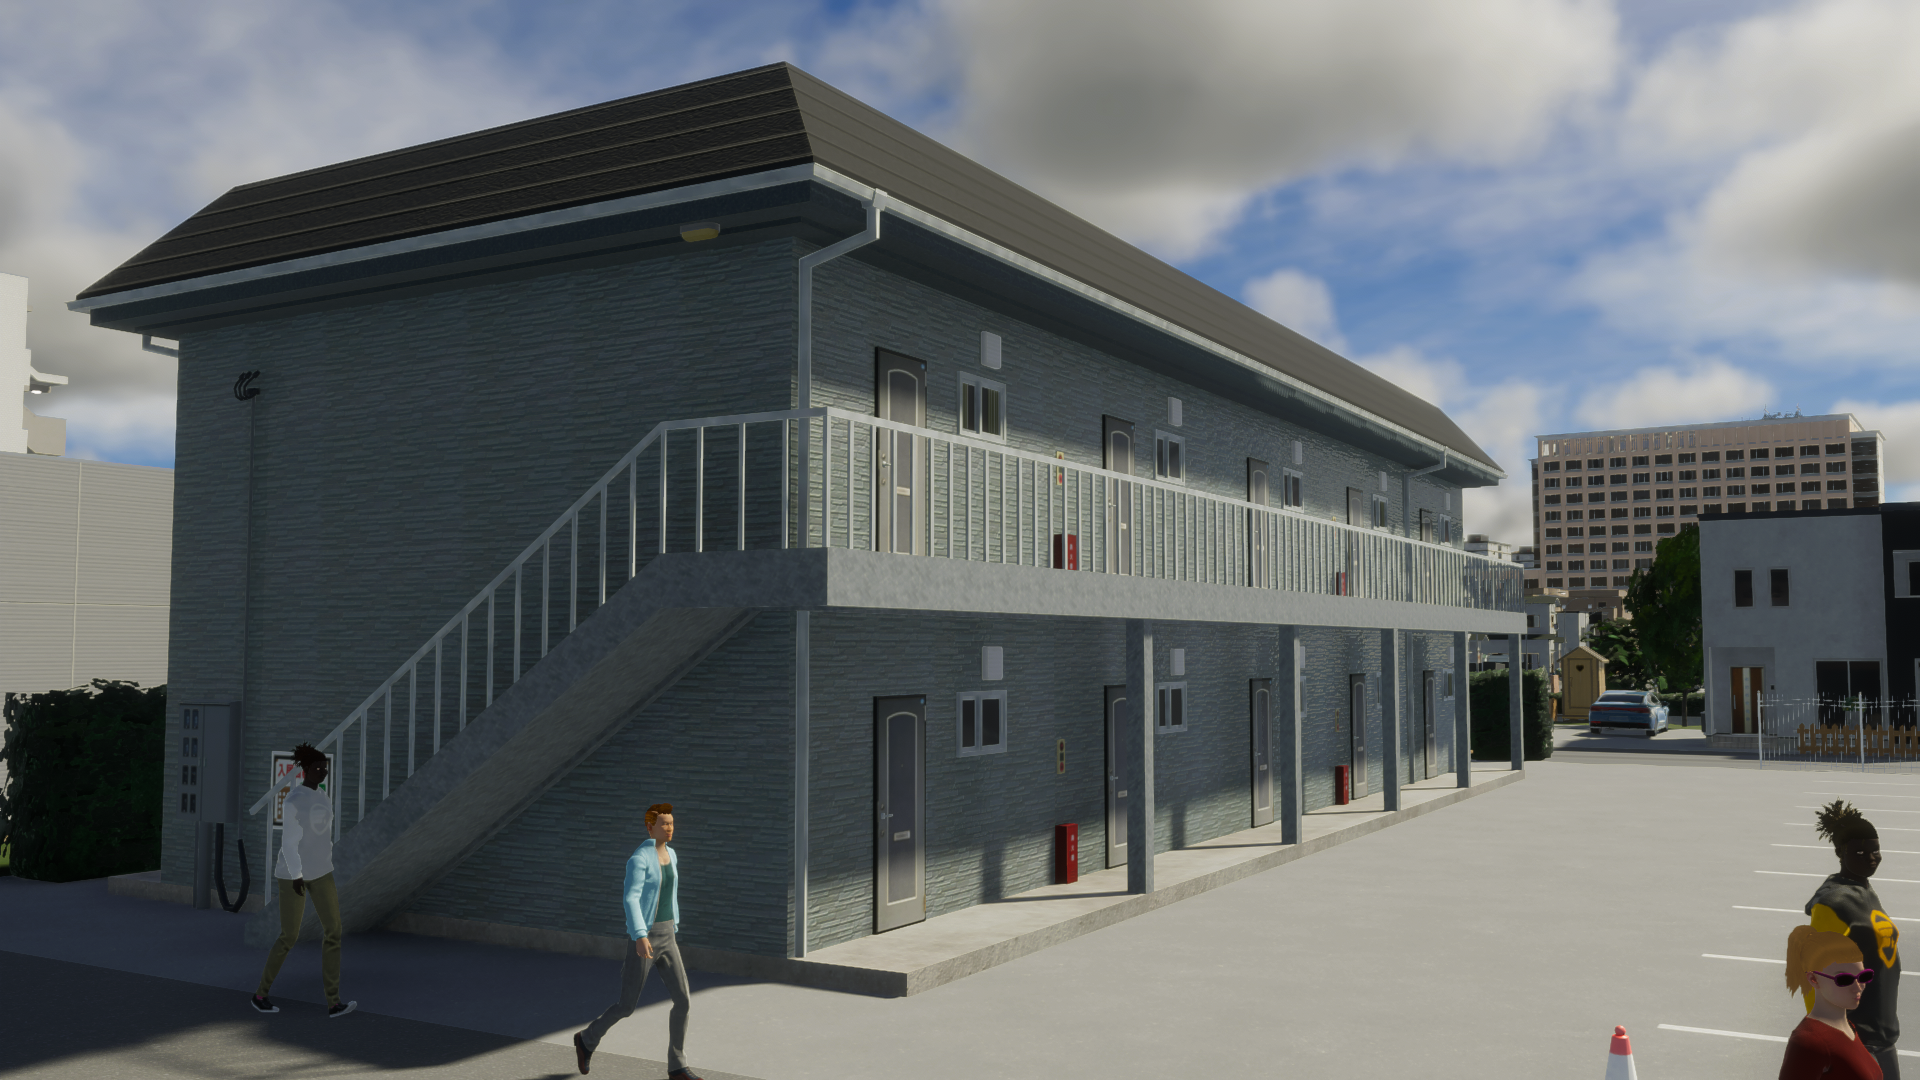
The open design of some apartment buildings can be a burden on the tri-budget. Due to fire code regulations, many builders choose to have open staircases and hallways as a cost-cutting measure. These features can quickly eat up a lot of triangles and require fairly extensive propping. My plan was to turn small, frequently reused items like doorbells and nameplates into props. After thinking about how many props that would entail, I quickly changed my mind. They were instead added to the meshes directly. Unfortunately, some features, like hallway lights, could not be added to the mesh directly. And believe me; there were a lot of them…
[i]Very fine, normal, and alpha textures from the pack.[/i]
The open design of some apartment buildings can be a burden on the tri-budget. Due to fire code regulations, many builders choose to have open staircases and hallways as a cost-cutting measure. These features can quickly eat up a lot of triangles and require fairly extensive propping. My plan was to turn small, frequently reused items like doorbells and nameplates into props. After thinking about how many props that would entail, I quickly changed my mind. They were instead added to the meshes directly. Unfortunately, some features, like hallway lights, could not be added to the mesh directly. And believe me; there were a lot of them…
 [i]...upwards of a hundred per building, even for growables.[/i]
The Substance Suite may be a hard sale for people who want just to dip their foot in asset creation, but I can assure you it’s worth every penny. It’s not just for people who want to do fancy stuff like paint directly on the model. With smart textures, I can scale it losslessly to any size, tweak the options to meet my exacting standards, and preview them directly on the model in real-time. I found this to be a total game-changer.
[i]...upwards of a hundred per building, even for growables.[/i]
The Substance Suite may be a hard sale for people who want just to dip their foot in asset creation, but I can assure you it’s worth every penny. It’s not just for people who want to do fancy stuff like paint directly on the model. With smart textures, I can scale it losslessly to any size, tweak the options to meet my exacting standards, and preview them directly on the model in real-time. I found this to be a total game-changer.
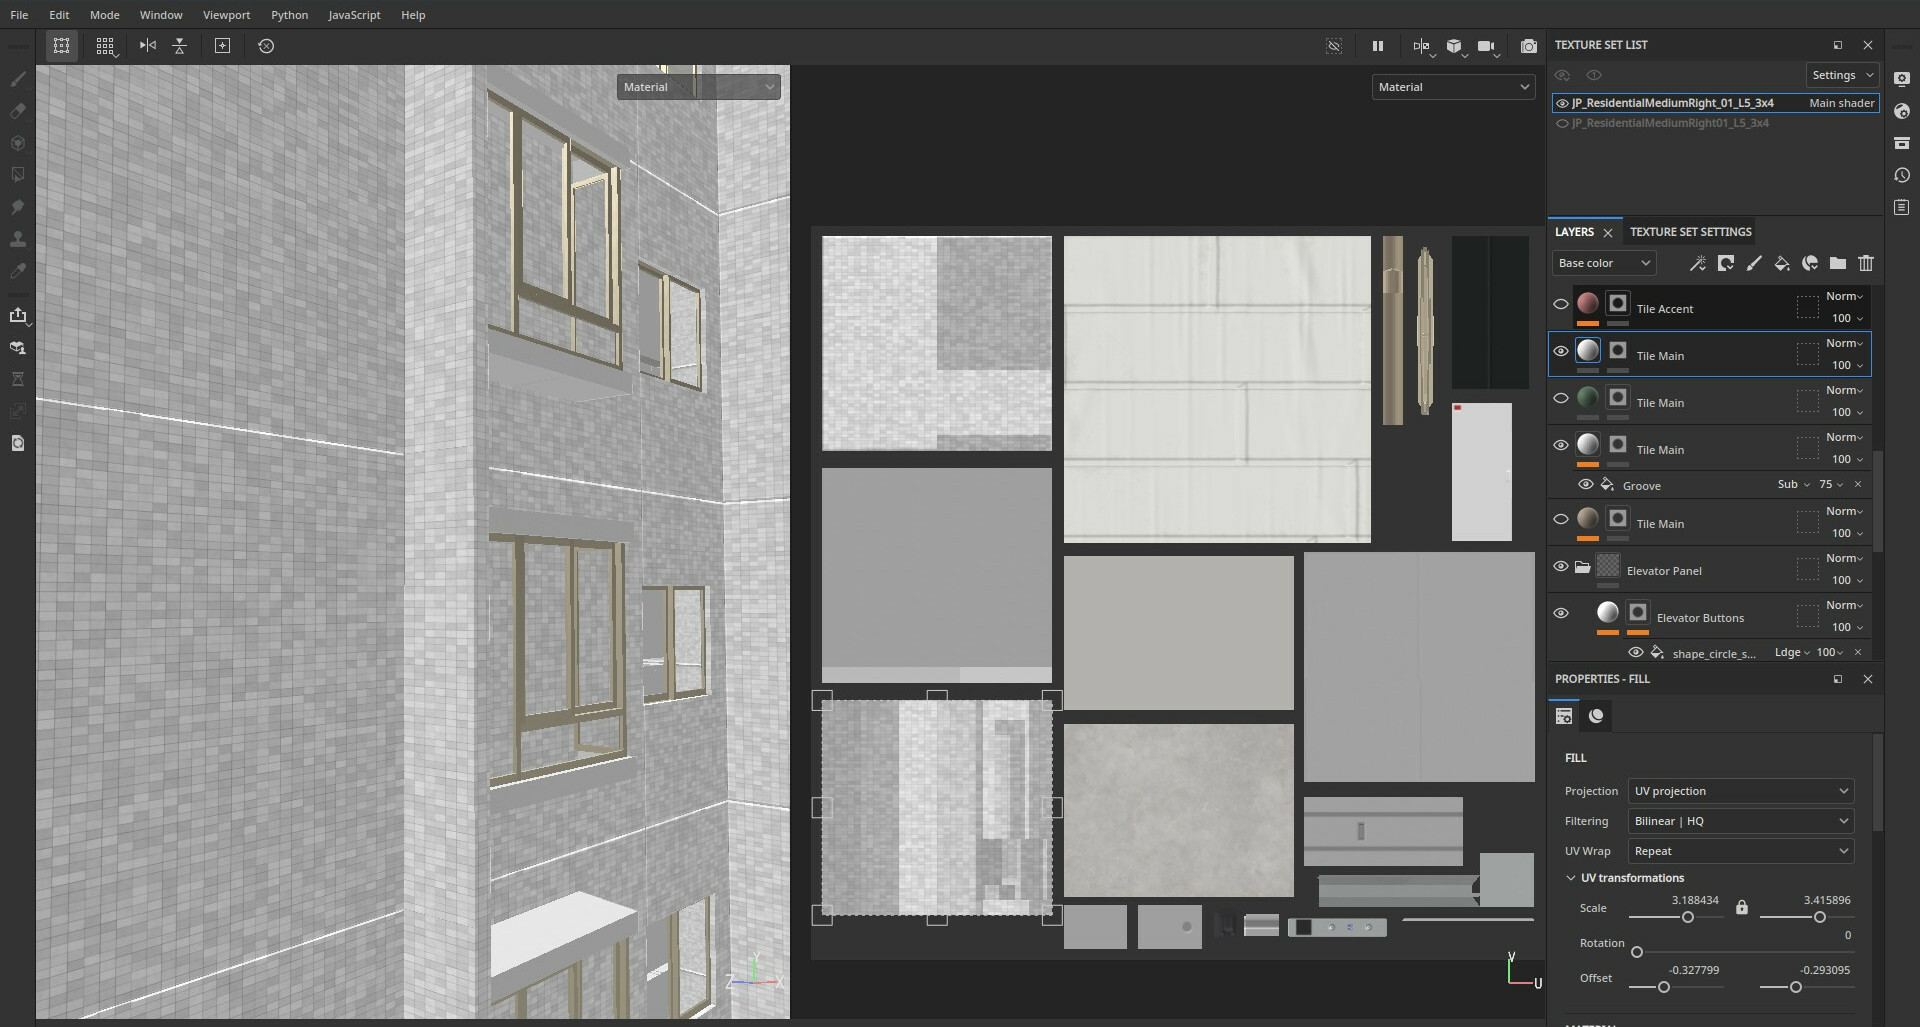 [i]Substance Painter. The base color is left white for “repaintability”. [/i]
The real star of the show for me, however, is Substance Designer.
In a raster image editor like Photoshop, making (or tweaking) textures requires blending layers together, resulting in them interacting with each other in ways that are often undesirable, unpredictable, or easy to lose track of. Updating your changes in a diffuse texture as well as a specular, normal, color, and so on becomes a headache very quickly. And when you finish all that, you’re often stuck with raster layers that can’t be reused easily in other textures.
With Designer, I can build a procedural, lossless texture with a simple node workflow. For a very trivial example, a basic brick wall can be created from a repeating white-rectangle-on-black pattern. This can be used as a height map onto which a normal is auto-generated. It can also be lightened to create a specular, or a color added to the white part to create a diffuse. Here’s the cool part: You can expose the variables so that the number of bricks in the pattern can be adjusted, their relative size changed, or a different color added, all with a click of a button in Substance Painter. Since it is all mathematically calculated, the texture can be scaled to any resolution losslessly.
Now, imagine you want to make it more complicated. You can use a tool to generate rectangles with random tilts, height changes, and offsets. You can apply a fine noise pattern to add texture to the brick or mortar. You can add filters that smear dirt and grime in ways that include the heightmap in their calculations so they accumulate more at hard edges. All of these are a node or two away.
I highly encourage all asset makers to try it. It’s much easier than it looks. Learning how to use it is well worth the effort, especially if you’re picky about details like I am.
[i]Substance Painter. The base color is left white for “repaintability”. [/i]
The real star of the show for me, however, is Substance Designer.
In a raster image editor like Photoshop, making (or tweaking) textures requires blending layers together, resulting in them interacting with each other in ways that are often undesirable, unpredictable, or easy to lose track of. Updating your changes in a diffuse texture as well as a specular, normal, color, and so on becomes a headache very quickly. And when you finish all that, you’re often stuck with raster layers that can’t be reused easily in other textures.
With Designer, I can build a procedural, lossless texture with a simple node workflow. For a very trivial example, a basic brick wall can be created from a repeating white-rectangle-on-black pattern. This can be used as a height map onto which a normal is auto-generated. It can also be lightened to create a specular, or a color added to the white part to create a diffuse. Here’s the cool part: You can expose the variables so that the number of bricks in the pattern can be adjusted, their relative size changed, or a different color added, all with a click of a button in Substance Painter. Since it is all mathematically calculated, the texture can be scaled to any resolution losslessly.
Now, imagine you want to make it more complicated. You can use a tool to generate rectangles with random tilts, height changes, and offsets. You can apply a fine noise pattern to add texture to the brick or mortar. You can add filters that smear dirt and grime in ways that include the heightmap in their calculations so they accumulate more at hard edges. All of these are a node or two away.
I highly encourage all asset makers to try it. It’s much easier than it looks. Learning how to use it is well worth the effort, especially if you’re picky about details like I am.
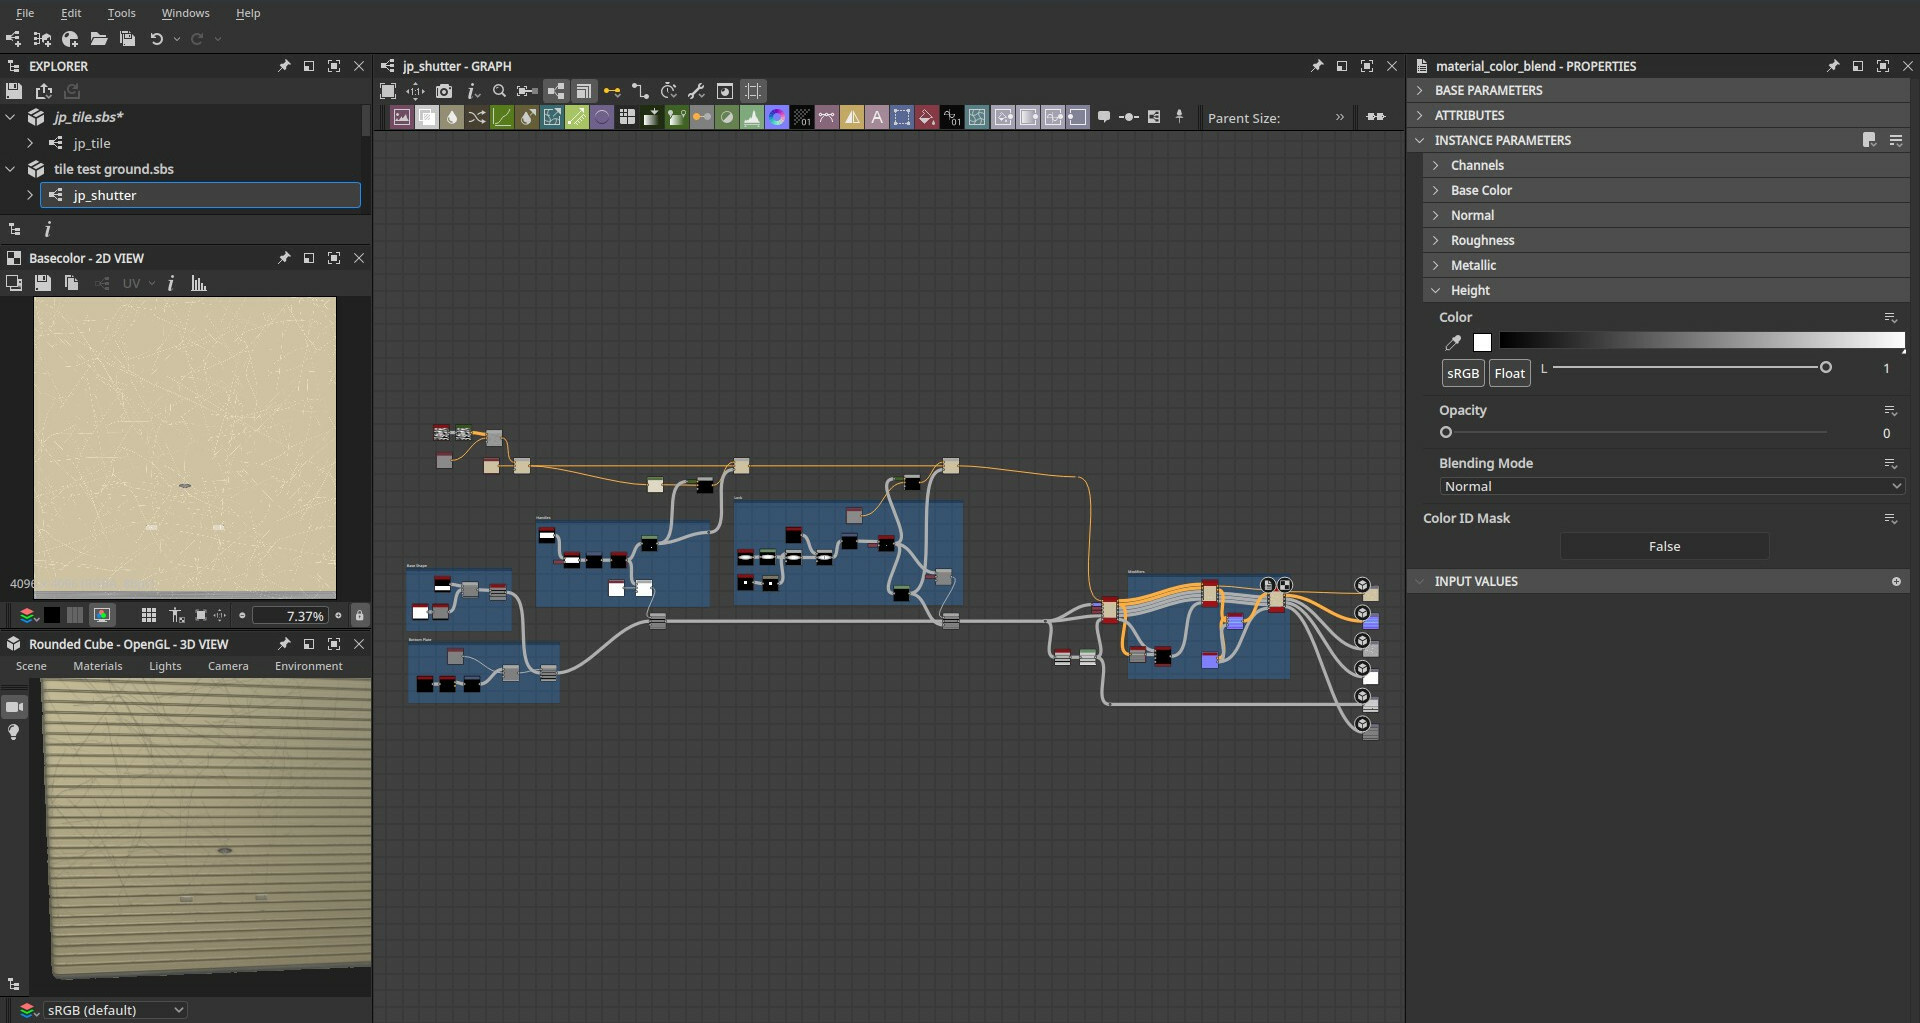 [i]Example of a shutter texture I made. Also flexible enough to be used for a few walls.[/i]
Showcase
So what’s in it? First off, the growables. The following zone types are included:- Low Density Housing
- Low Density Business
- Medium Density Housing
- Mixed Housing
 [i]Low Density Housing, center lots. From front to back: L1, L3, L5.[/i]
 [i]Low Density Housing, left-corner lots. From front to back: L1, L3, L5.[/i]
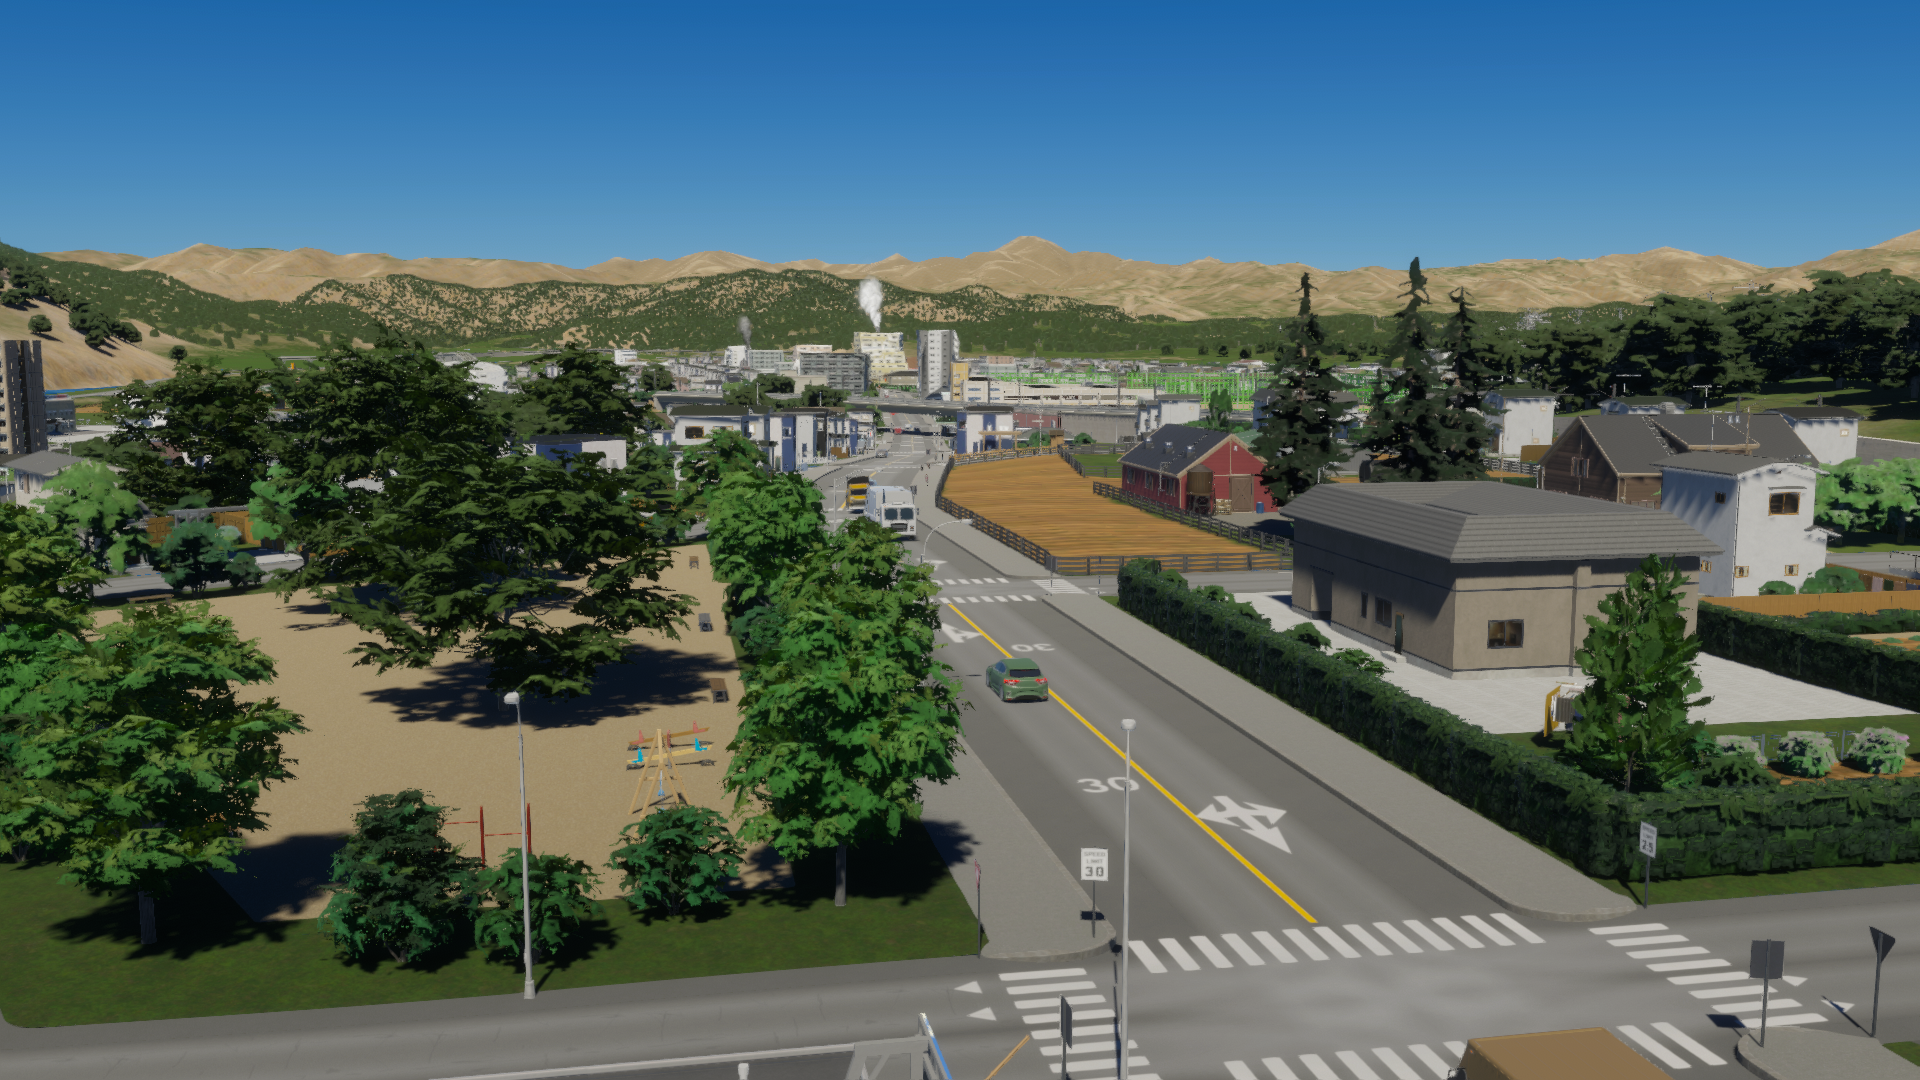
Low-density Business are inspired by the car-centric businesses that are common on major roads in rural and suburban areas, especially national highways. Big chain retail and parking lots… a familiar sight for Americans! (American-sized parking lots are sold separately.)
[i]Low Density Housing, left-corner lots. From front to back: L1, L3, L5.[/i]
Low-density Business are inspired by the car-centric businesses that are common on major roads in rural and suburban areas, especially national highways. Big chain retail and parking lots… a familiar sight for Americans! (American-sized parking lots are sold separately.)
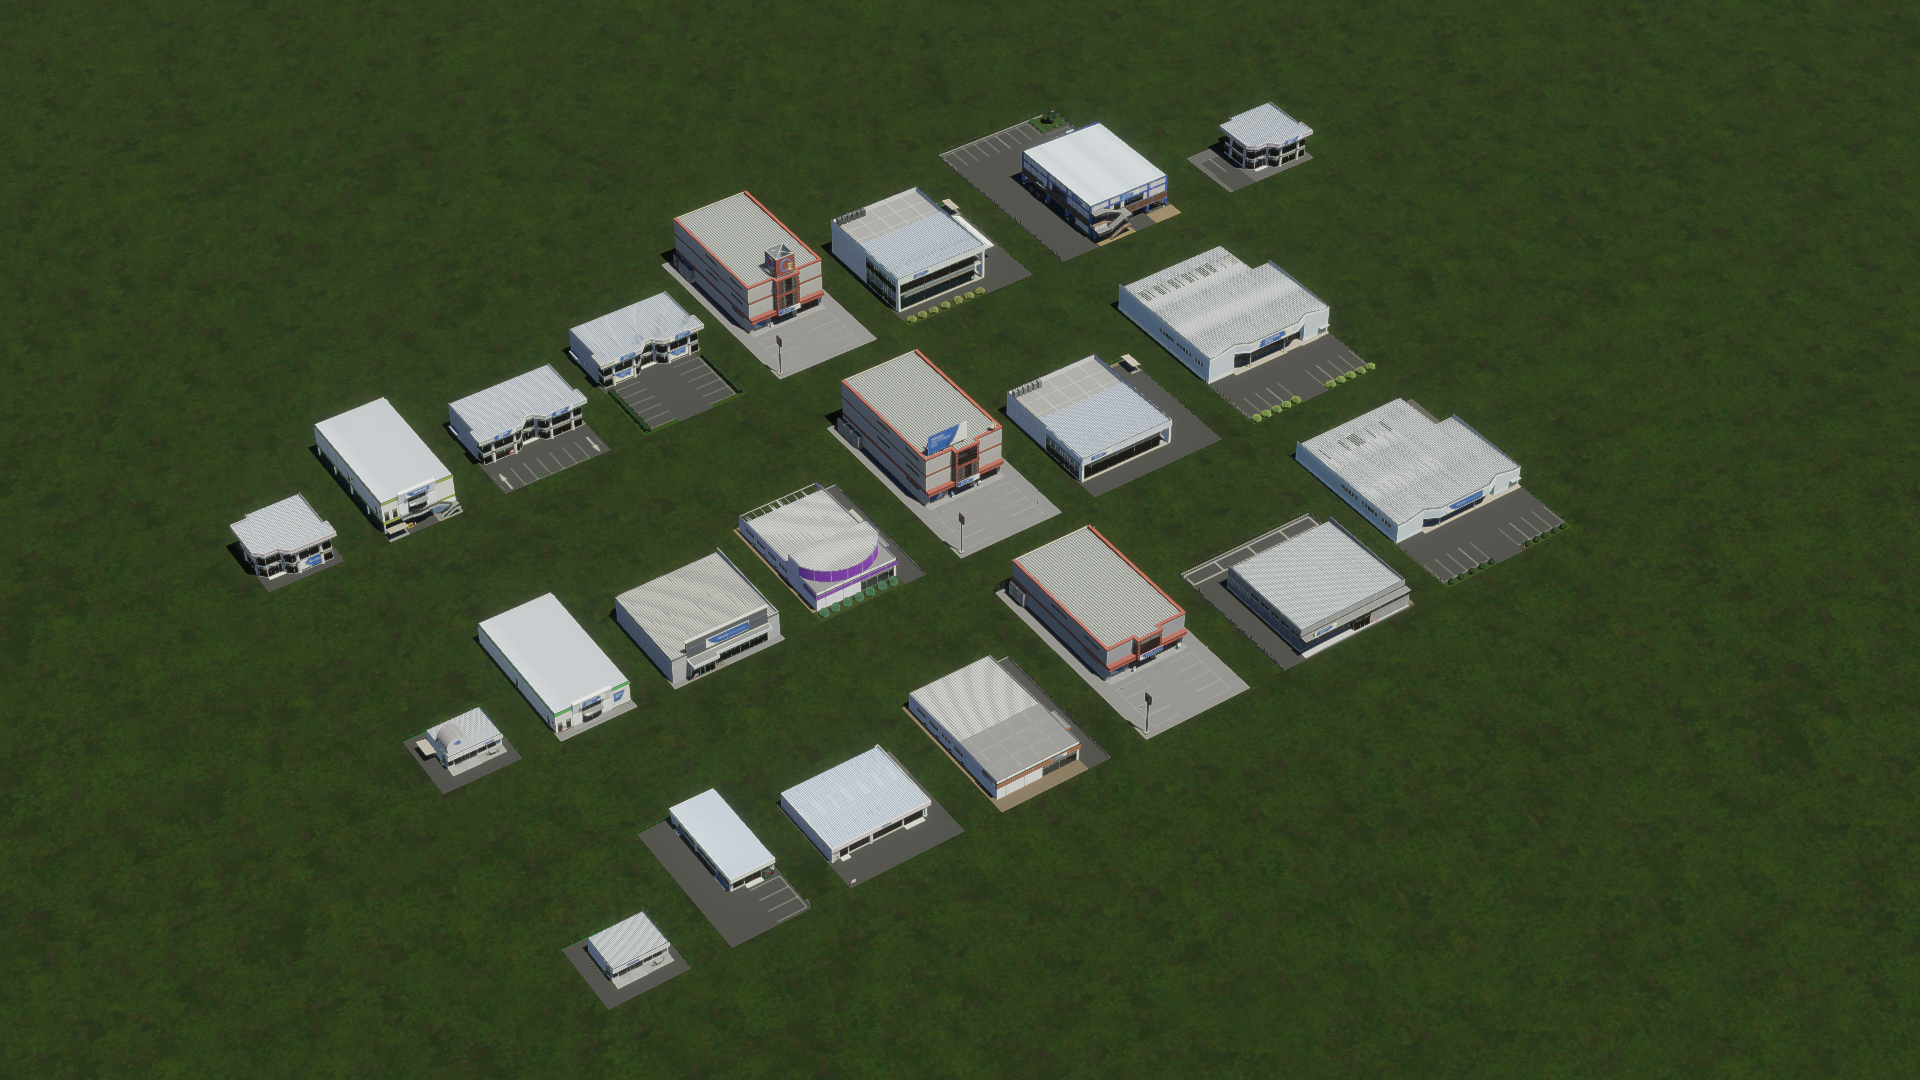 [i]Low Density Business, center lots. From front to back: L1, L3, L5.[/i]
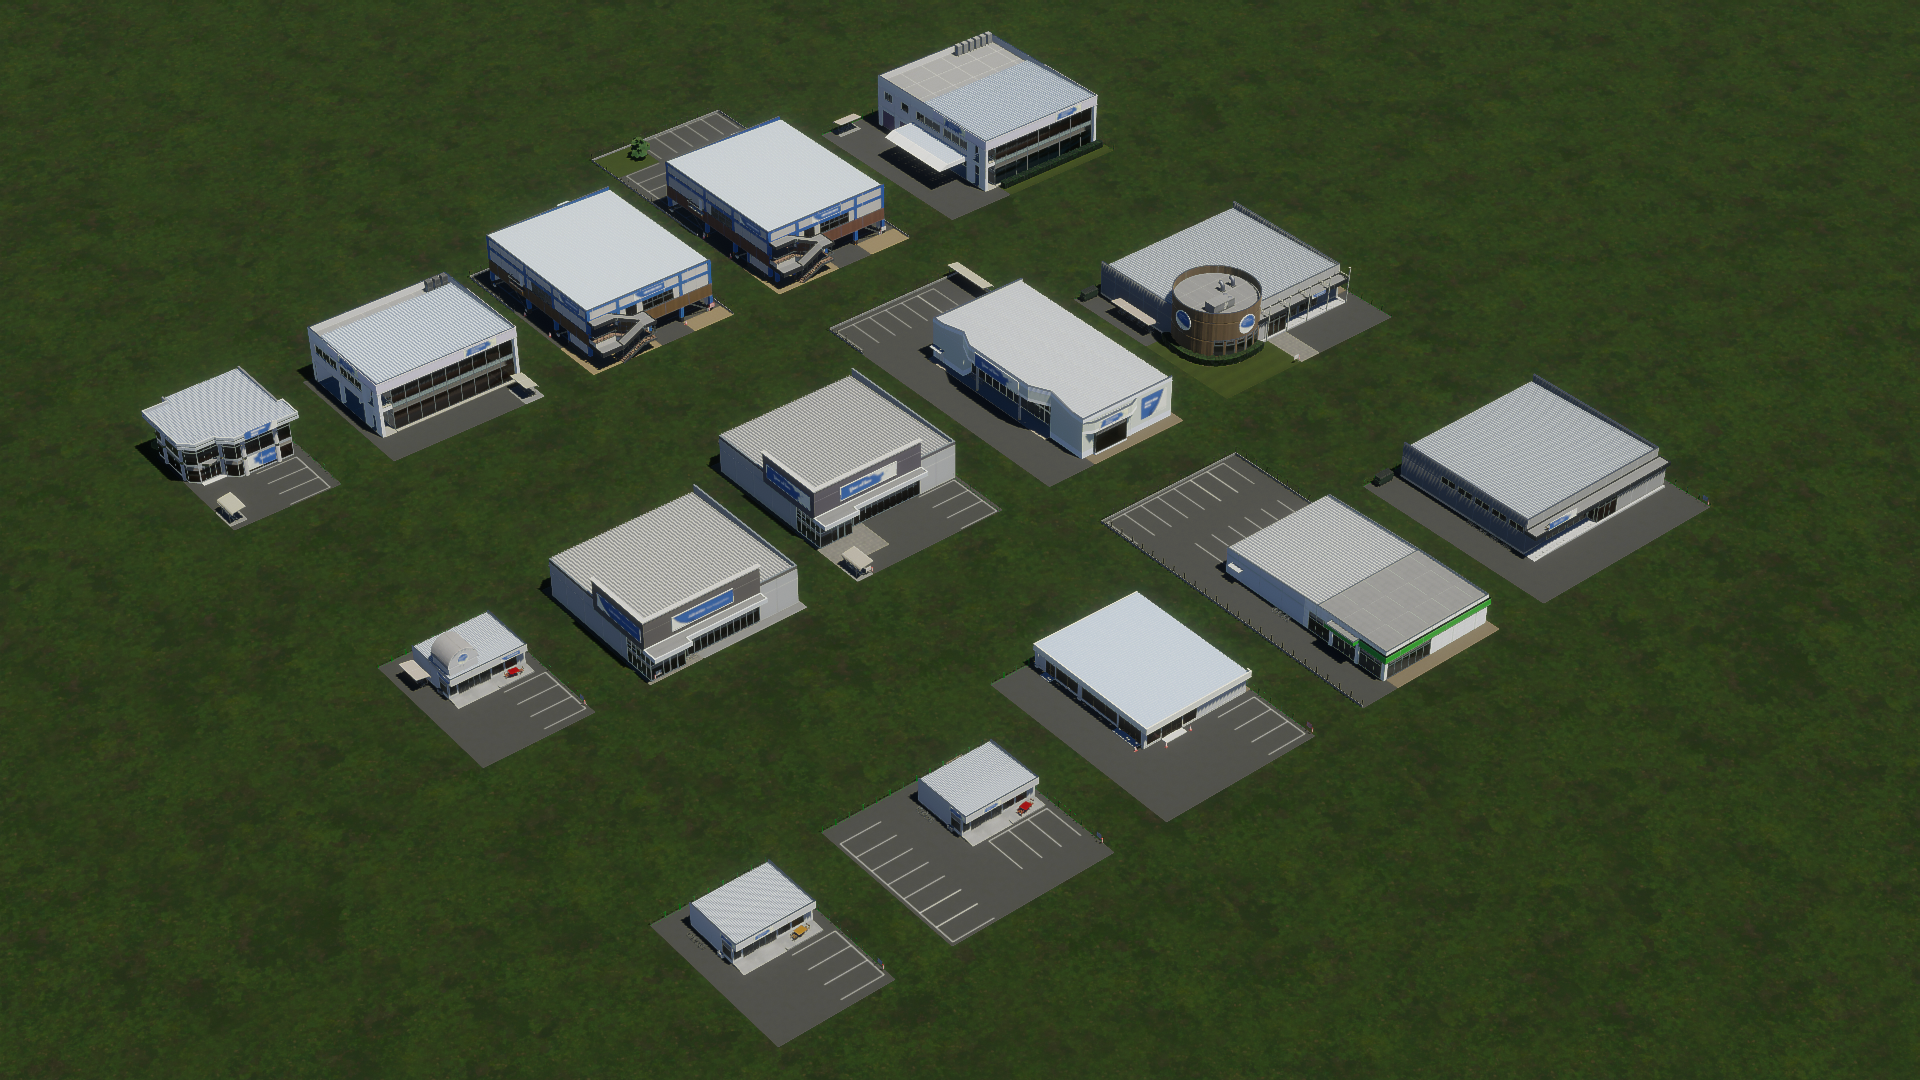 [i]Low Density Business, left-corner lots. From front to back: L1, L3, L5.[/i]
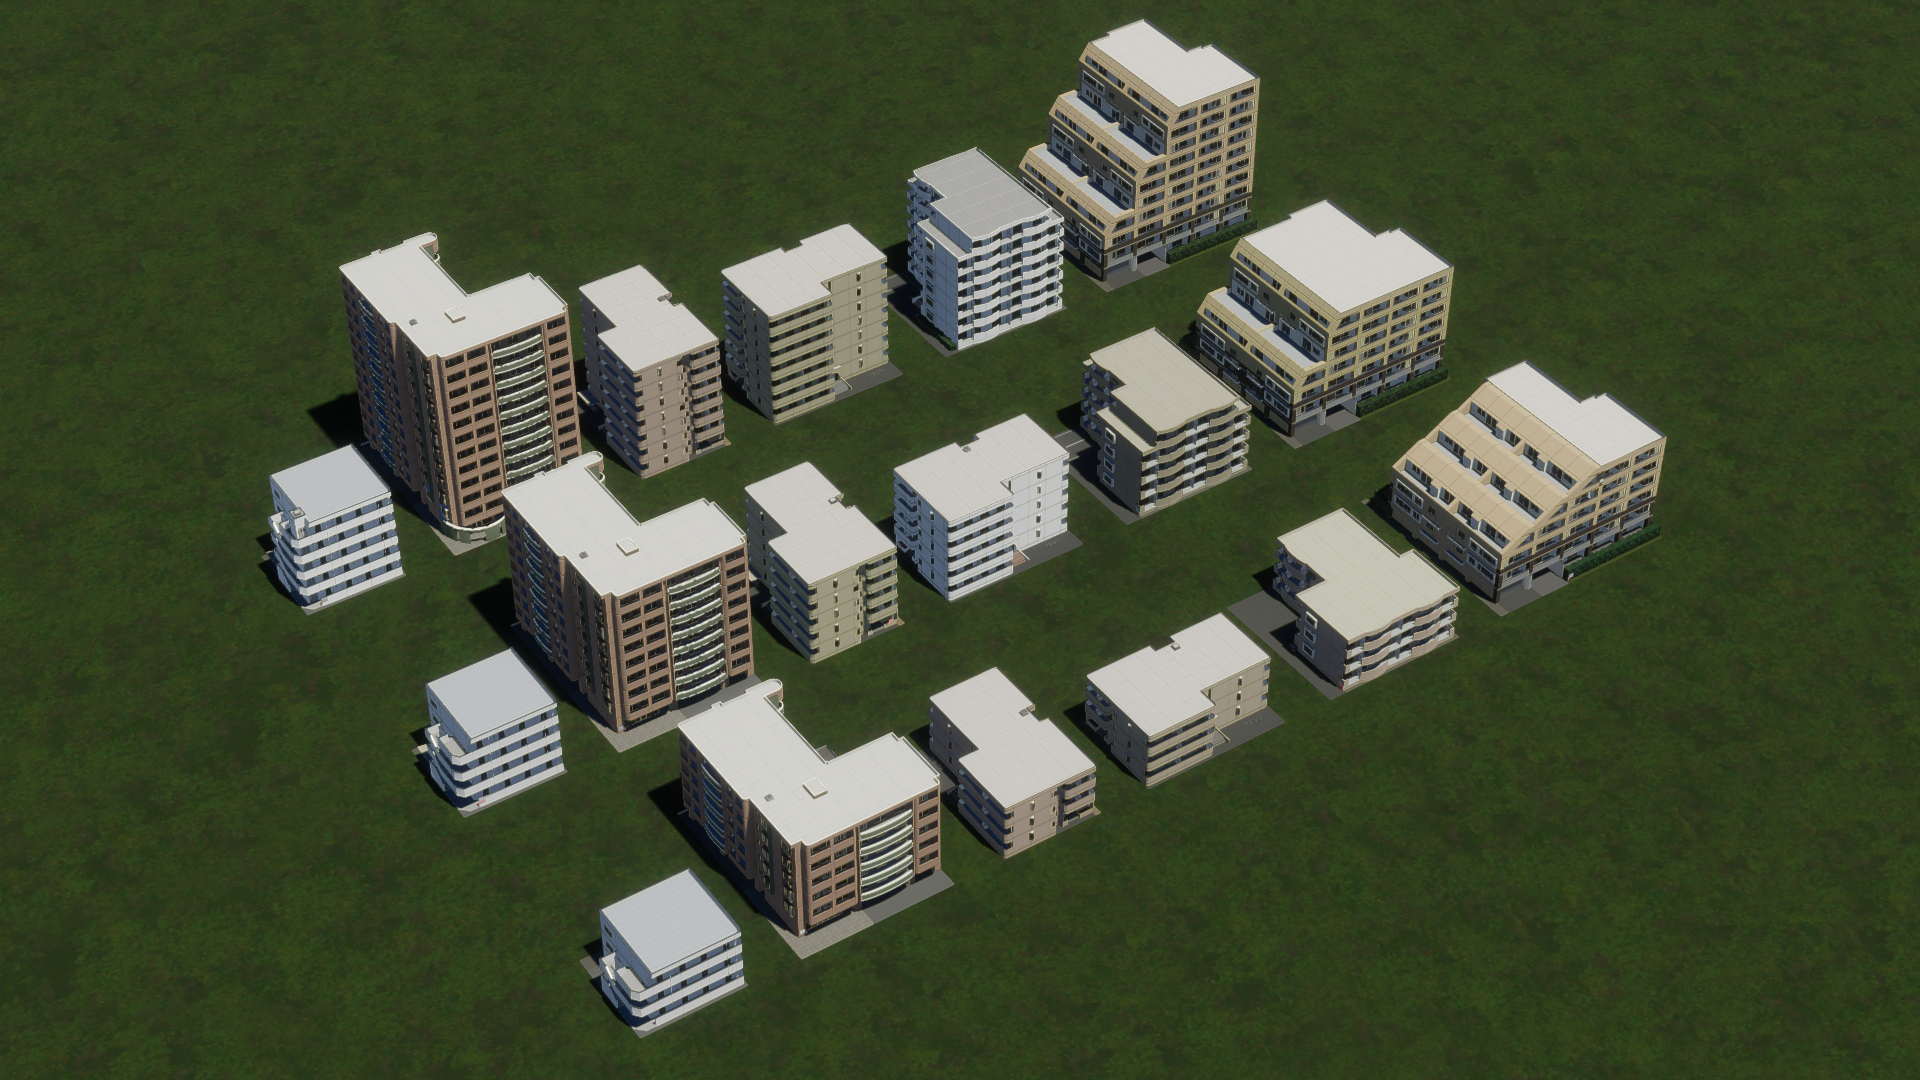
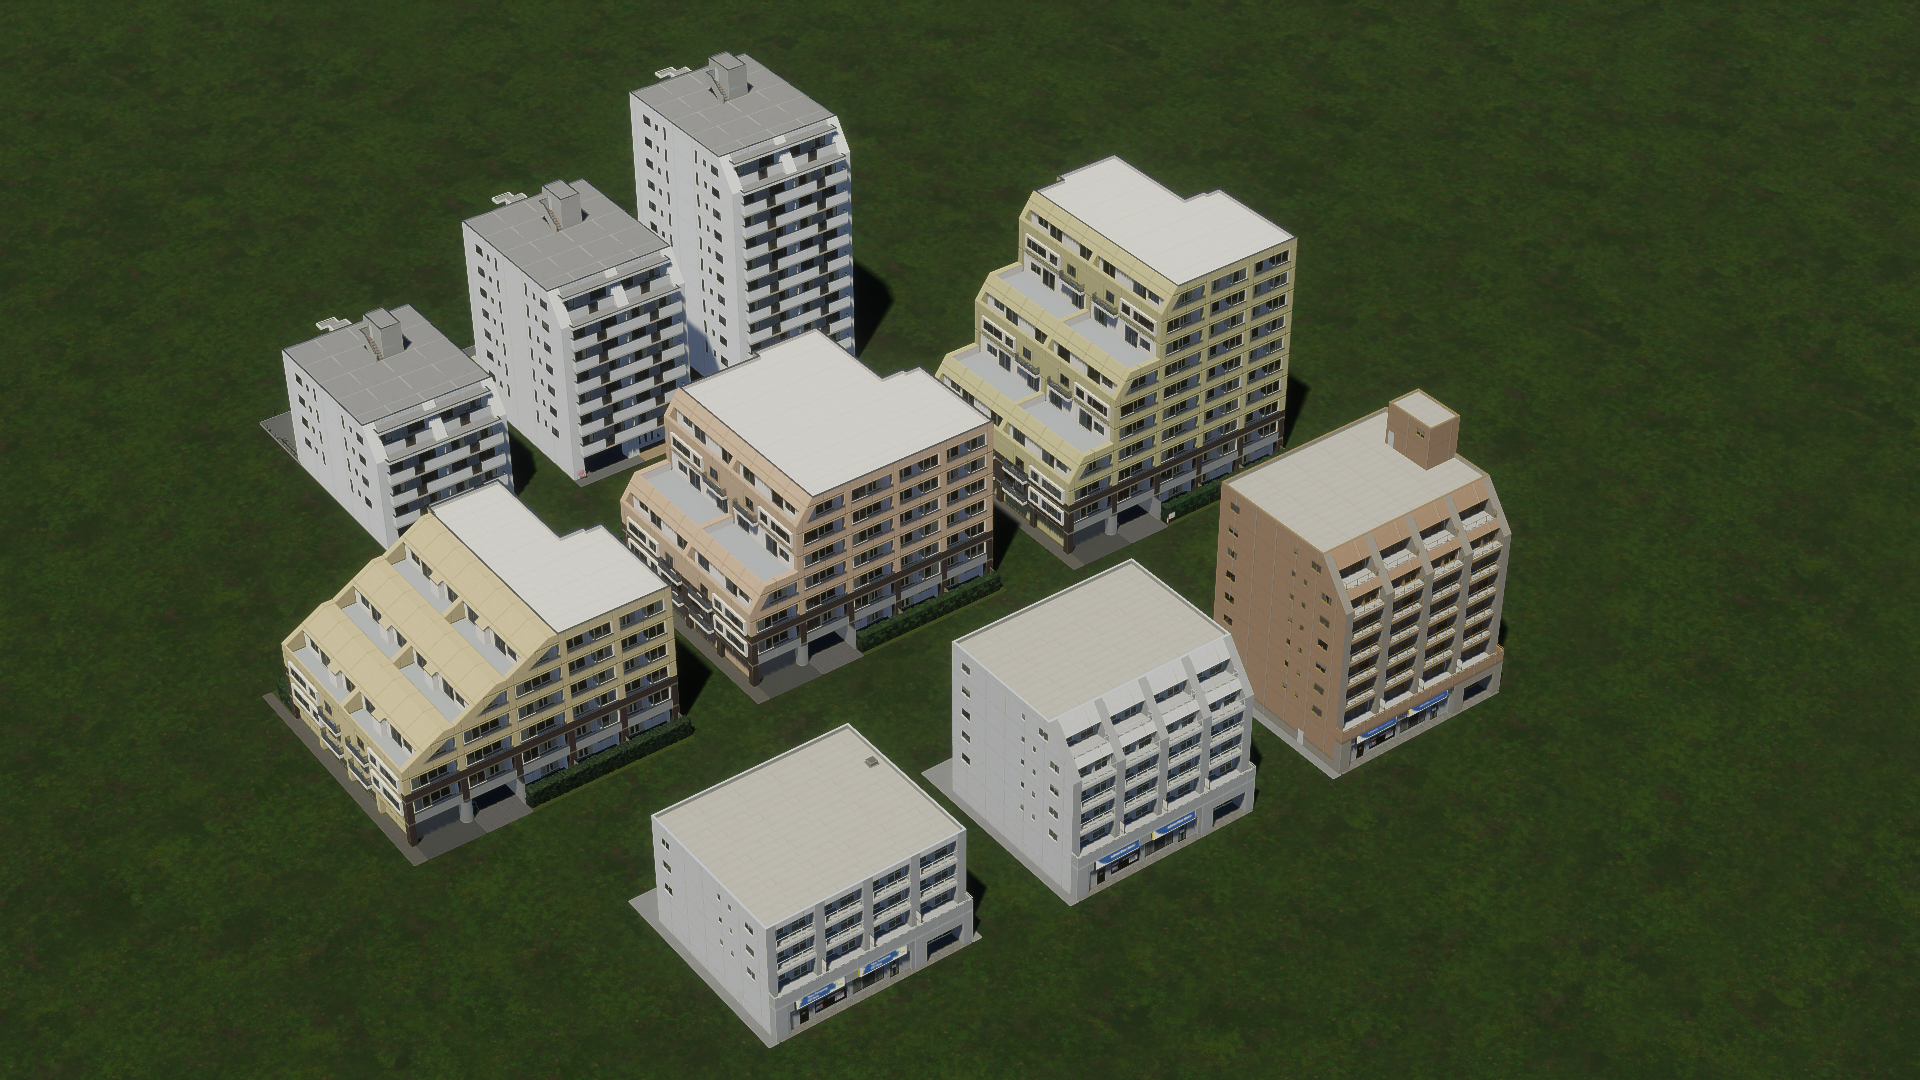
The medium-density housing zones, however, are less thematic. From the “mansion” (condo tower) to the “aparto” (two-story studio apartment building) to the “ubiquitous, two-story, sometimes detached but not always, residential-over-commercial mixed building” (if you know what this is called in either language, please let me know in the comments); there is a wide variety of buildings in these two zone types.
[i]Low Density Business, left-corner lots. From front to back: L1, L3, L5.[/i]
The medium-density housing zones, however, are less thematic. From the “mansion” (condo tower) to the “aparto” (two-story studio apartment building) to the “ubiquitous, two-story, sometimes detached but not always, residential-over-commercial mixed building” (if you know what this is called in either language, please let me know in the comments); there is a wide variety of buildings in these two zone types.
 [i]Medium Density Housing, center lots. From front to back: L1, L3, L5.[/i]
 [i]Medium Density Housing, left corner lots. From front to back: L1, L3, L5.[/i]
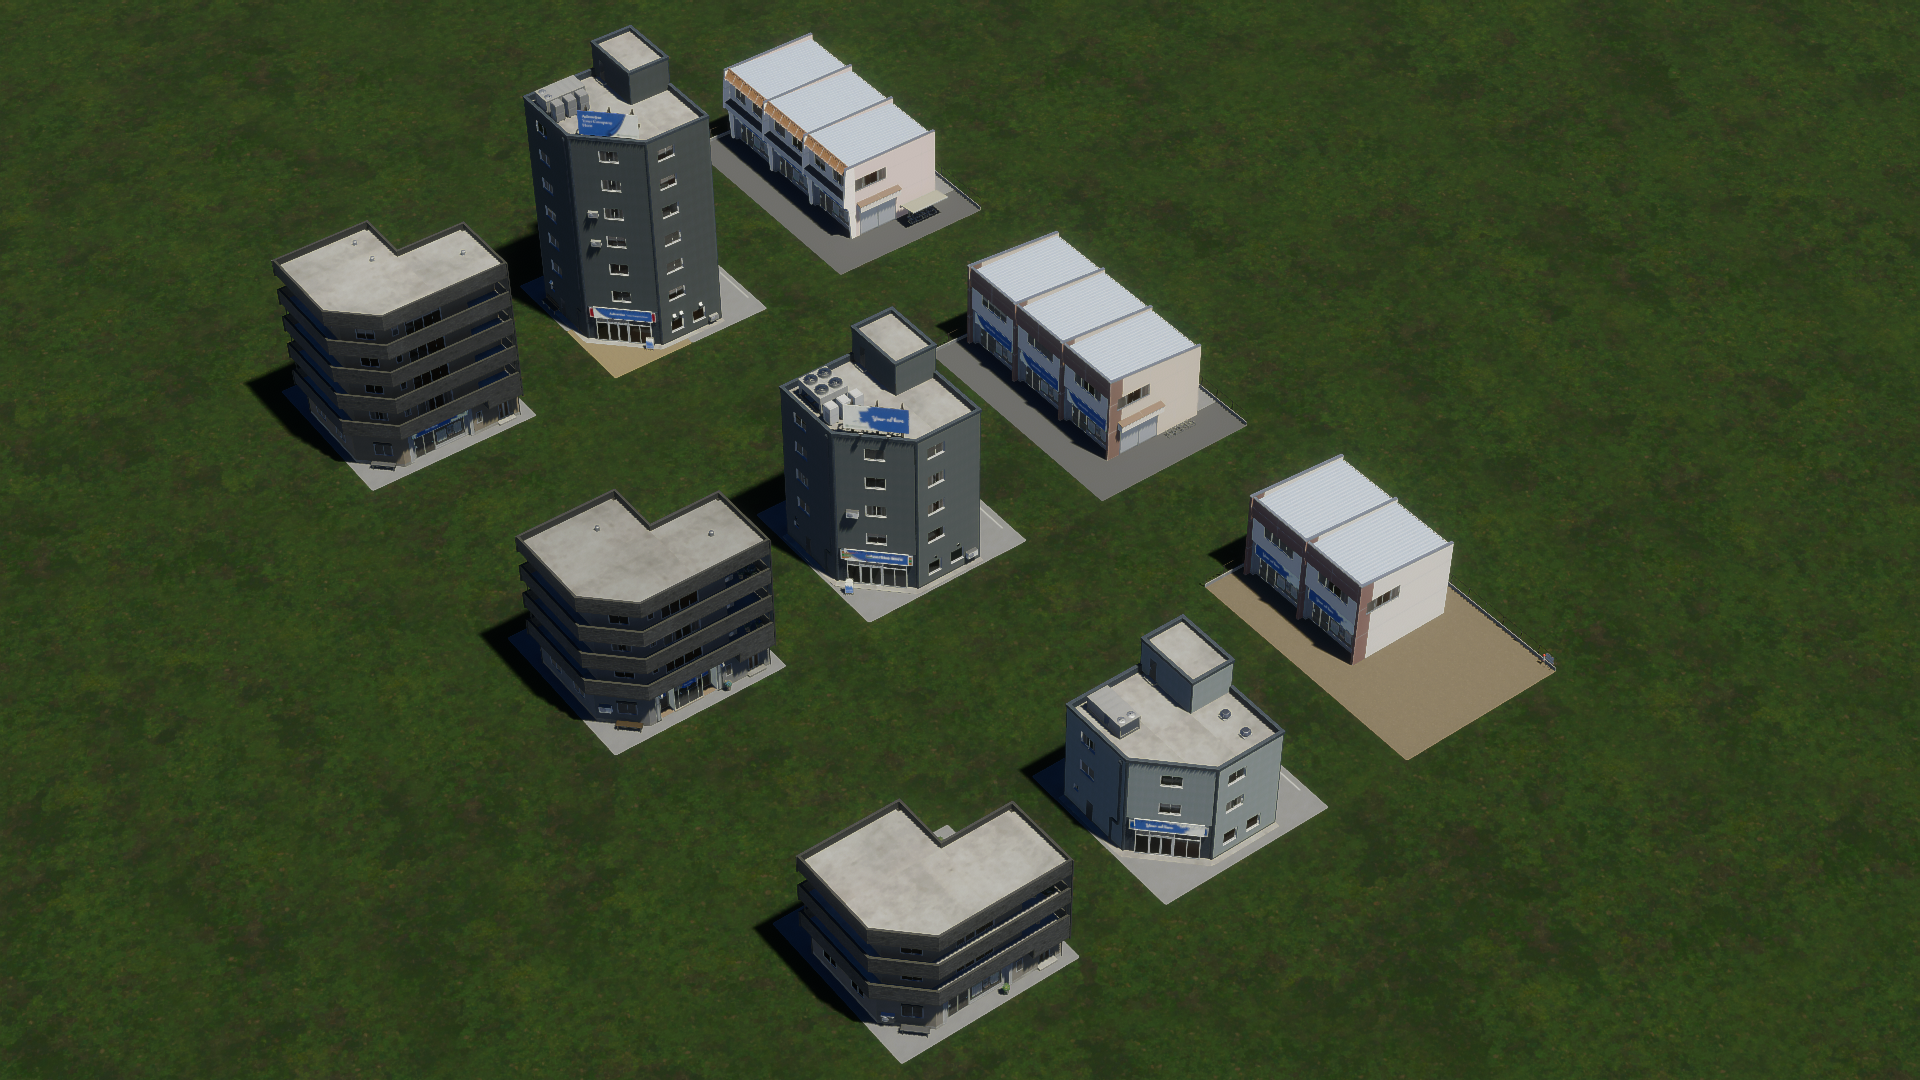 [i]Mixed Housing, center lots. From front to back: L1, L3, L5.[/i]
[i]Mixed Housing, left corner lots. From front to back: L1, L3, L5.[/i]
We also have the following service buildings:
[i]Mixed Housing, center lots. From front to back: L1, L3, L5.[/i]
[i]Mixed Housing, left corner lots. From front to back: L1, L3, L5.[/i]
We also have the following service buildings:
- City Hall
- College
- Elementary School
- Fire House
- Fire Station
- High School
- Hospital
- Medical Clinic
- Police Station
- Police HQ
- Post Office
- Radio Mast
- Recycling Center
- University
- Water Treatment Plant
- Welfare Office
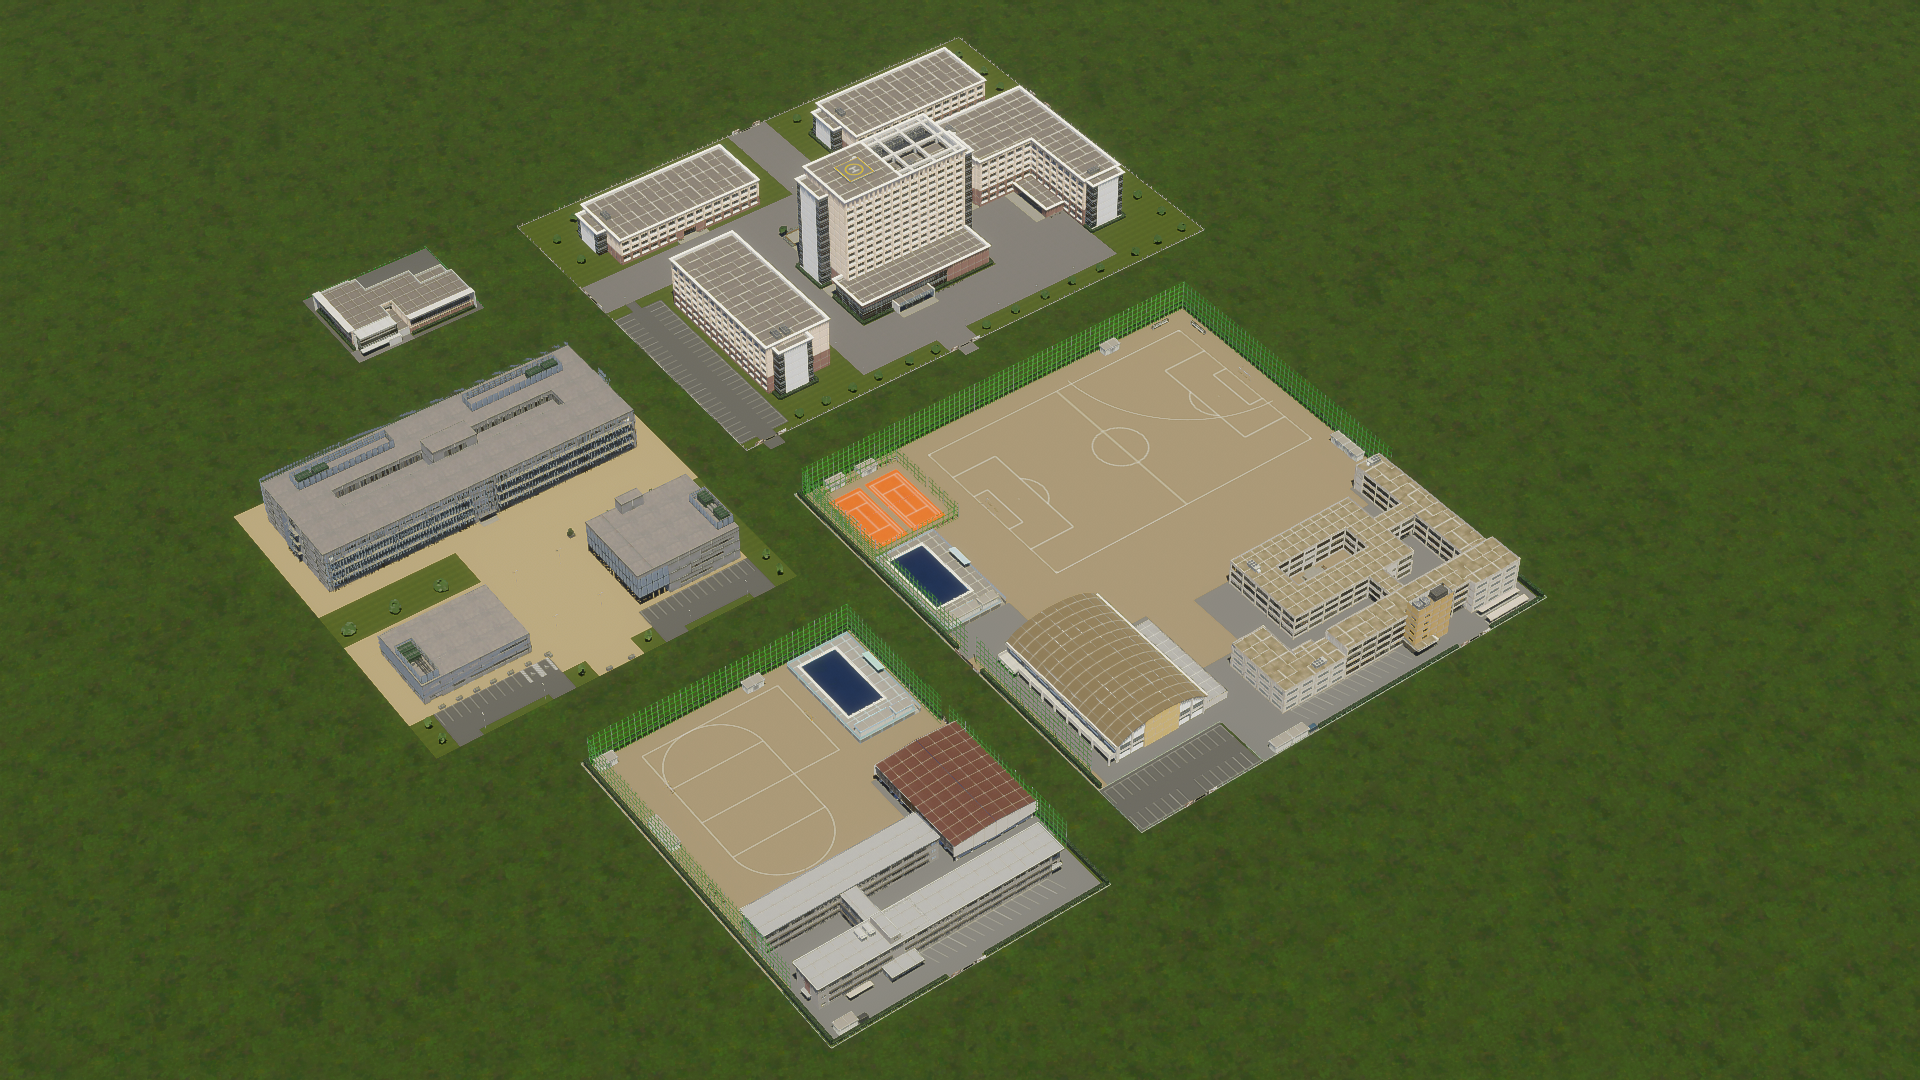 [i]Education buildings, clockwise from top: University, high school, elementary school, college,
university library.[/i]
[i]Education buildings, clockwise from top: University, high school, elementary school, college,
university library.[/i]
 [i]City hall (left) and welfare office (right).[/i]
 [i]Post office (left) and radio mast (right).[/i]
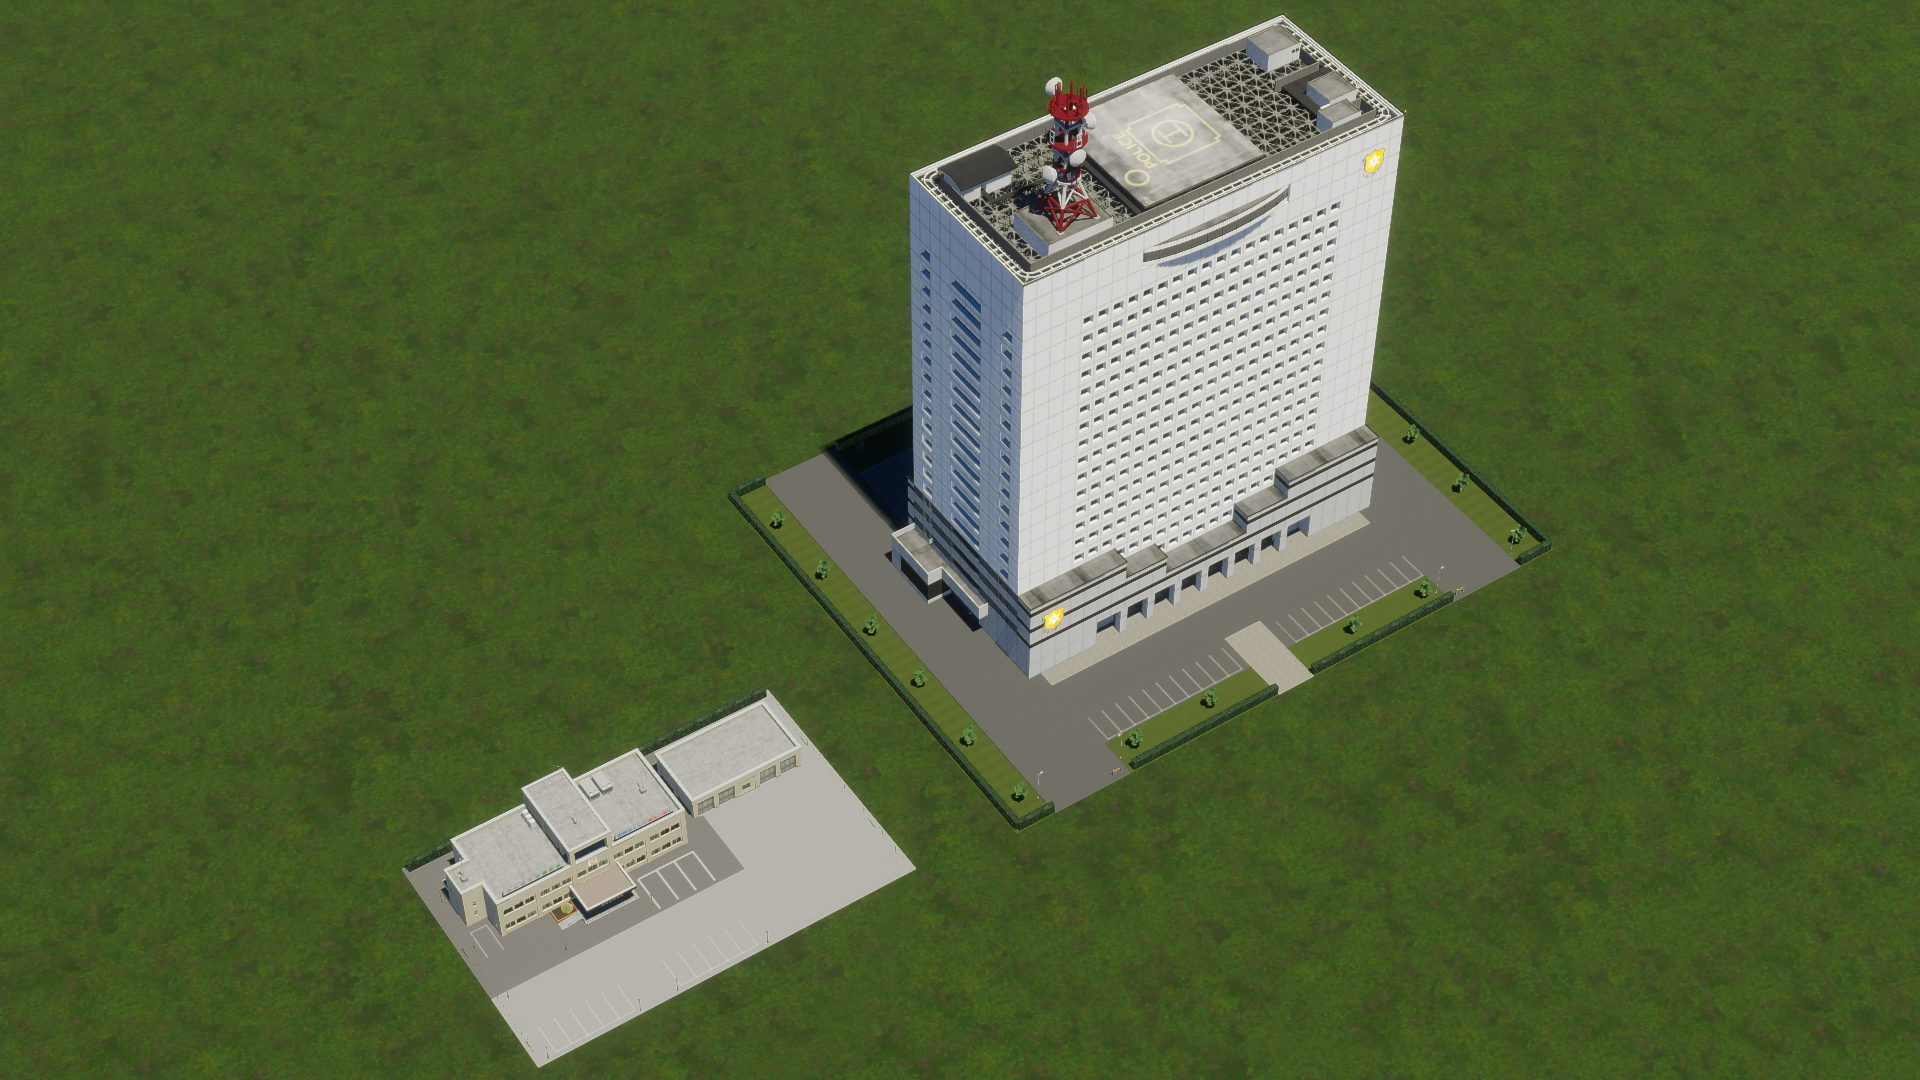 [i]Police station (left) and police HQ (right).[/i]
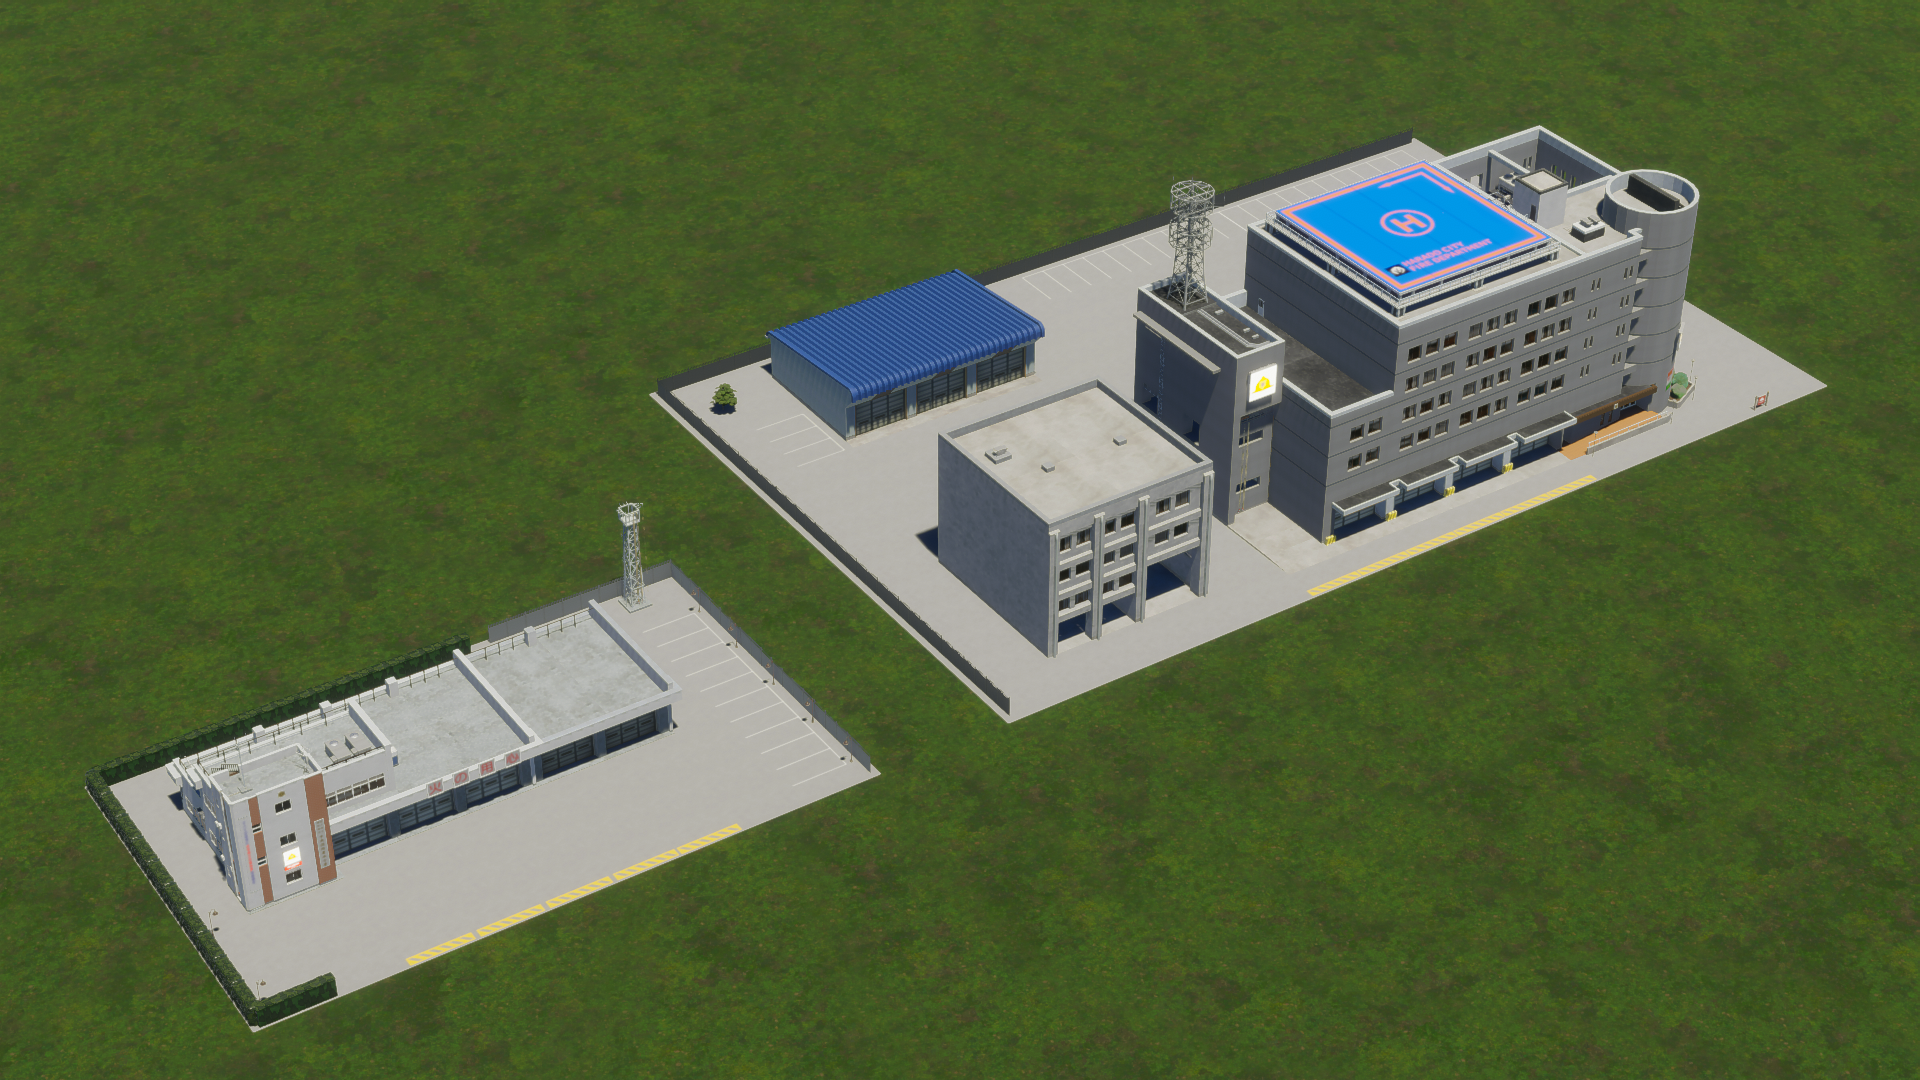 [i]Firehouse (left) and fire station (right).[/i]
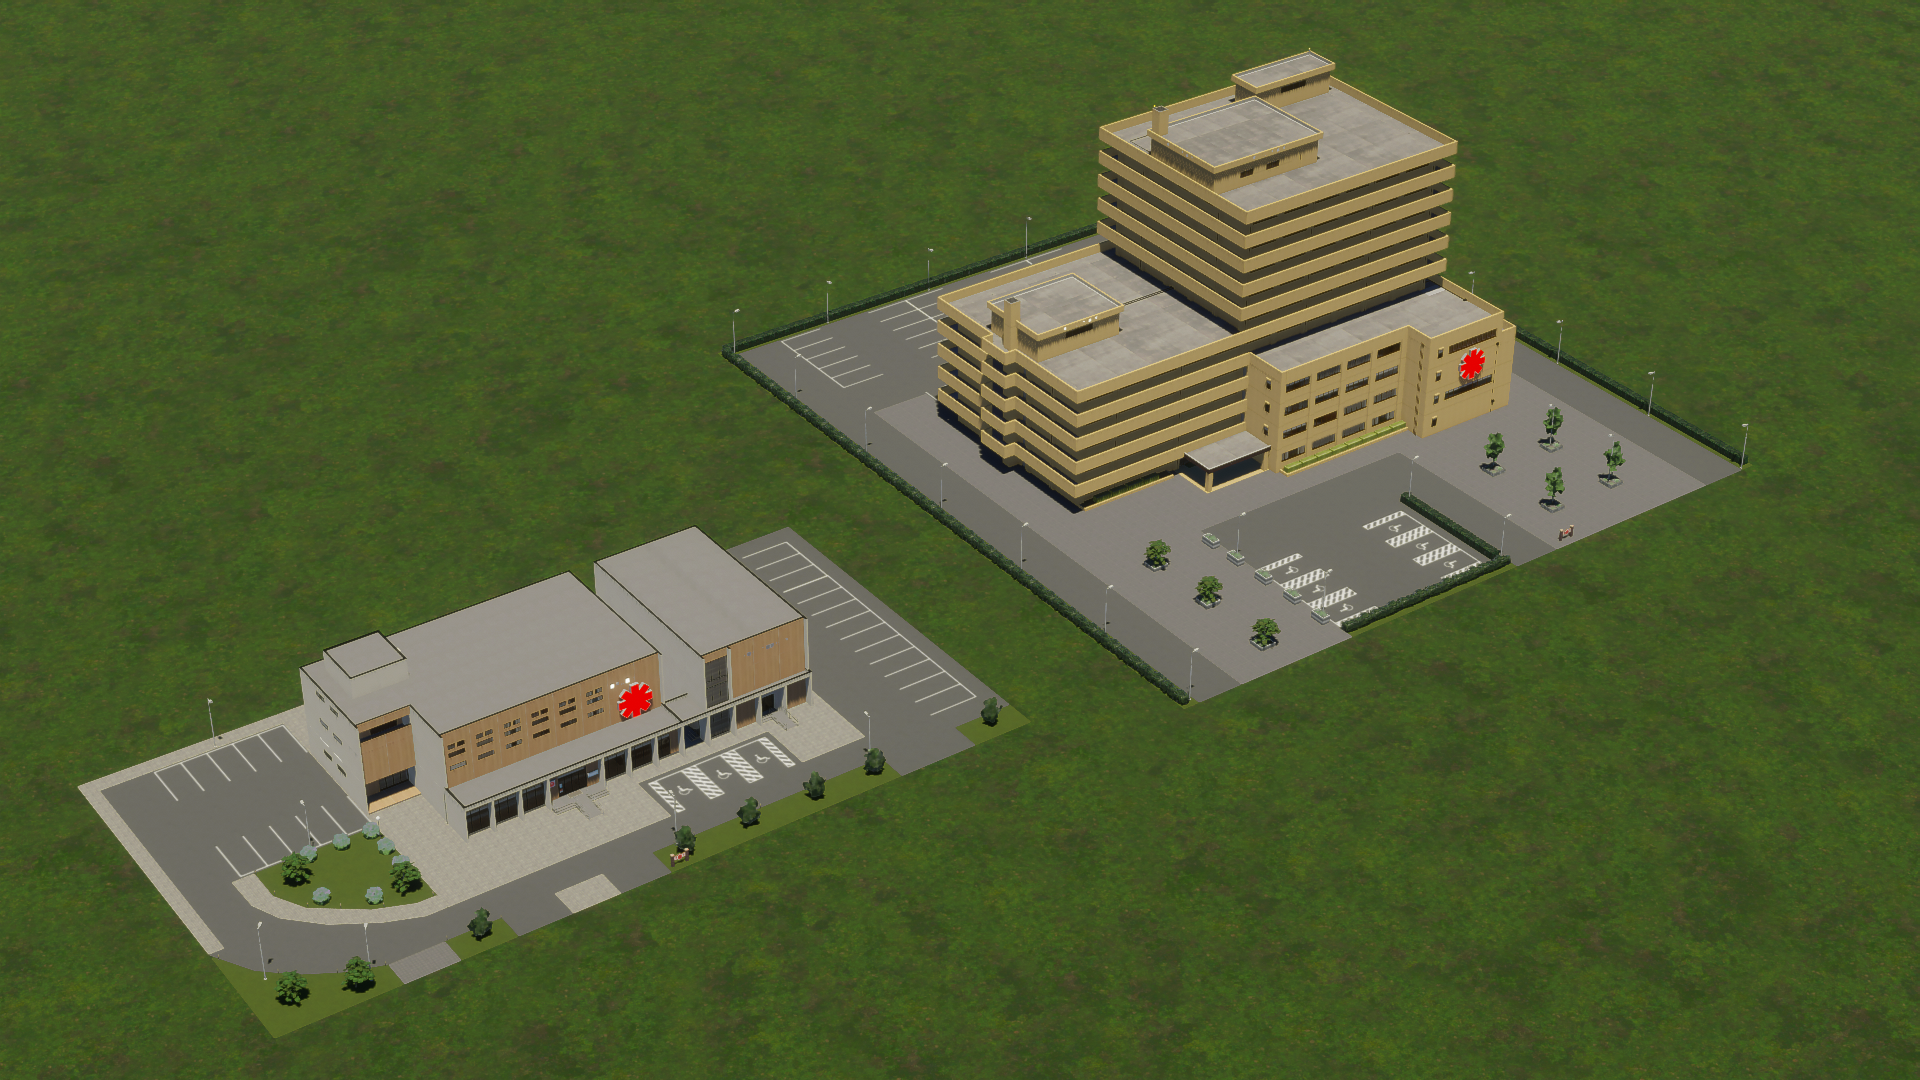 [i]Medical clinic (left) and hospital (right).[/i]
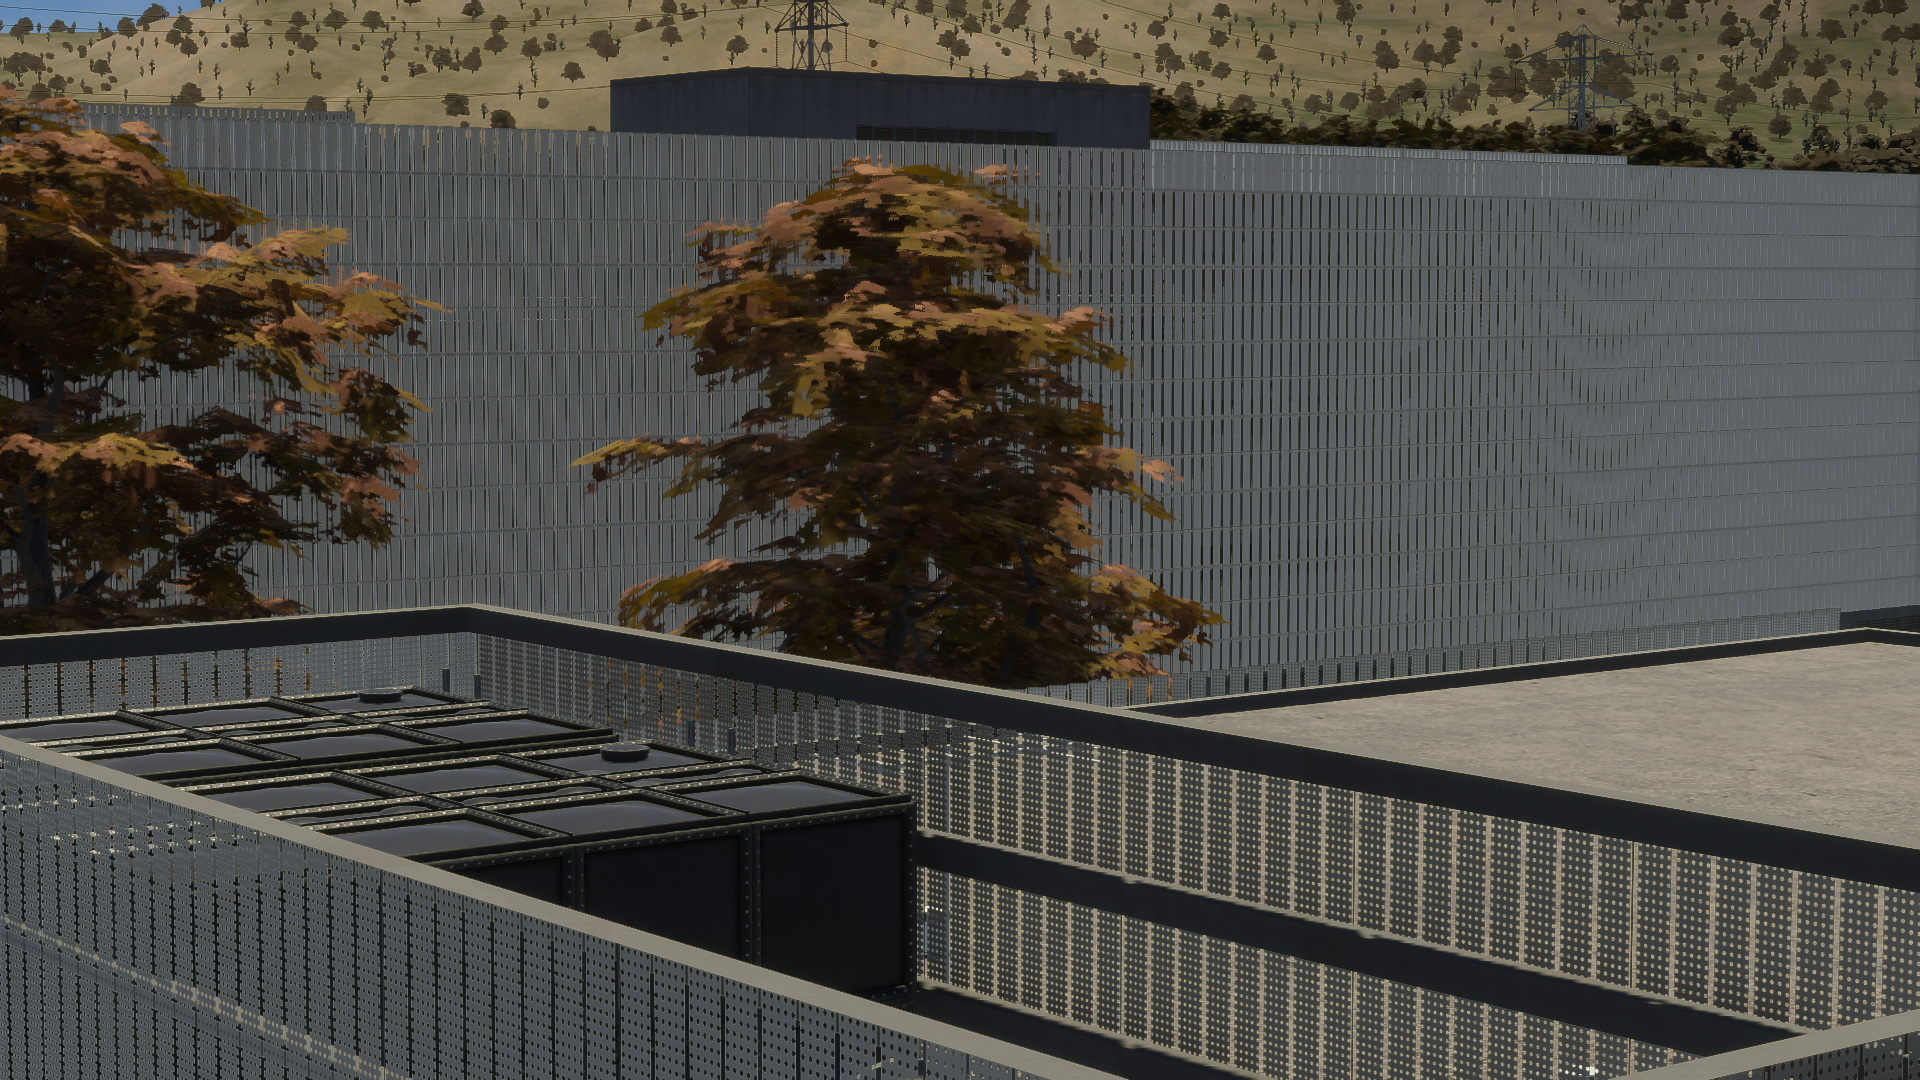
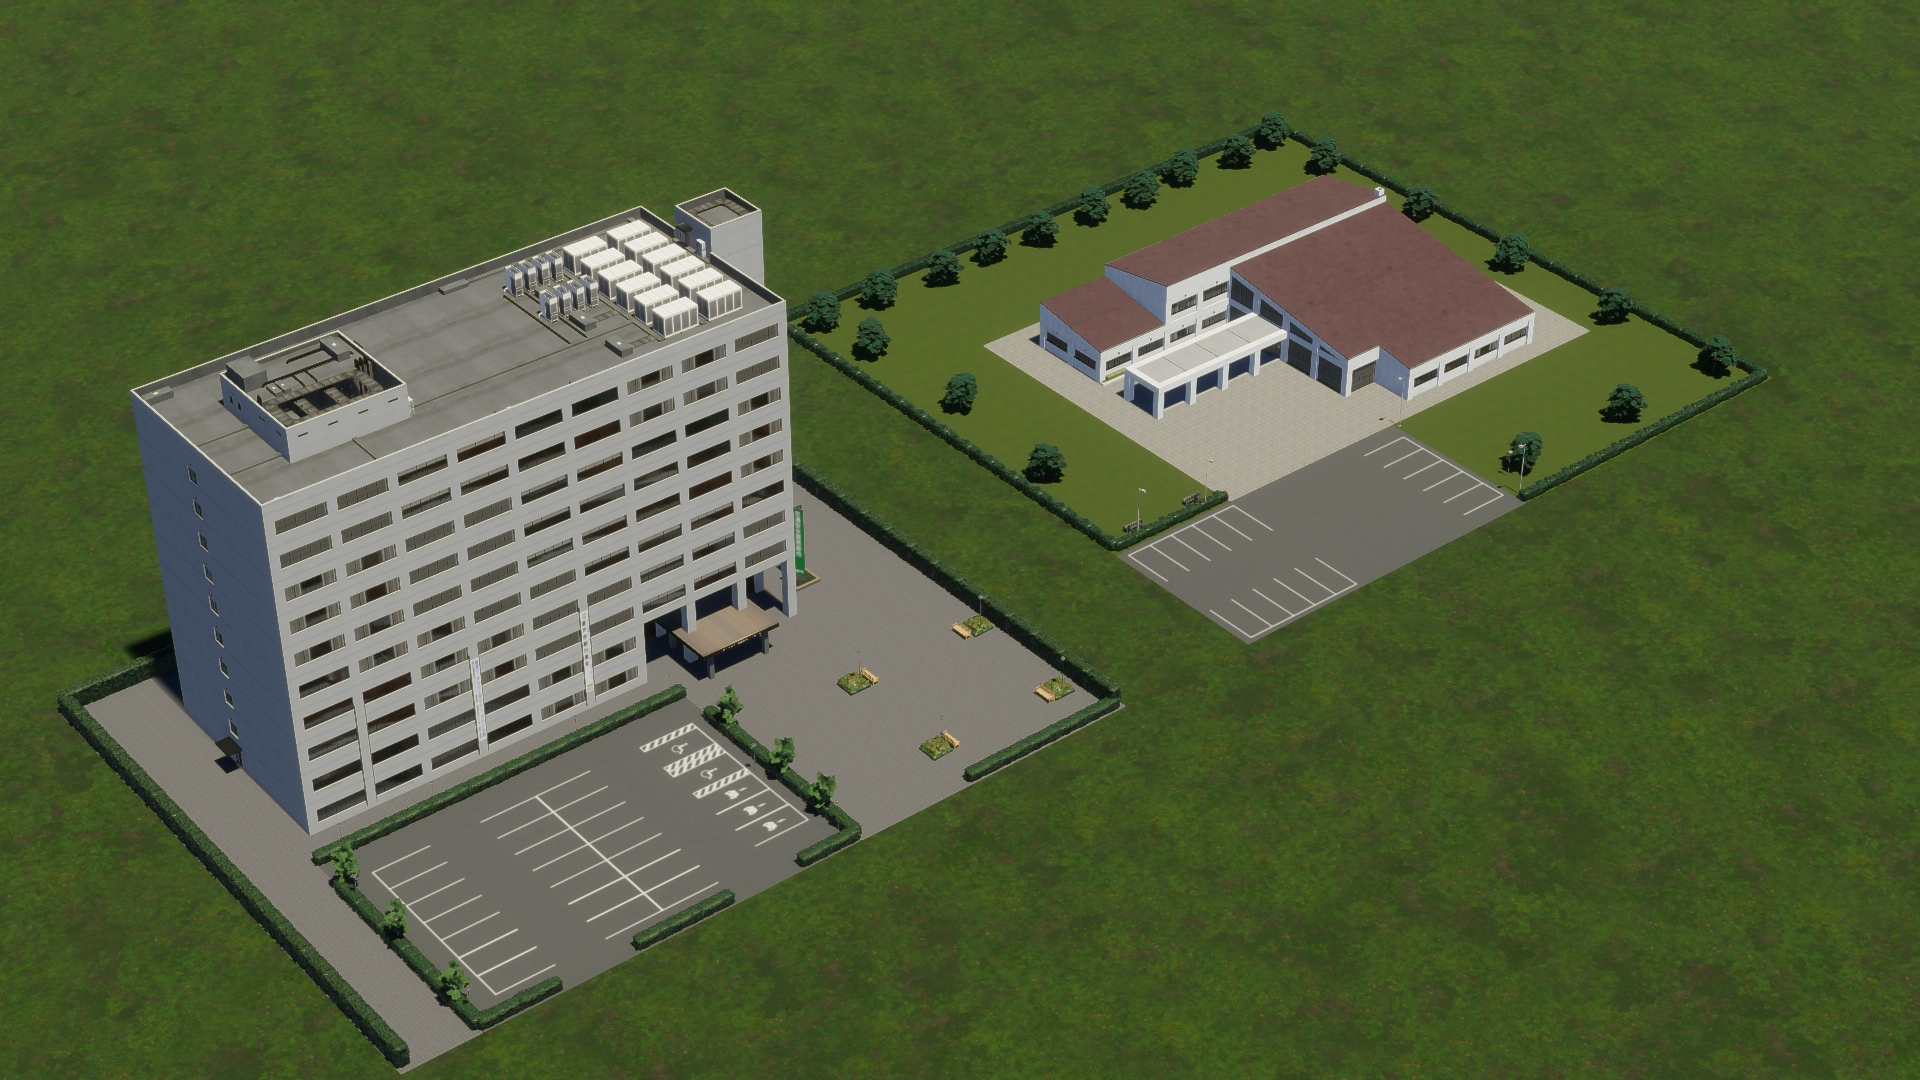
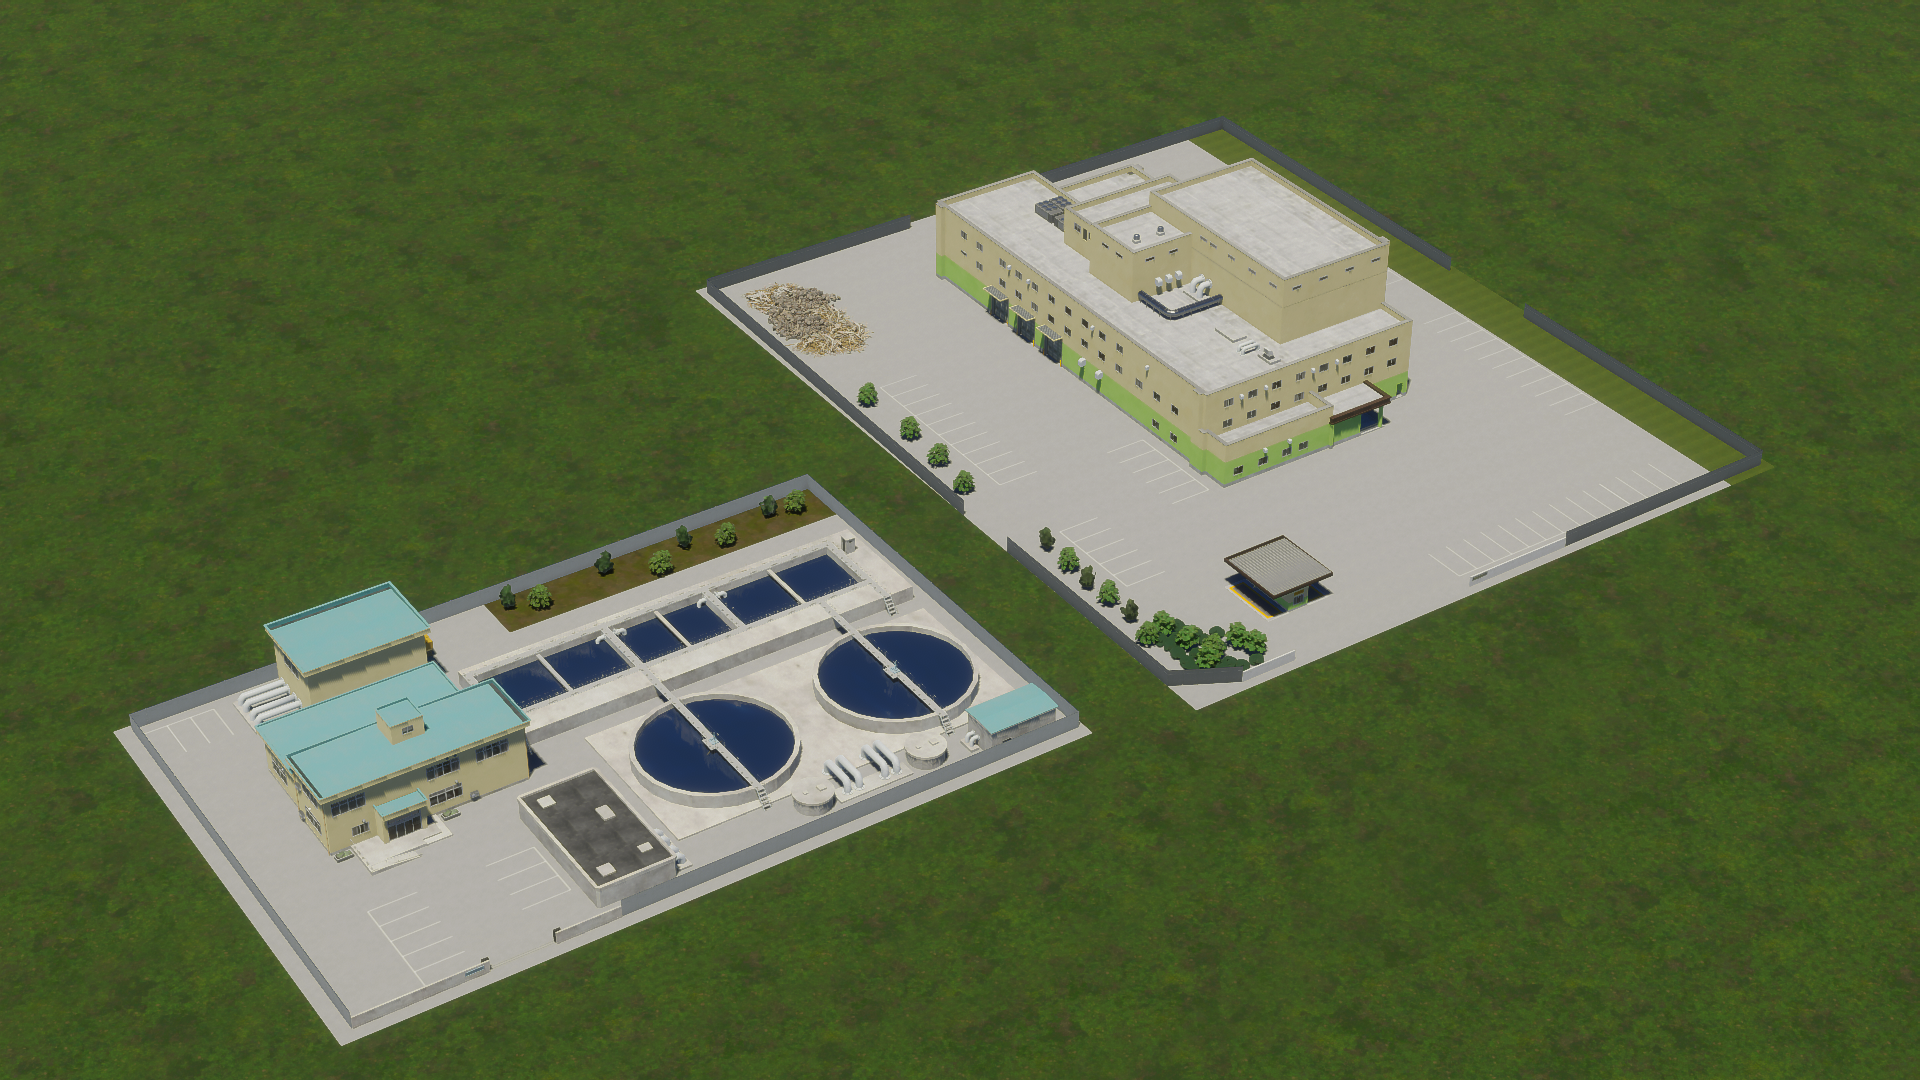 [i]Water treatment plant (left) and recycling center (right).[/i]
Two signature High Density Offices are also included.
[i]Water treatment plant (left) and recycling center (right).[/i]
Two signature High Density Offices are also included.
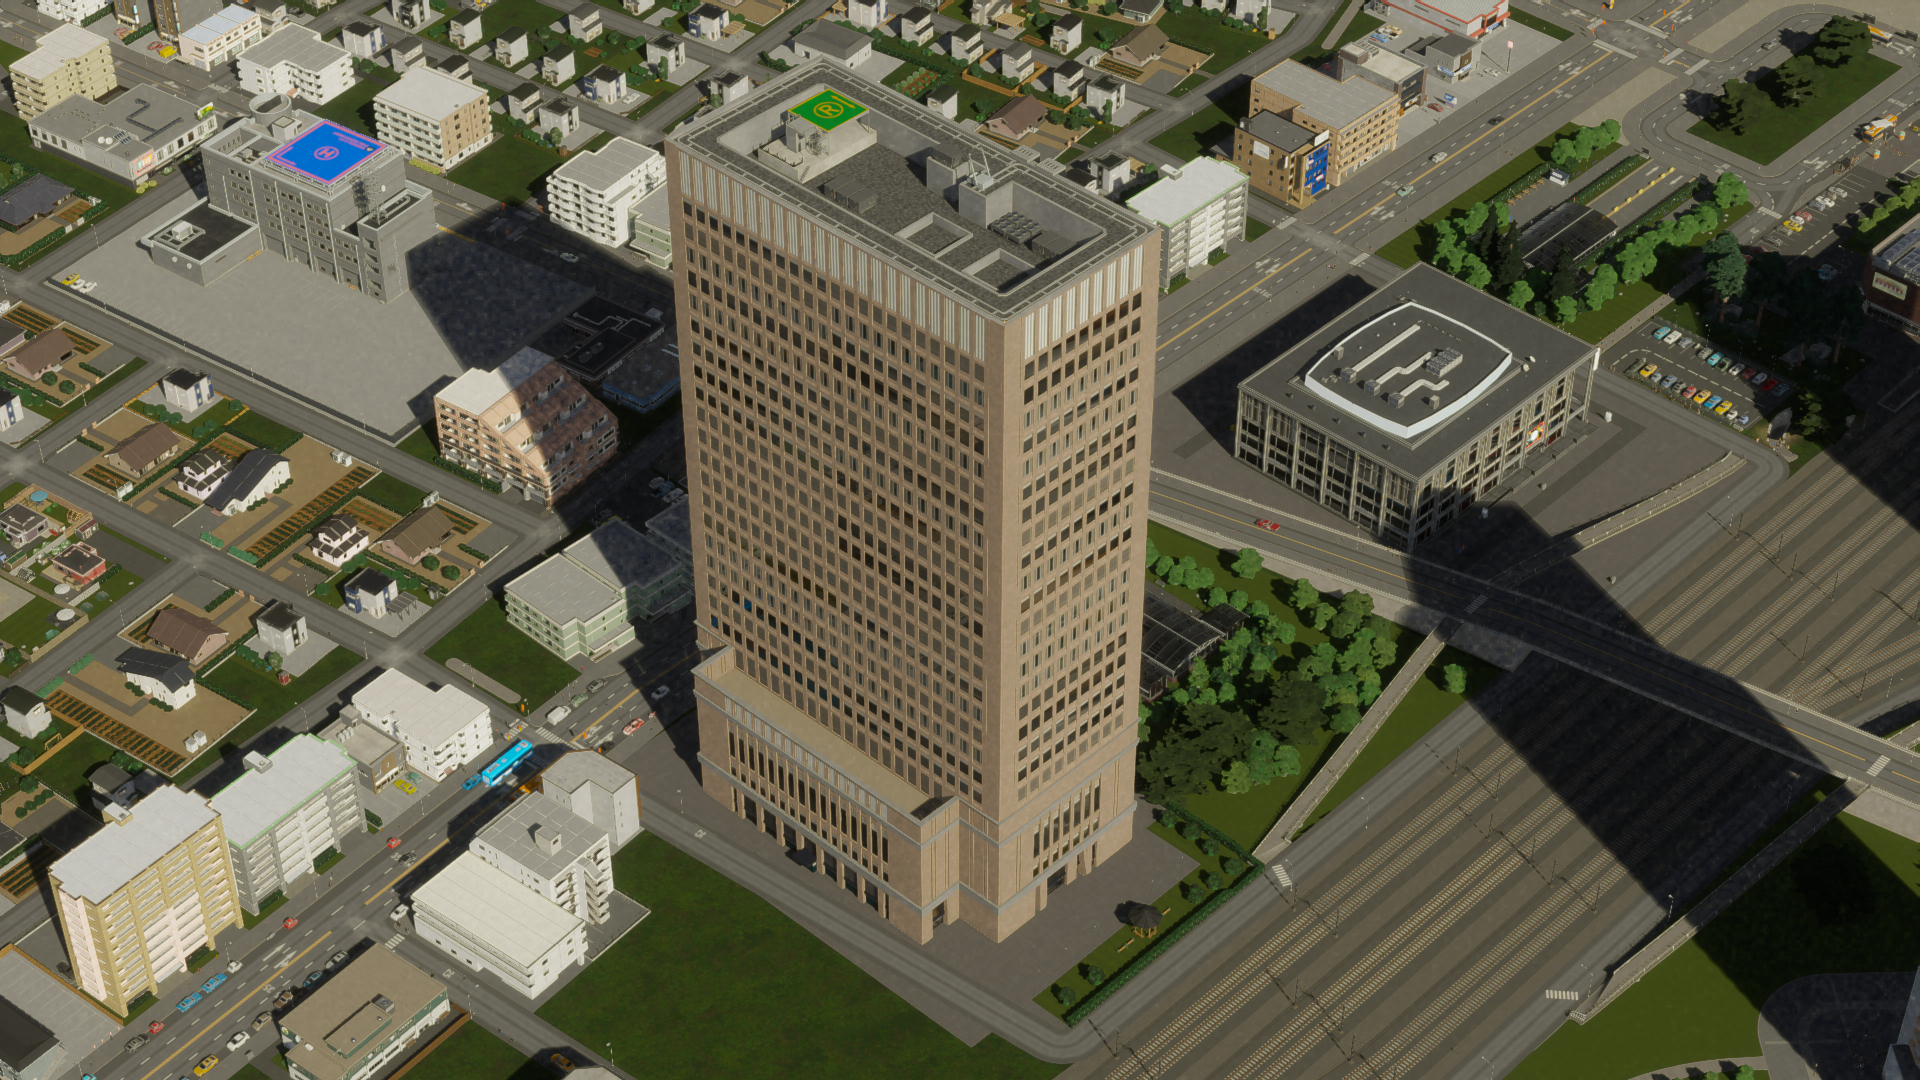
 [i]Newspaper head office.[/i]
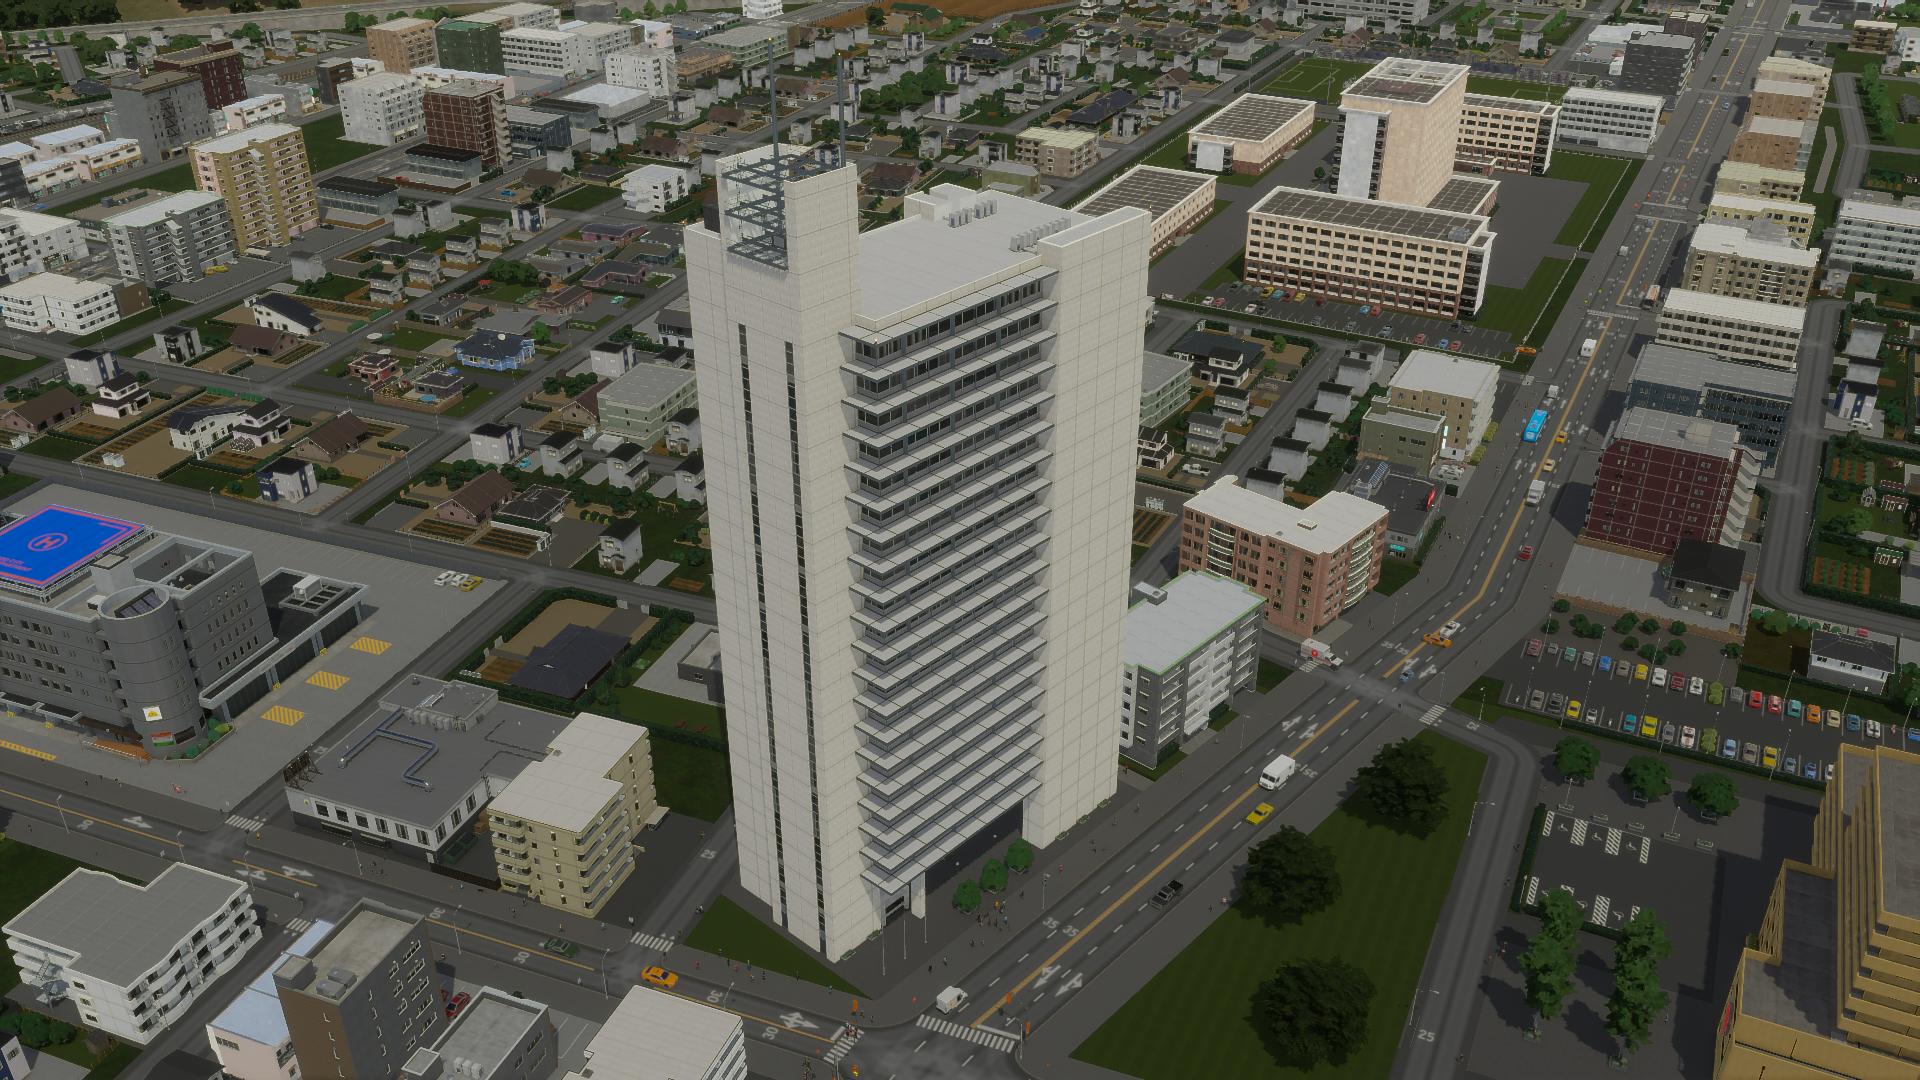
 [i]Sushi chain head office.[/i]
And finally, a couple props which you can place freely from the new prop menu.
[i]Sushi chain head office.[/i]
And finally, a couple props which you can place freely from the new prop menu.
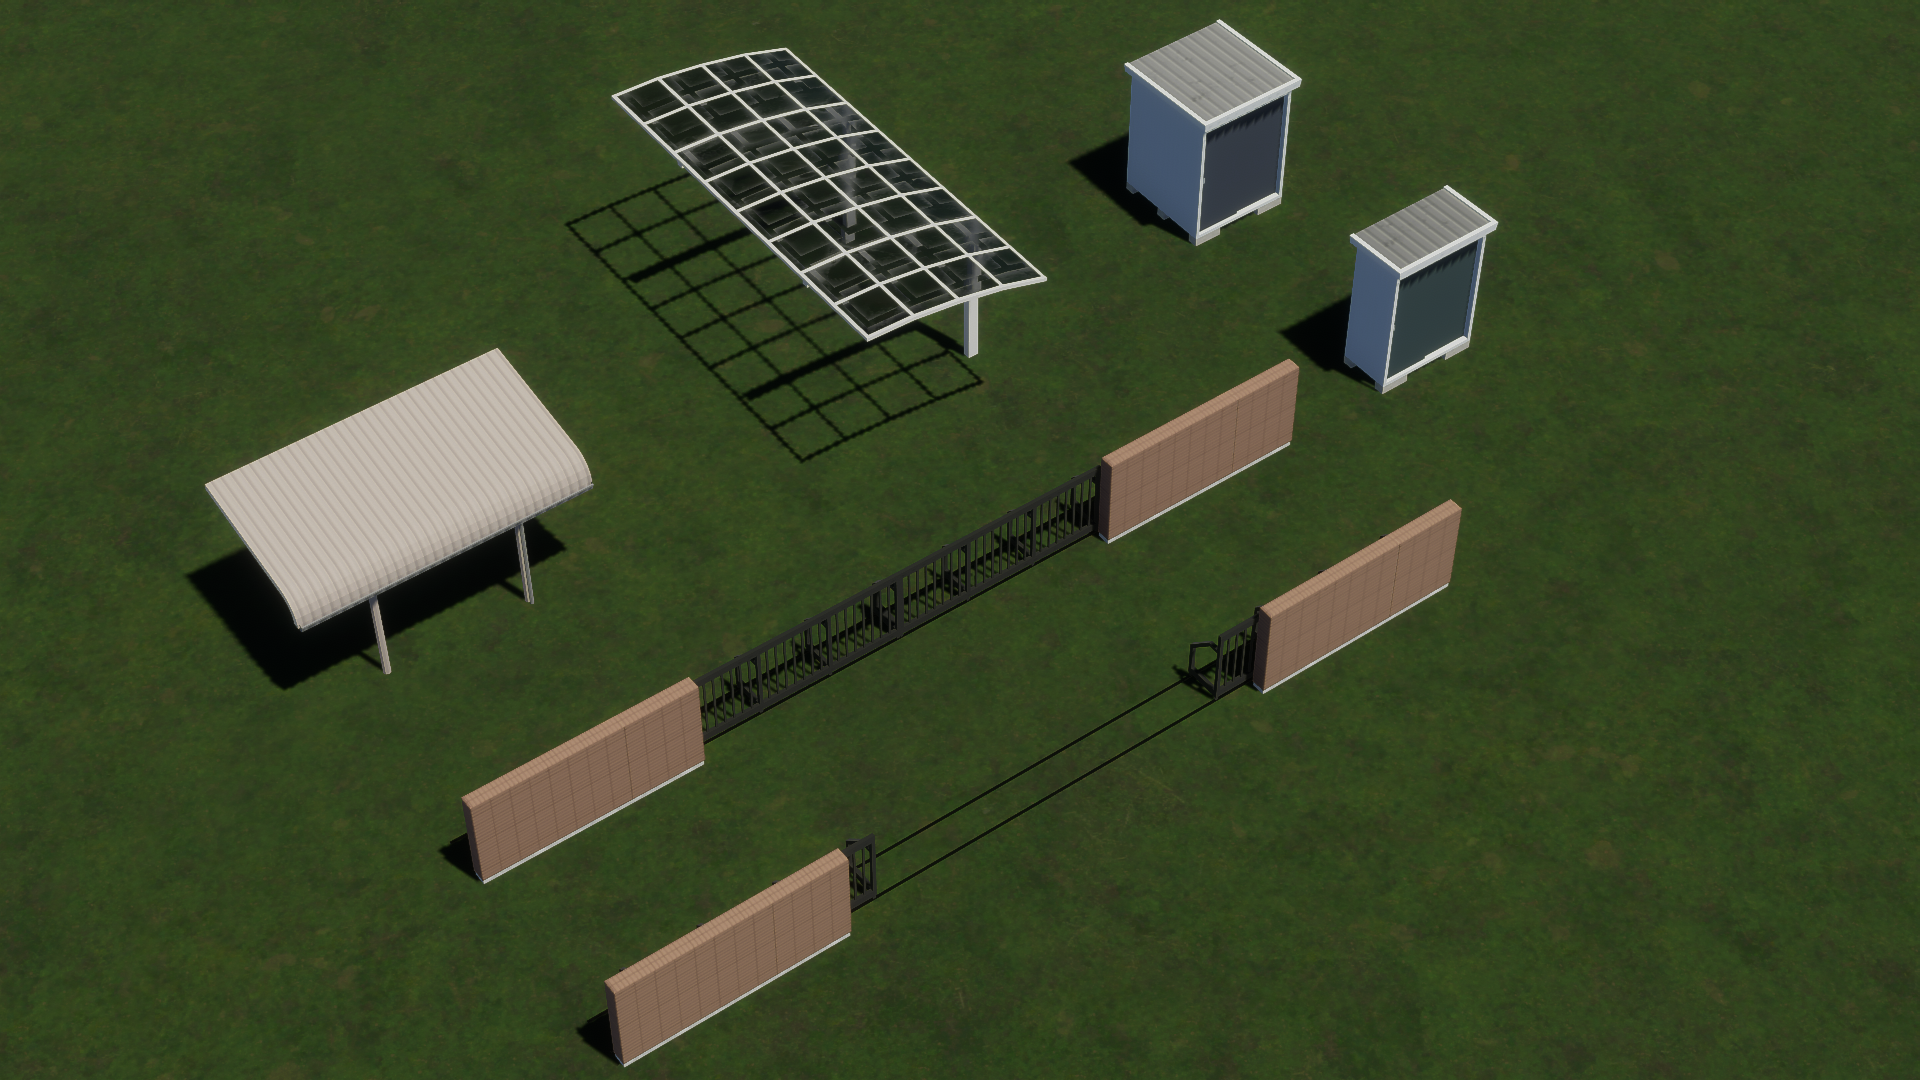 [i]PS: There are a whole bunch of other props outside this menu as well. Find It! users should know how to find them.[/i]
One personal priority for me was adding more setback buildings, which are buildings that are slanted at the edges to minimize the shadow they cast on the street or other buildings. The Japanese put a very high priority on maximizing sunlight for streets and other buildings, going as far as to enshrine it in law as a “right to light” (nisshoken). Setback buildings are common in real life but fairly scarce in the first game’s Workshop, so I wanted to make at least a couple of these for the new game.
[i]PS: There are a whole bunch of other props outside this menu as well. Find It! users should know how to find them.[/i]
One personal priority for me was adding more setback buildings, which are buildings that are slanted at the edges to minimize the shadow they cast on the street or other buildings. The Japanese put a very high priority on maximizing sunlight for streets and other buildings, going as far as to enshrine it in law as a “right to light” (nisshoken). Setback buildings are common in real life but fairly scarce in the first game’s Workshop, so I wanted to make at least a couple of these for the new game.
 [i]Some are more committed to maximizing sunlight than others.[/i]
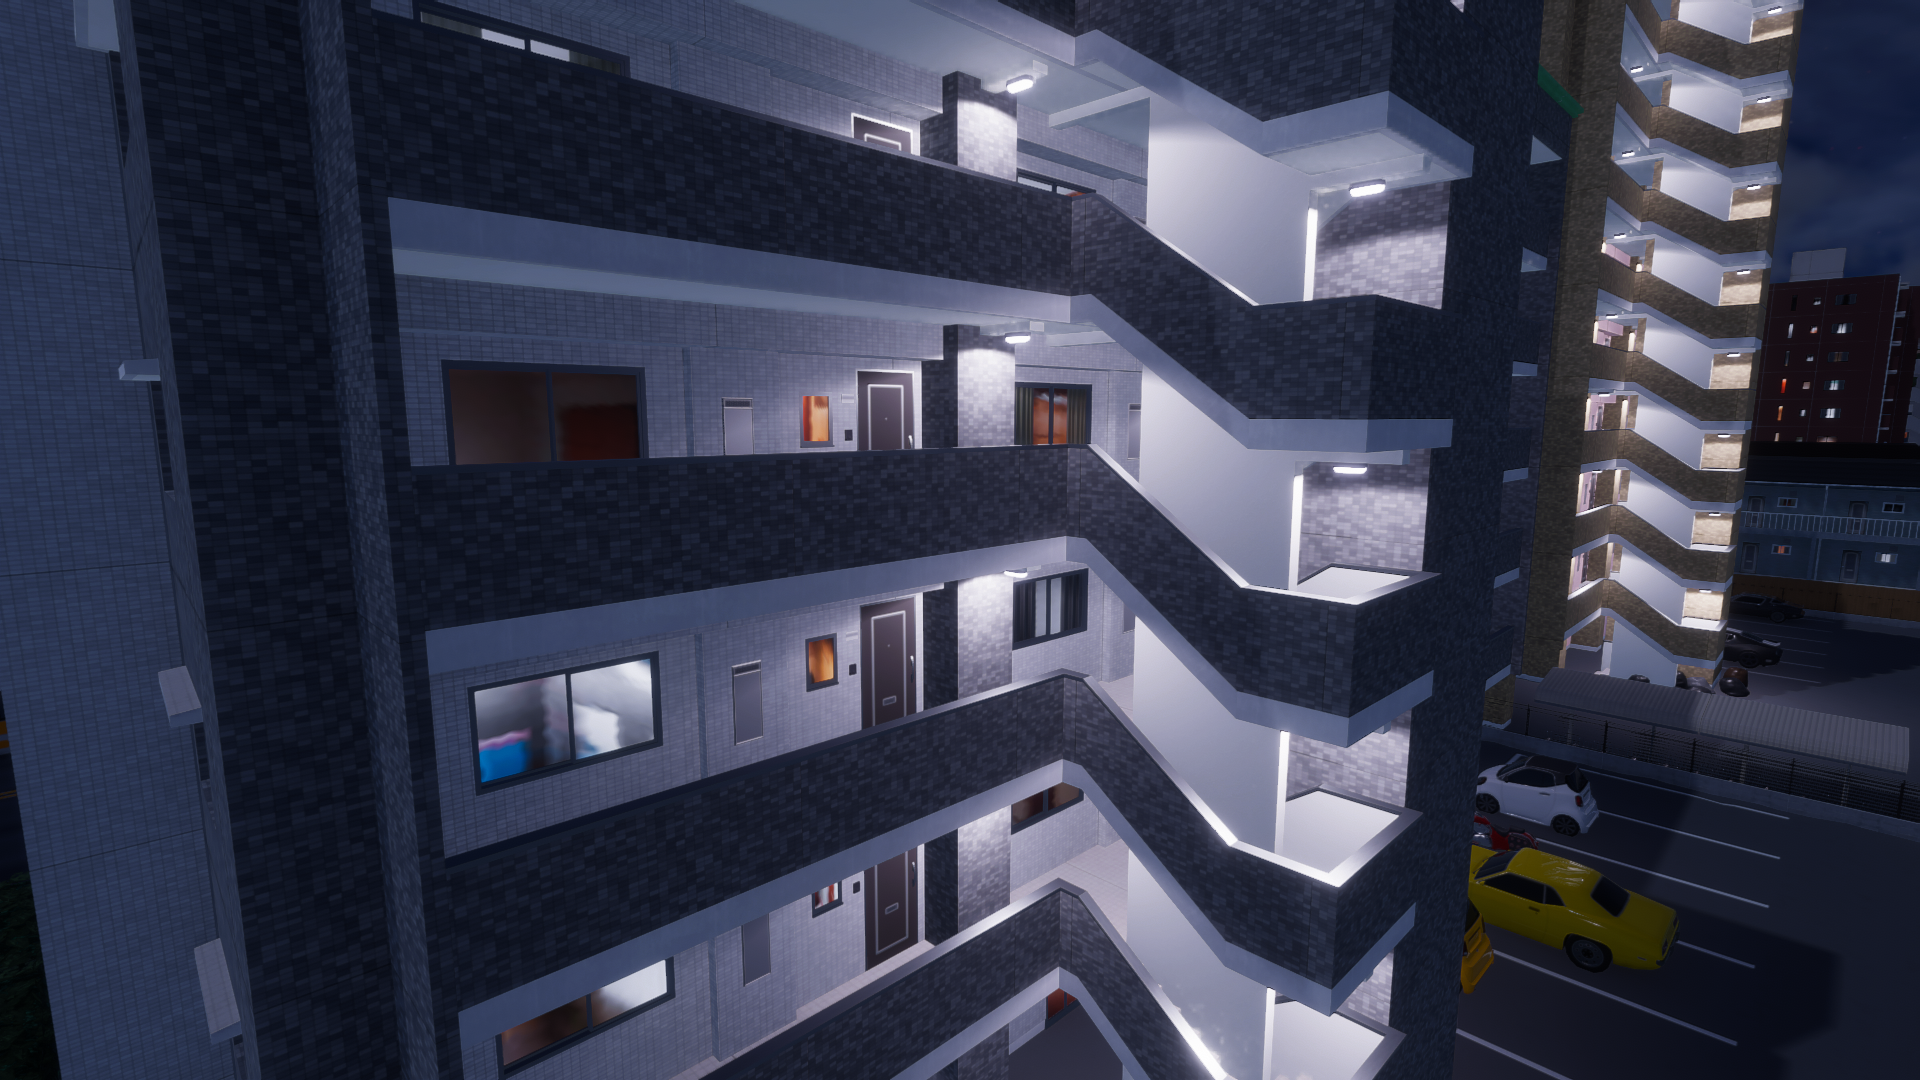
Open-hallway apartments can be somewhat of a headache to make, but they sure are pretty at night.
[i]Some are more committed to maximizing sunlight than others.[/i]
Open-hallway apartments can be somewhat of a headache to make, but they sure are pretty at night.
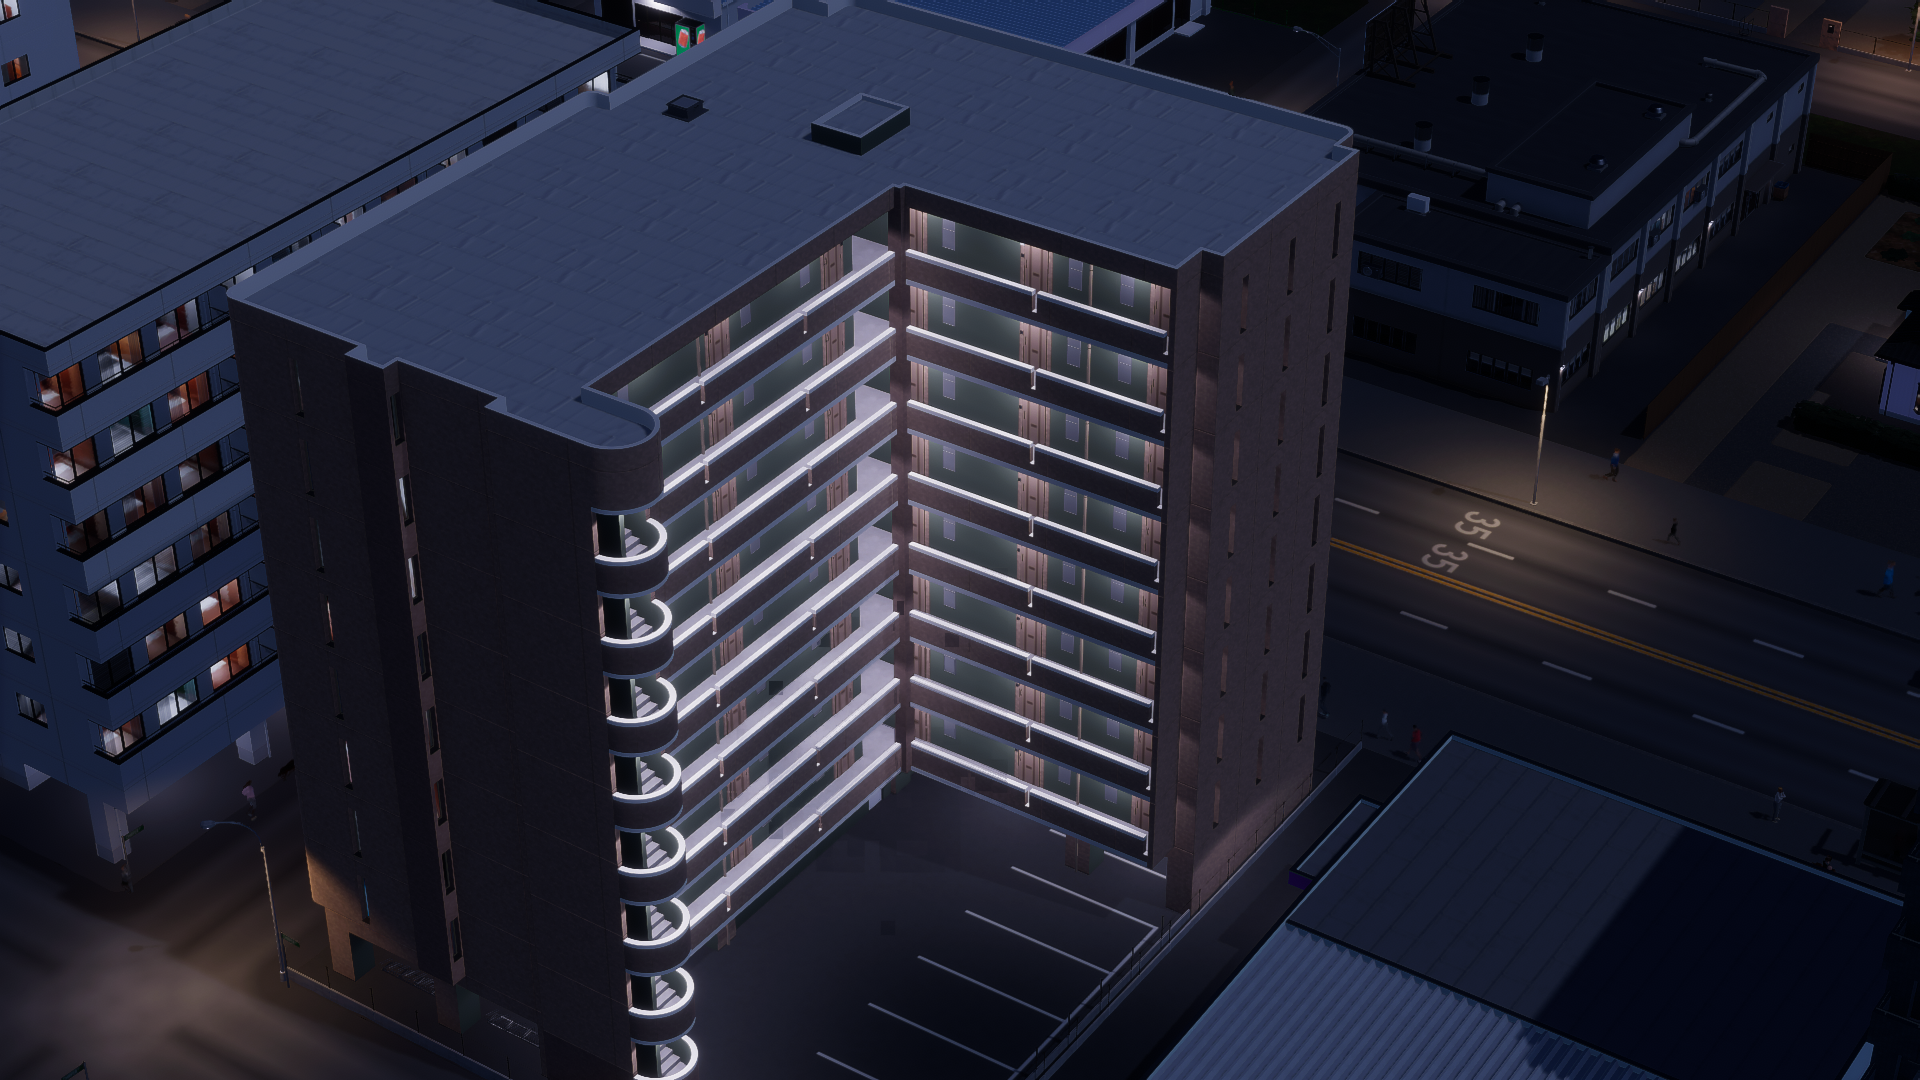 [i]Worth it.[/i]
City building tip: Japanese cities generally do not strictly separate building types to the degree that other countries do. As a general rule, I would recommend you resist the urge to plan the layout from the start. Make your city center in the starting tiles of your map, spread out from the center quickly, and gradually replace the low-density zones along the major roads with medium-density buildings here and there. Be sure to vary your zone types, too. It’s not uncommon to see residential, industrial, commercial, and office buildings all on the same block. You might even see a small farm on a vacant lot!
[i]Worth it.[/i]
City building tip: Japanese cities generally do not strictly separate building types to the degree that other countries do. As a general rule, I would recommend you resist the urge to plan the layout from the start. Make your city center in the starting tiles of your map, spread out from the center quickly, and gradually replace the low-density zones along the major roads with medium-density buildings here and there. Be sure to vary your zone types, too. It’s not uncommon to see residential, industrial, commercial, and office buildings all on the same block. You might even see a small farm on a vacant lot!
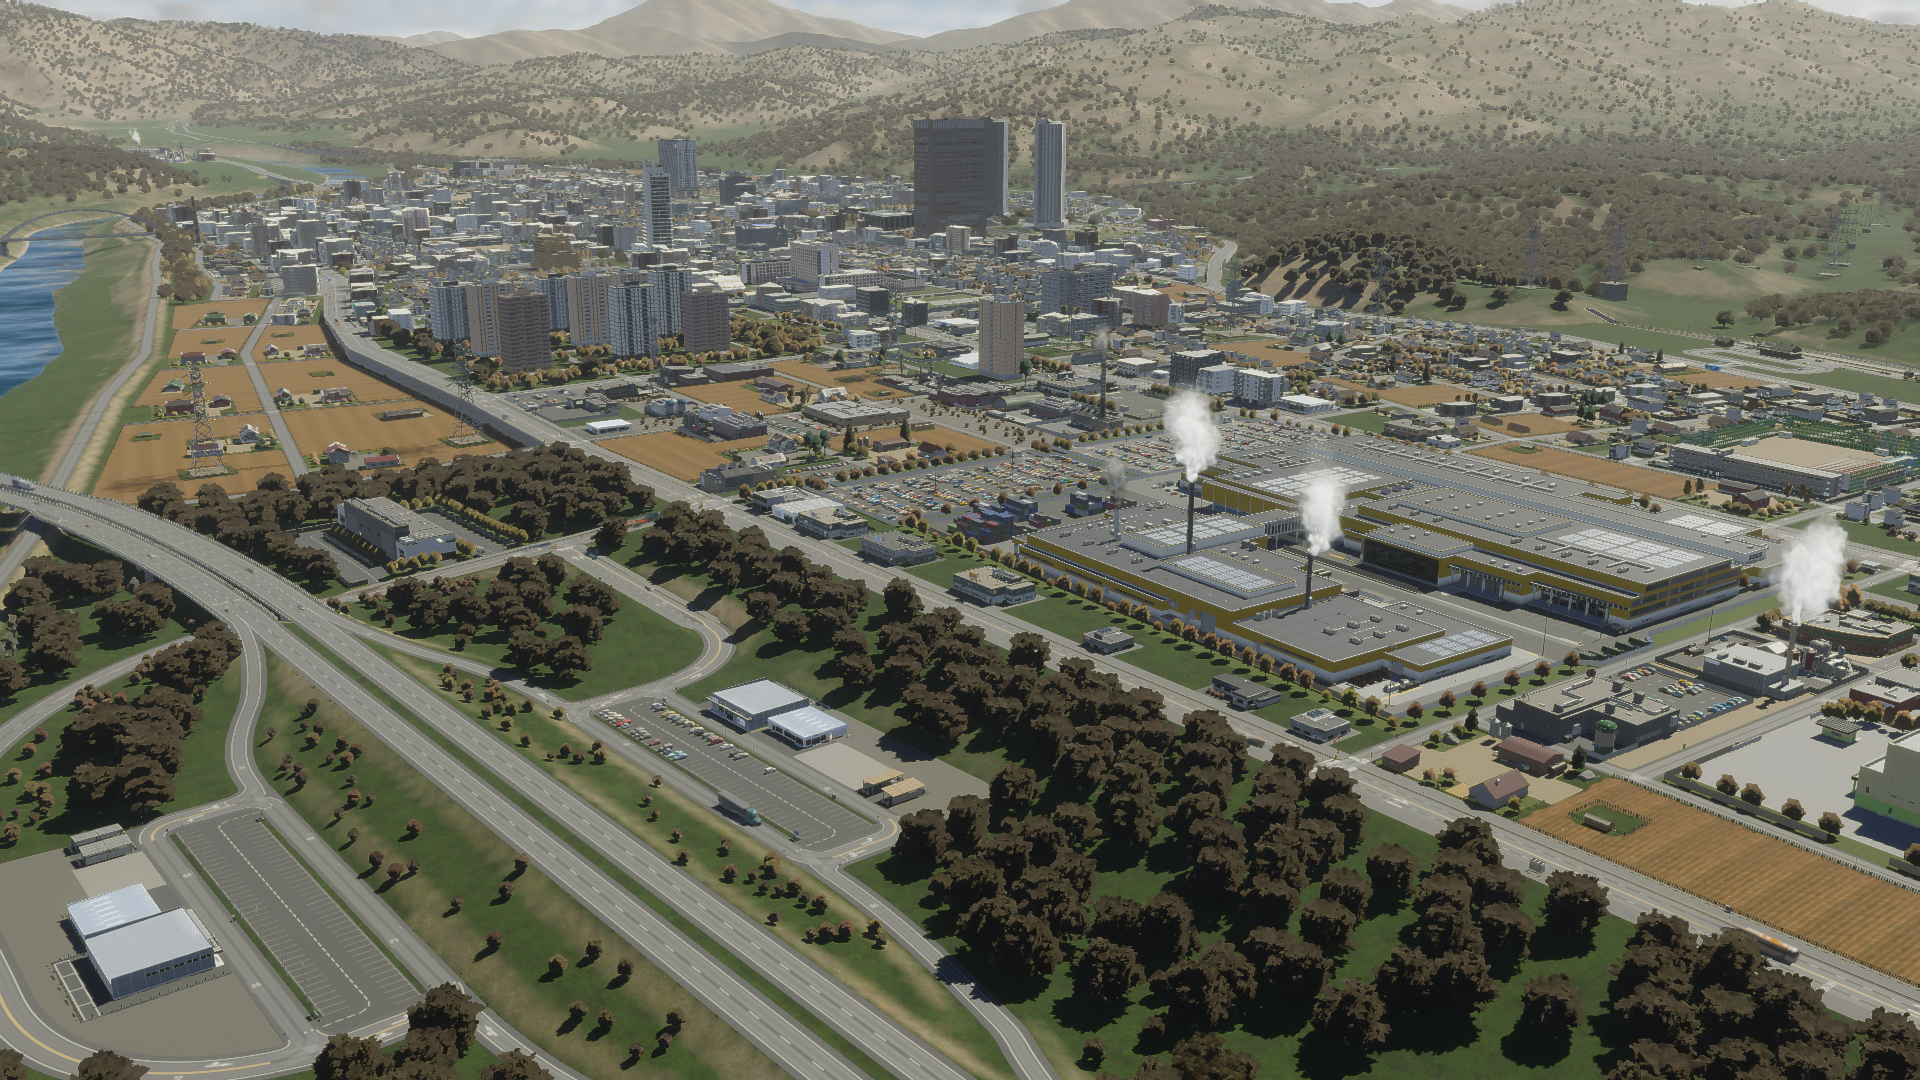
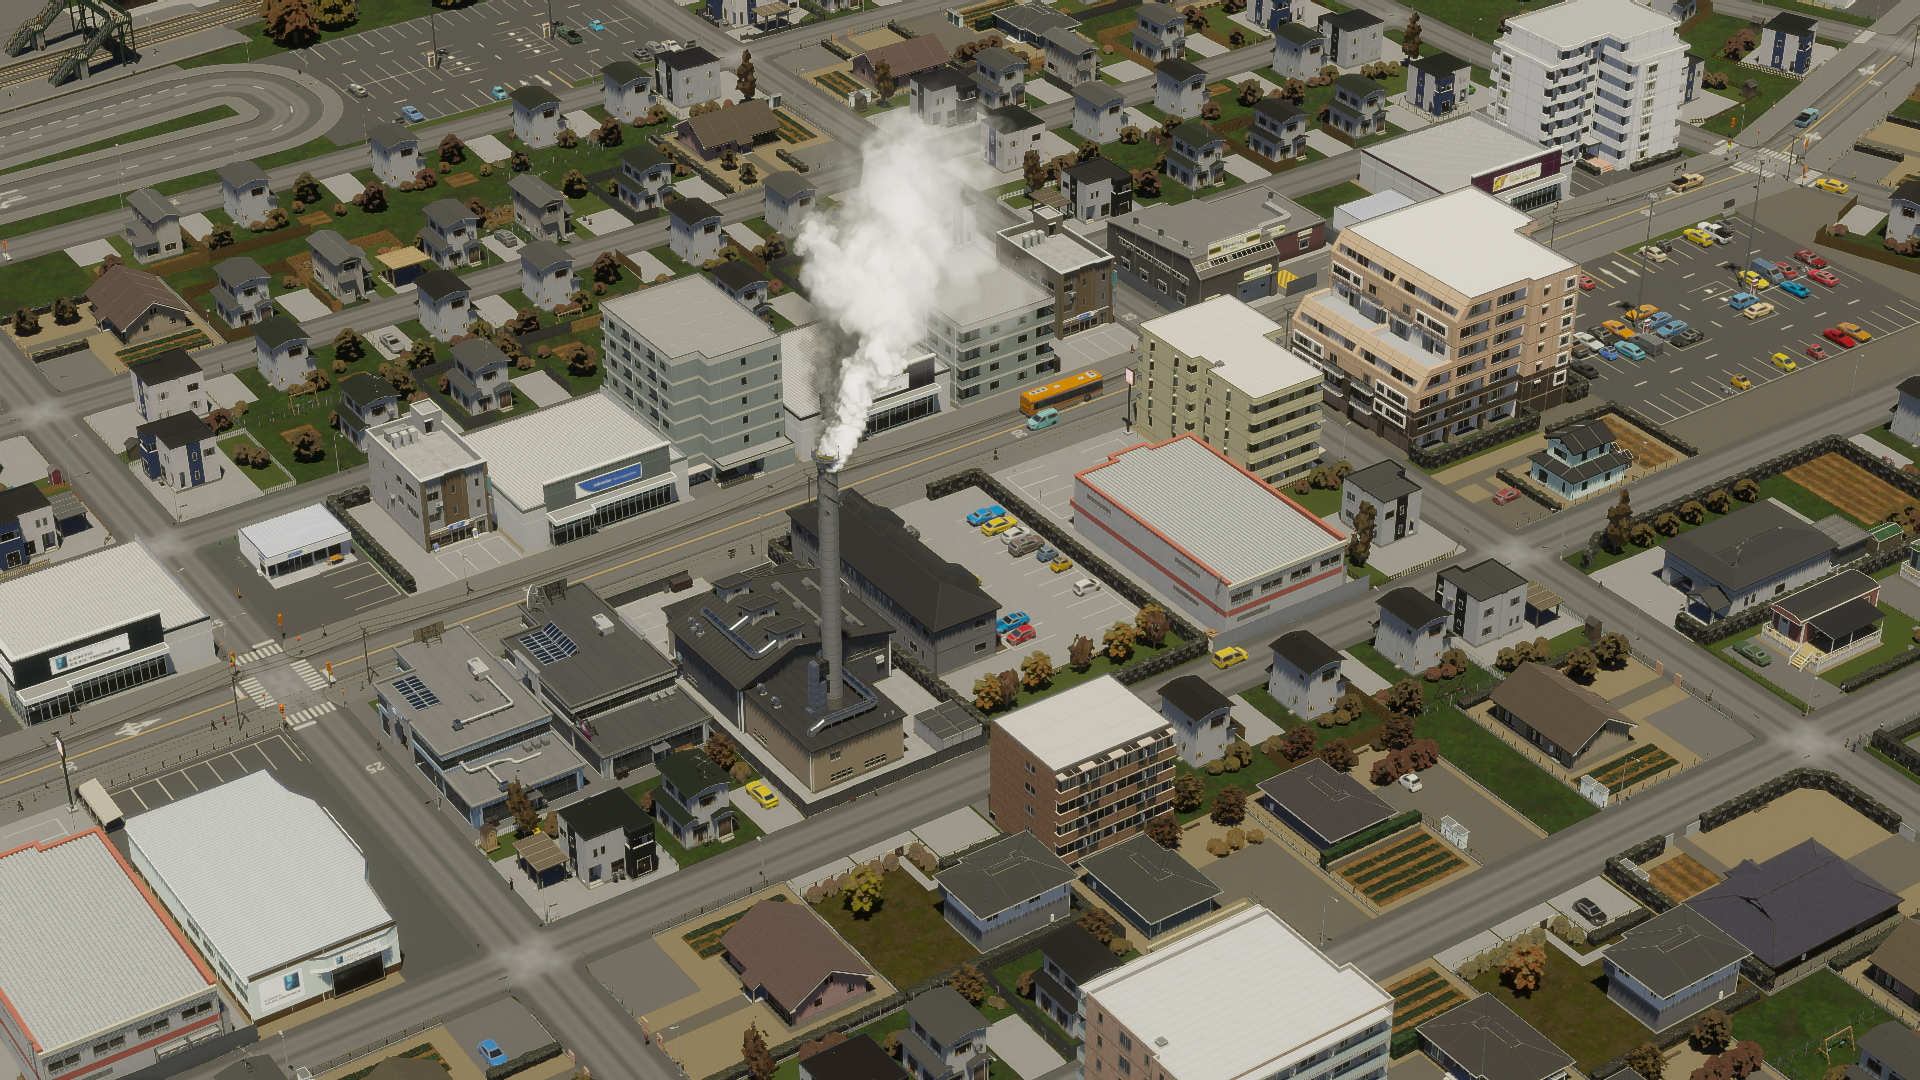 [i]By industrial, I don’t mean the kind with smokestacks. Just pretend that one’s a sentou.[/i]
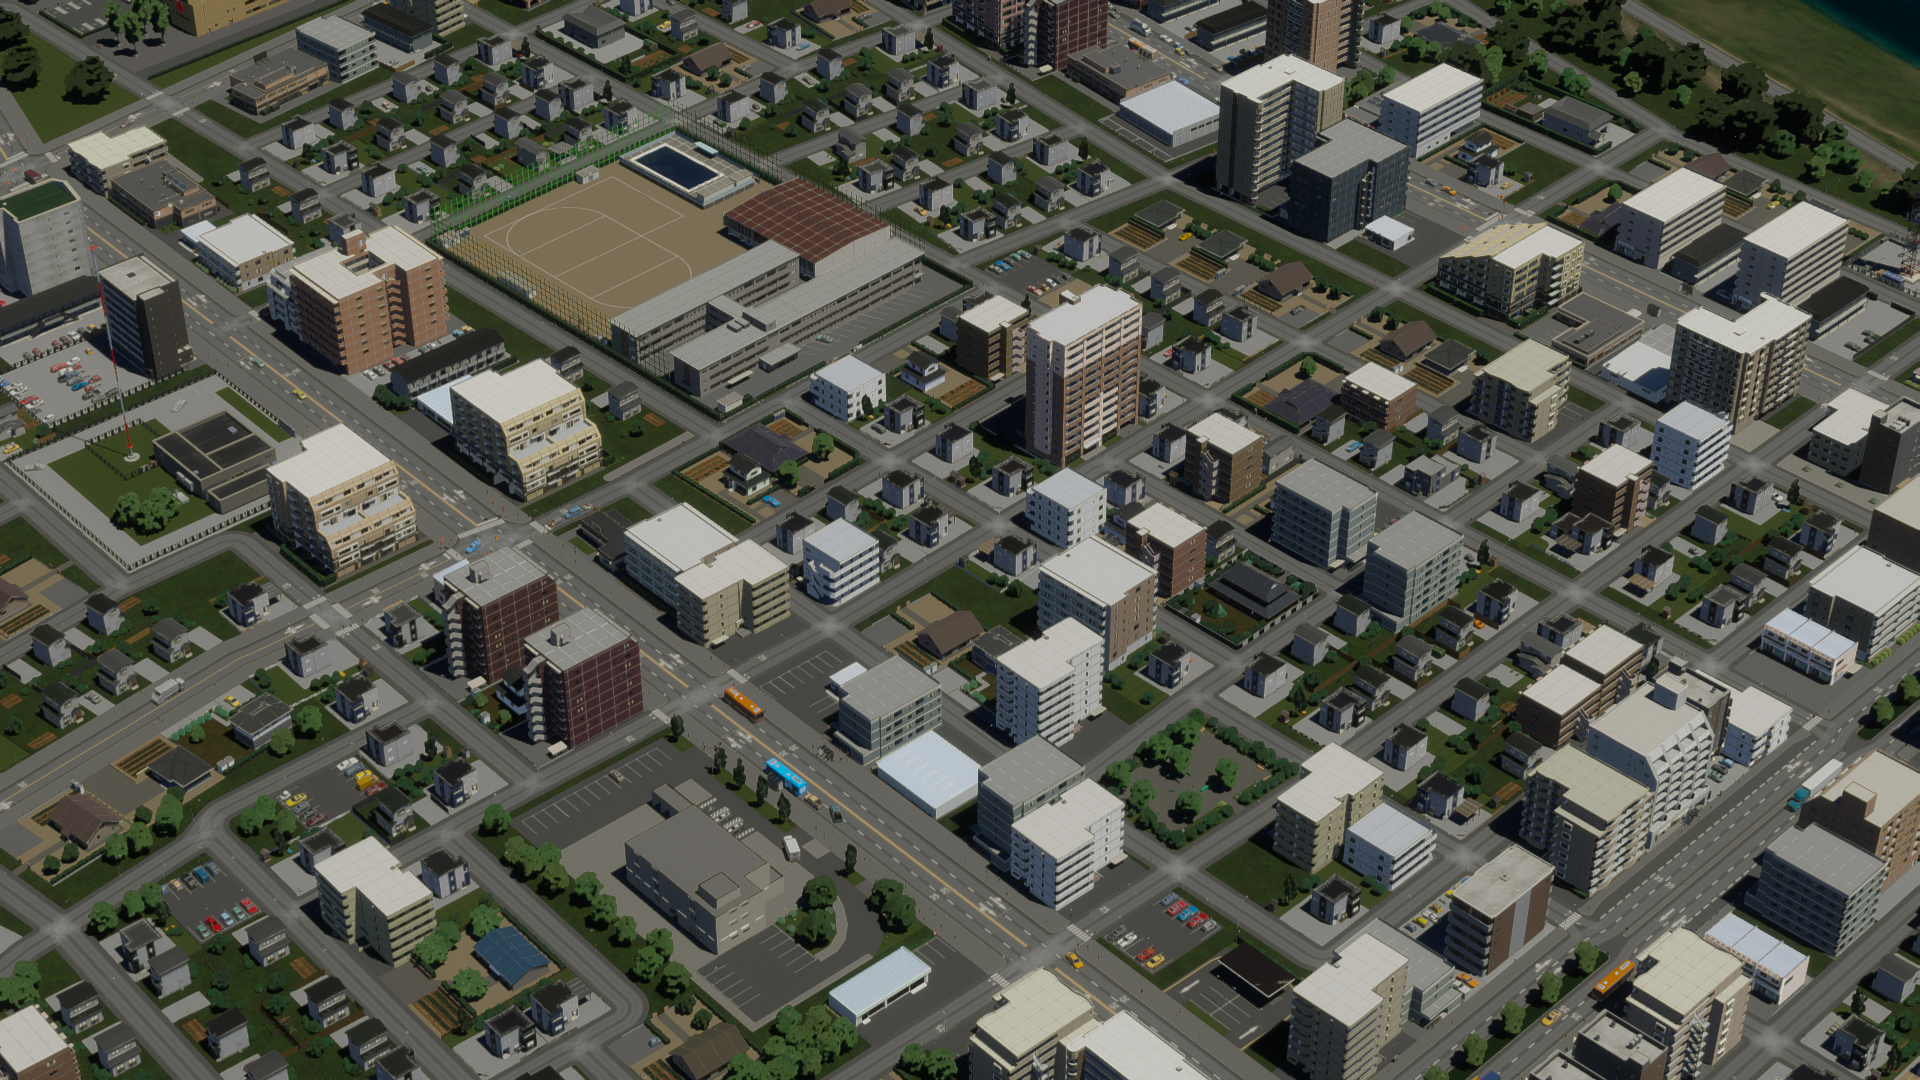
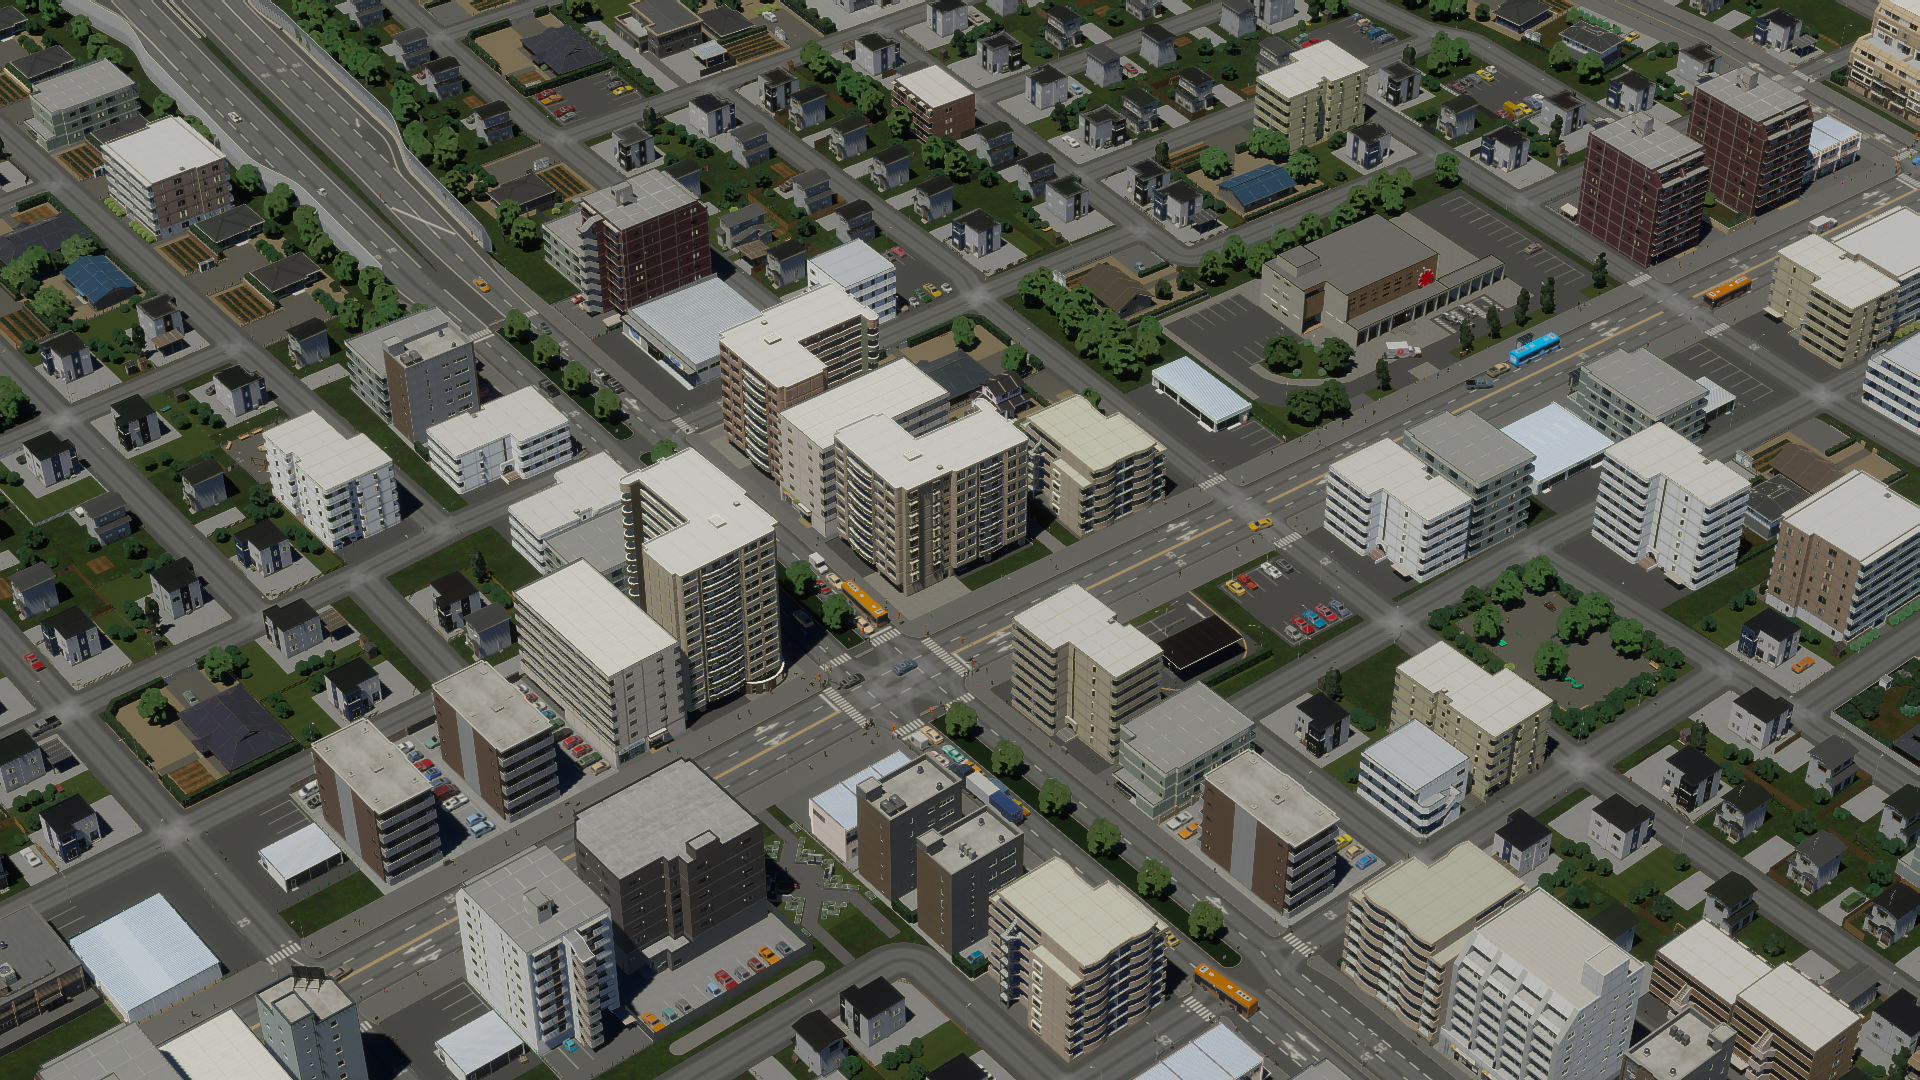
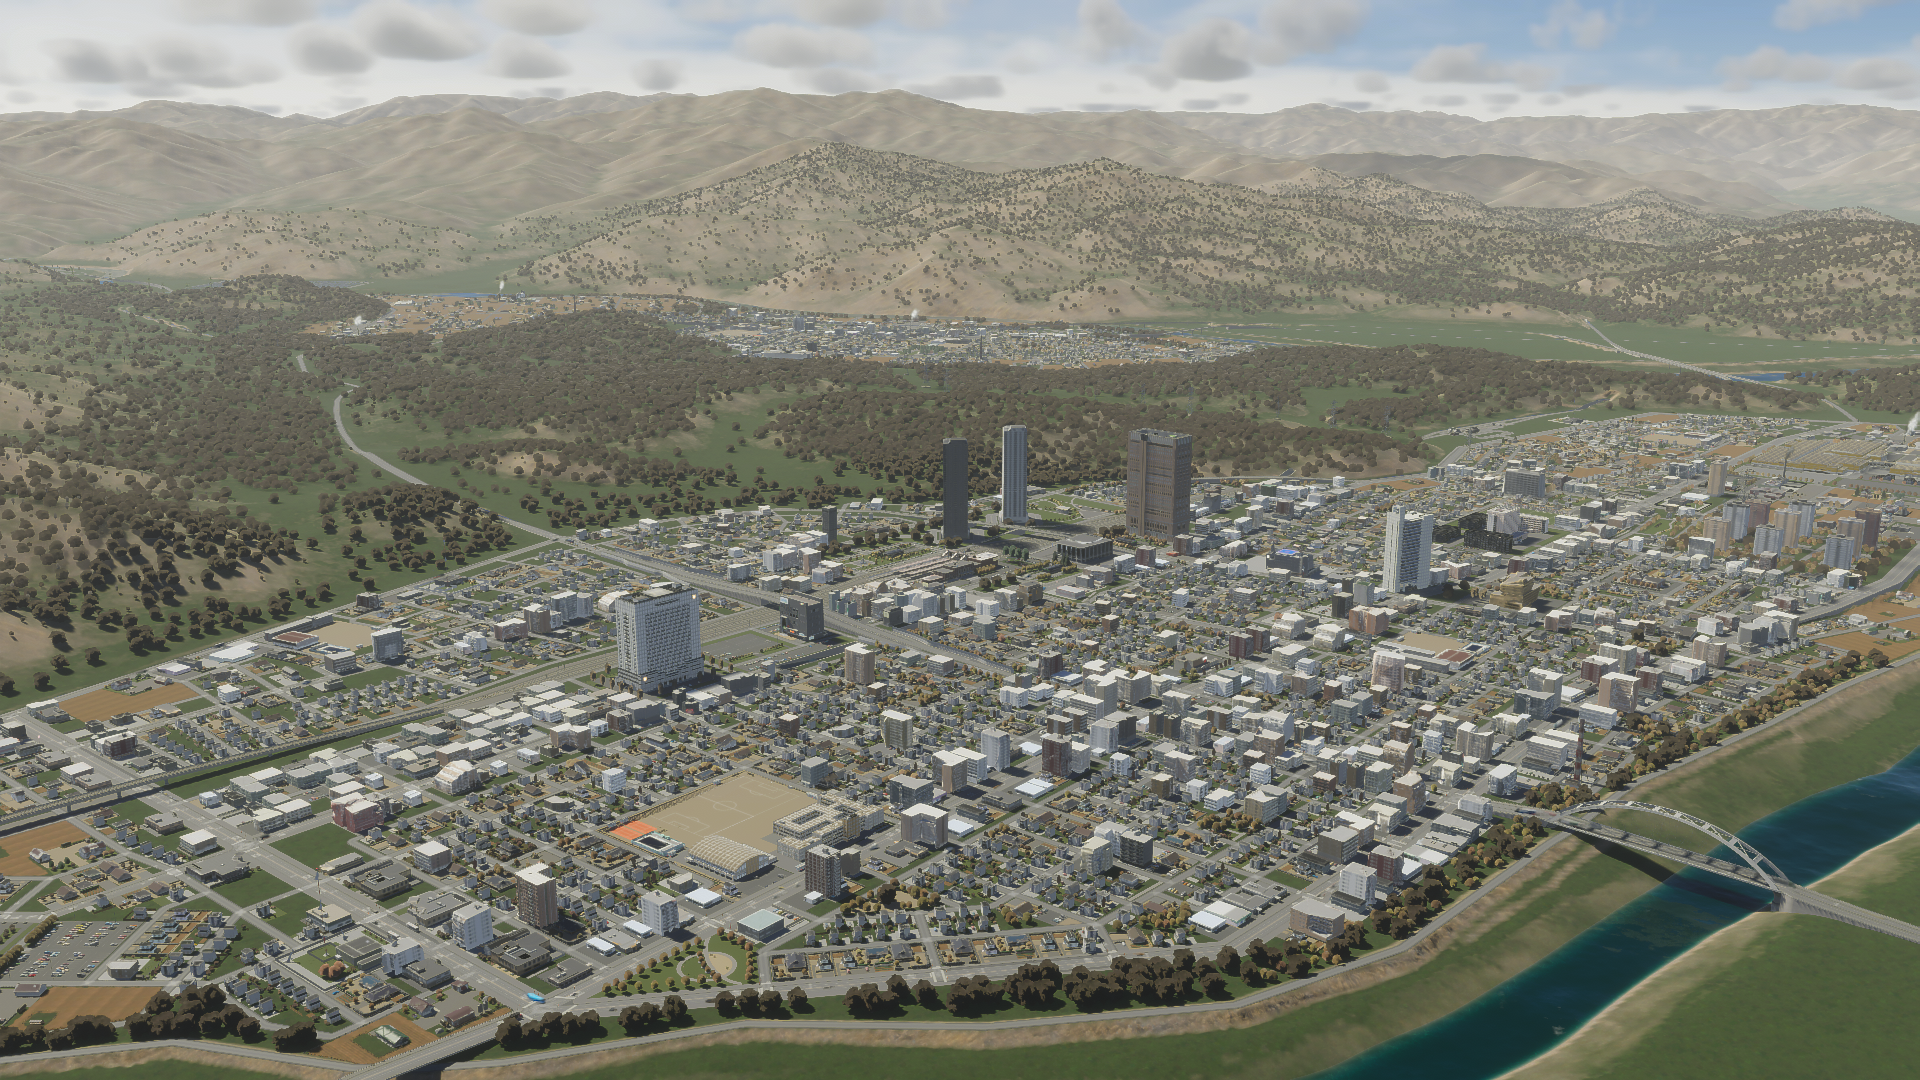
And finally, some miscellaneous screenshots:
[i]By industrial, I don’t mean the kind with smokestacks. Just pretend that one’s a sentou.[/i]
And finally, some miscellaneous screenshots: